Are you returning from a family vacation with batches of photos to share or need a special way to celebrate the upcoming holiday? Then an engaging slideshow is a great way to share photos with families and friends.
Making a photo slideshow with iMovie is one of the best things any Mac user can rely on. As an inbuilt video editor, it provides a simple yet professional way to make slideshow movies from your photos and videos. Besides, you can level up your slideshow by trimming, cropping, adding transitions, filtering and more.
Can't wait to start now? Here we'll walk you through how to create an iMovie slideshow, from getting the images from Photos to adding transitions, effects and music for that exciting thrill at the end.
Free and Customizable iMovie Video Slideshow Templates for You:


Can't Miss: Best Free Slideshow Makers with Music & Effects Online/Offline>
Part 1. How to Make a Slideshow on iMovie with Music
Now let's go straight to see how to make an iMovie slideshow with music. Simply follow the steps below.
Step 1: Prepare the Images in Photos
Before making slideshows on iMovie, crop and edit your pictures in Photos. Then create an album and arrange the images in the order you want them to display in the slideshow.
Even if you can do these in iMovie, it's much easier to edit them in Photos.
Step 2: Create a New Project in iMovie
When you open iMovie, click on the Projects button and then click Create New. iMovie gives you two options: to create short and fun Hollywood-style trailers with some ready-made templates as below or make a video with a combination of photos, videos and music.
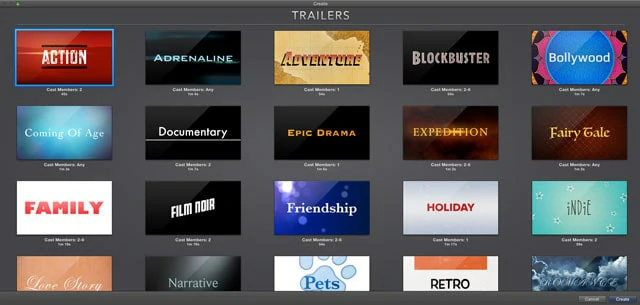
Trailer Templates in iMovie
To make a slideshow, the Movie function is what we'll be using today as it gives more flexibility and features.
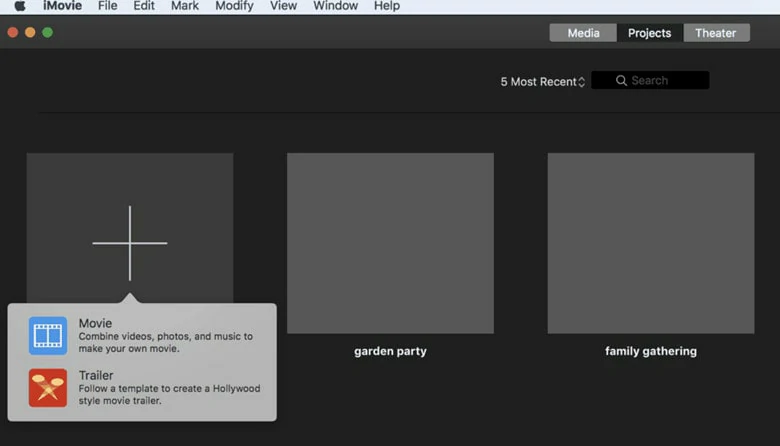
Create a New Project in iMovie
Step 3: Import Photos, Videos and Audio Files
Go to My Media tab and click on Import to load your photos, videos and audio to iMovie. If you've already arranged all your media resources in the Photos app, you can just switch to Photos tab under the Libraries panel on the left to import.
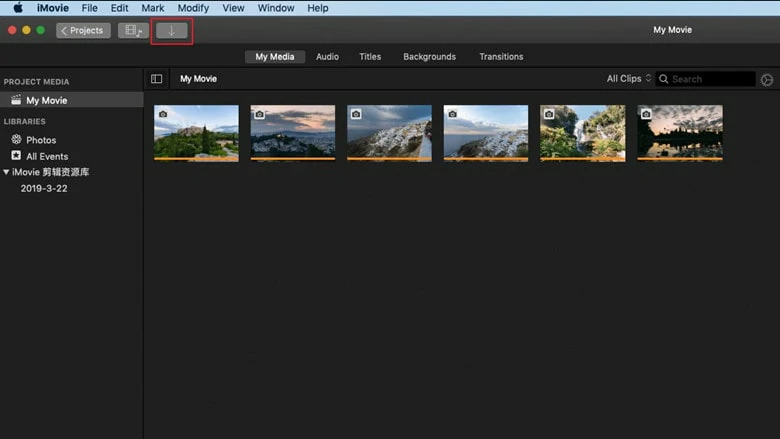
Import Photos, Videos and Audio Files
Step 4: Adjust the Photos in Timeline
Now it's time to fine-tune your photos with some extra editing options available on the Viewer pane. You can use the Magic Wand tool to improve the photo quality automatically, do some color correction, work on the color balance, crop your photos, and add filters. When finishing edits, remember to save your changes.
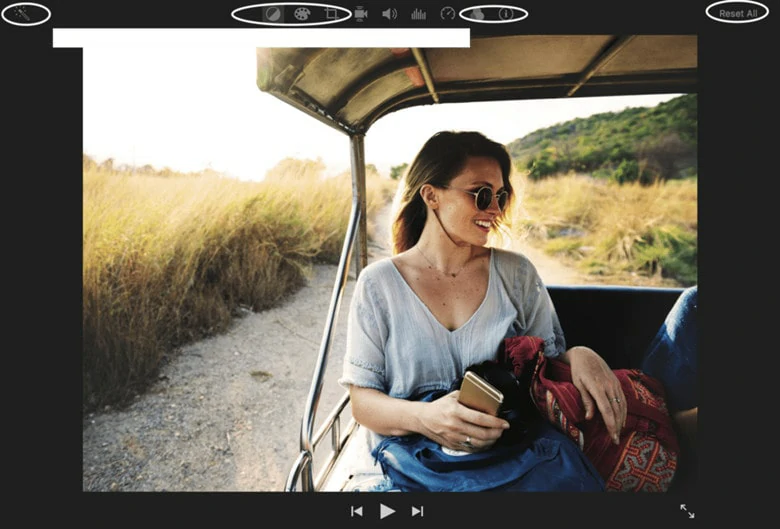
Adjust the Photos in Timeline
Step 5: Add Motion to Still Image
When you use pictures in slideshow, it's nice to bring motion to your still images. Select the photos you want to add motion, go to the Cropping option at the top of your Viewer pane and choose the Ken Burns tab. Adjust the starting and ending frames in the way you want to see the effect start and end.

Add Motion to Still Image
Step 6: Add Transition to Your Slideshow
Transitions are one of the main features to create a smooth slideshow. iMovie offers an array of transition effects like cross dissolve, fade and cross blur. But it's not wise to use a lot of different transitions one after another, as it distracts the attention and interrupts the flow.
To add a transition to the slideshow, drag and drop it between two photos in the timeline.
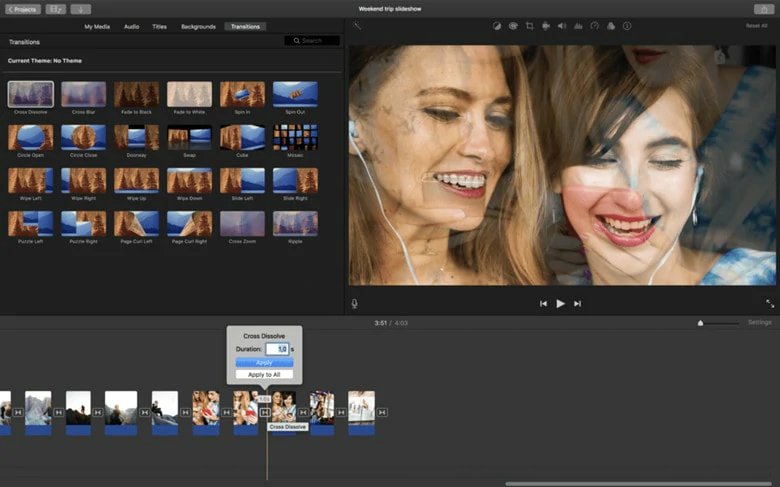
Add Transition to Your Slideshow
Step 7: Add Titles and Text
Using titles and text is a great way to mark the beginning and end parts of your slideshow. You can also add some famous quotes and words to bring an extra emotional dimension to your slideshow.
To add a title, click the Titles panel and then select one of the templates. Then drop it into the timeline and type your preferred text in the preview window now. However, iMovie doesn't allow you to add plain text to your slideshow as all the text presets include animation effects. Don't worry! We will offer a solution later.
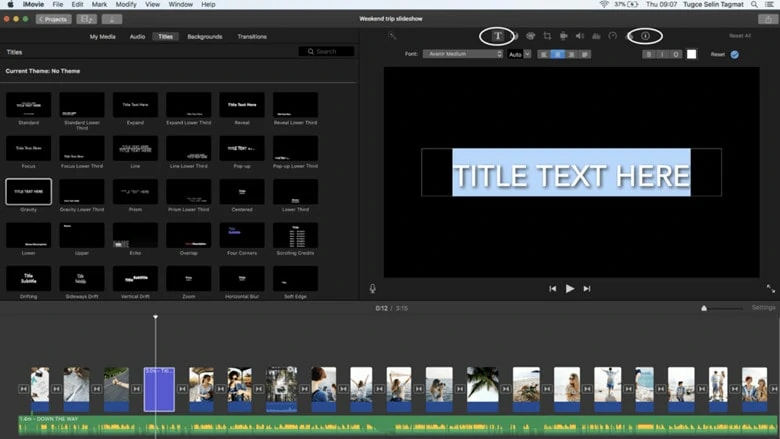
Add Titles and Text
Step 8: Add Music to Slideshow
You can import your audio from computer or download some royalty-free music tracks from websites to set them as the background music of your slideshow. According to iMovie's official website, you'd better purchase music from iTunes and then apply it to your slideshow.
Sync the track with your slideshow by trimming if you're make a storytelling video. But if you want to layer multiple audios like voiceover, background music and sound effects, iMovie is not the ideal option for you as multiple soundtracks layer is unavailable on iMovie.
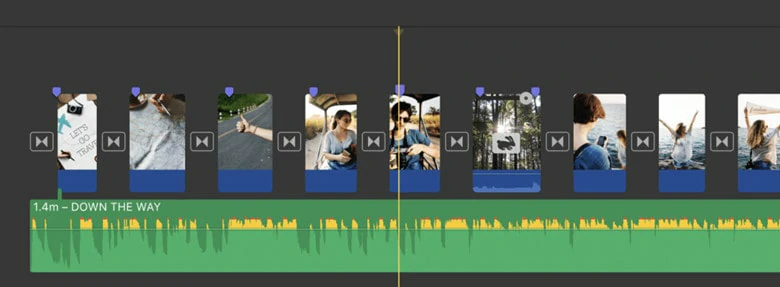
Add Music to iMovie Slideshow
Step 9: Save and Export the Slideshow
Play the slideshow to check if everything goes well and select File / Share / File to export your slideshow. Now you can share the iMovie photo slideshow with your friends.
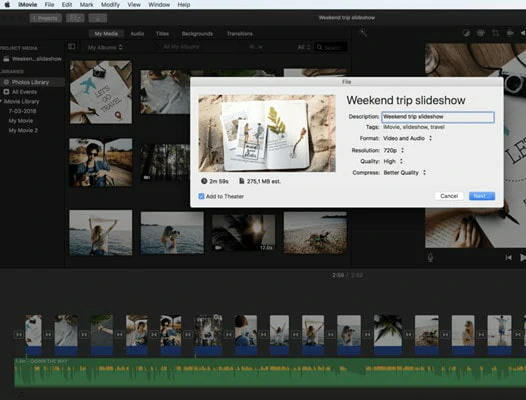
Save and Export the iMovie Slideshow
Although iMovie is an easy-to-use option for creating slideshow on Mac, it still has drawbacks as below.
Are you looking for an iMovie alternative way to create slideshow with more freedom and flexibility? Just keep reading and explore an AI-powered interesting way to create photo slideshow with template.
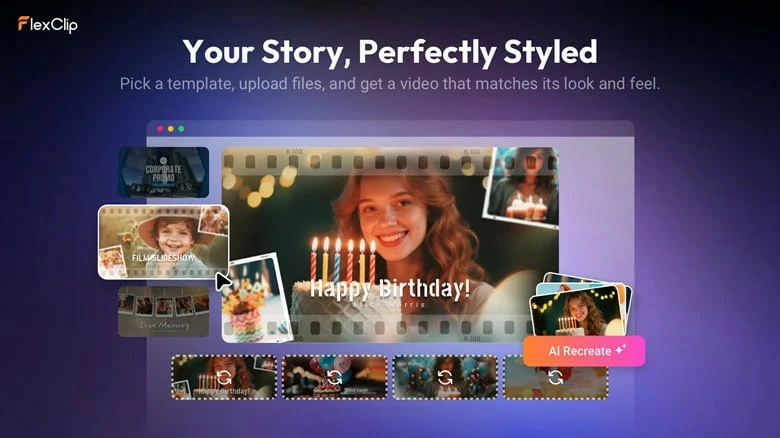
Part 2. Make Stunning Photo Slideshow with AI Recreate
If you want to start a branded new experience of creating photo slideshow, you can try this online iMovie alternative - FlexClip.
Offering almost 6000+ ready-made template, FlexClip enables you to quickly find a stylish template and apply its design to form a professional-level photo slideshow. However, that's just the beginning of your slideshow creation using FlexClip.


How about the template customization? FlexClip revolutions basic drag-and-drop replacements into AI-powered recreate process. Its smart AI technology will analyze your uploaded content and reimagine resources to tailor a new slideshow that aligns with your theme and unique story. No editing skills required! No downloads needed! With FlexClip’s templates, creating appealing slideshow has never been easier.
AI Recreate Feature to Make Photo Slideshow with More Flexibility


Key Features of FlexClip's Templates

Extensive Library of Slideshow Templates in FlexClip

Strong Compatibility Support of Every Template in FlexClip

Millions of Media Resources to Make Your Slideshow Shine
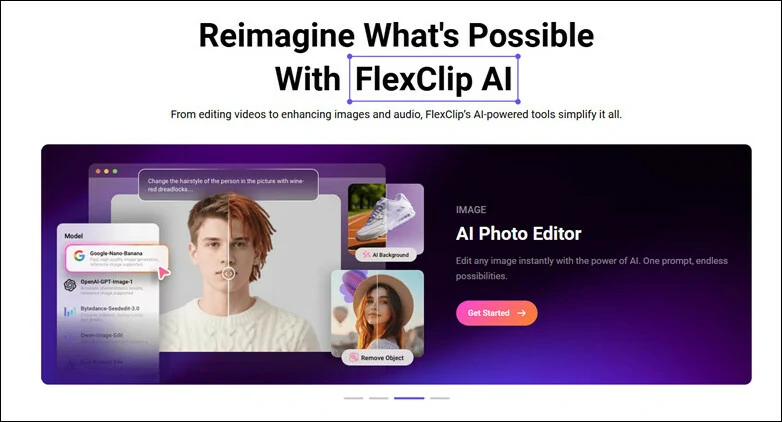
AI-driven Tools of FlexClip to Speed up Slideshow Creation
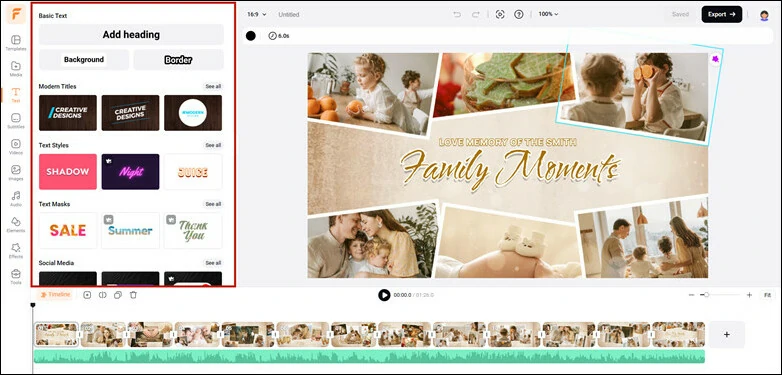
Hundreds of Texts, Filters, Overlays and Other Elements to Infuse Your Creativity into Slideshow

Team Collaboration Feature to Craft Slideshow with Your Colleague
How to Create a Slideshow with Templates in FlexClip
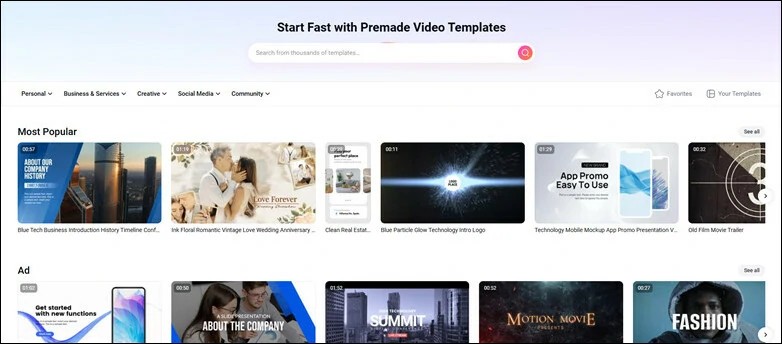
Step 1: Pick a Template You Like
Access FlexClip's template interface, enter keyword to instantly circle your theme option and pick your preferred template to start.
Pick a Template You Like to Start
Step 2: Customize the Template with AI Recreate Feature
FlexClip offers both general drag-and-drop customization and AI Recreate. Here hit on AI Recreate button below and you’ll be led to the setup interface. The selected template will appear on the left for you to preview and check.

Use AI Recreate Feature to Customize the Selected Template
On the right panel, select the language, tone, and theme for AI to analyze and rebuild. After that, upload your photos and clips to create your slideshow
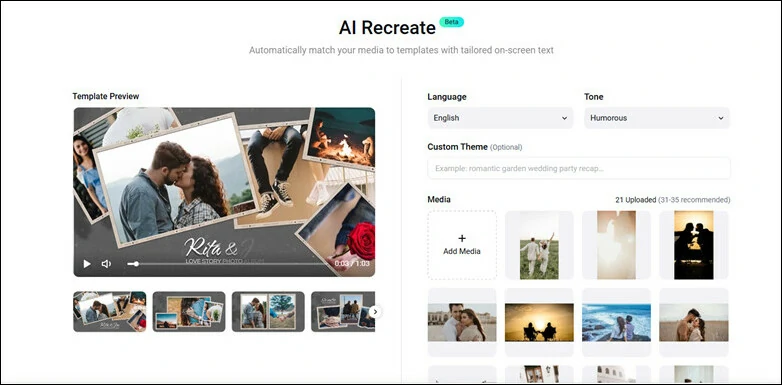
Upload Your Photos and Customize Setup to Guide AI Rebuild Your Slideshow
Step 3: Generate and Preview
Hit on Generate button to get started. AI will instantly analyze visuals and audios content in uploaded media, then generate appropriate text to match on your slideshow theme and visuals, finally it combine the visuals, text and effects to produce the final slideshow result.
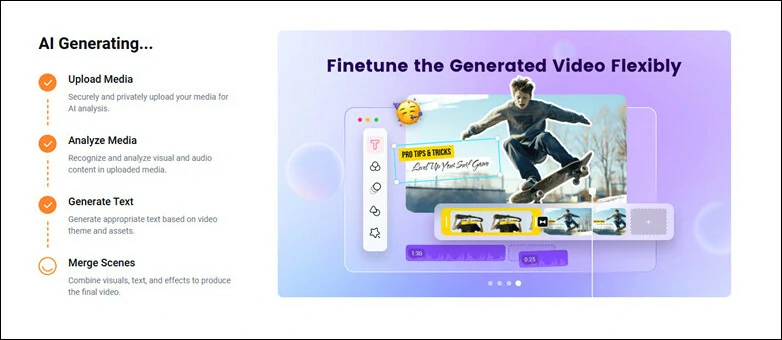
Star AI Recreate Process and Let AI Rebuild the Template for You
Within minutes, your crafted slideshow will be ready to preview and play in FlexClip's built-in editor page. At there, you can make more personal touch by changing default music, adjusting playback speed and applying additional AI tools to make it truly shine.

Preview the AI-generated Slideshow and Add Personal Touches
Step 4: Download and Share
Congrats! Now it's time to share your stunning slideshow. You can tap the Export button to download the video or share it with your friends in no time.
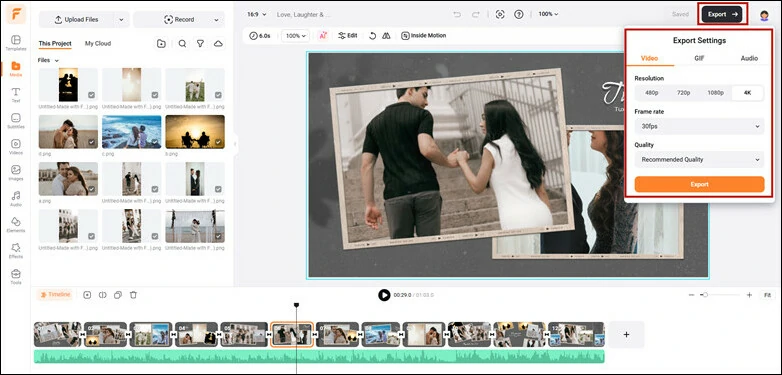
Download the Edited Slideshow and Share Across Social Media
Part 3. Popular Slideshow Types iMovie Users Like to Create
iMovie Memorial Templates in FlexClip Free Download
Turn the life story of your loved one into a heartfelt, personal film, allowing relatives and friends to celebrate their remarkable life. An editable template simplifies the process. Choose your favorite preset, then personalize it by incorporating their favorite song, selecting cherished photos, and adding heartfelt words to express your sorrow and honor their memory.


iMovie Wedding Templates in FlexClip Free Download
Marriage is for two while wedding is for all! Whether you’re in need of a wedding invitation slideshow template for gathering people together for your Big Day or a romantic wedding template to tell your love story at the rehearsal dinner party, these free templates below can help you out! You can use these beautiful wedding templates not only for invitation but also for anniversary celebration or proposal.


iMovie Collage Slideshow Templates Free Download
Looking for creative ideas for a more engaging slideshow? Why not create a collage slideshow that showcases multiple photos on one screen and combines visuals in innovative shapes? Simply browse FlexClip’s collage template collection and choose your favorite to personalize with your unique touches.


The Bottom Line
That's all about how to create an iMovie photo slideshow on Mac and an alternative way to create slideshow with iMovie slideshow templates. Hopefully, with all the methods shared, everyone can easily turn photos into eye-catching slideshows in seconds.


FlexClip AI Video Maker
Reach professional-quality videos faster with easy editing tools, templates, and smart AI.
Start Now for Free
Hot & Trending
-

Best Ways to Find Music in YouTube Videos
-

Instagram Story Video Quality Bad After Upload? Fix It!
-

How to Repost Video on TikTok & How to Remove TikTok Repost
-

Improve Video Quality Online: 3 AI Video Quality Enhancers You Can't Miss
-

4K Convert to HD 1080p without Watermark: Best 4k Video Converters
-

Top 13 Birthday Video Makers with Music and Effects Free
-

How to Search Filters on TikTok & Use a Filter You See - TikTok Filter Guide
-

Large Collection of Creative and Funny Birthday Video Ideas for Ones You Care