No one would post unedited raw footage to YouTube.
Whether you want to share a video tutorial on YouTube or become a YouTube content creator in your niche, editing YouTube video footage to make it engaging is the very first step on the road to YouTube success.
So, if you are new to editing YouTube videos, in this tutorial, we will walk you through how to edit a YouTube video online with YouTube’s built-in video editor and a feature-packed online video editor, plus offering you the best YouTube video editing workflow.
Here is what you will learn:
How to Edit YouTube Videos by the Native YouTube Video Editor
If you have a simple video project or you want to edit YouTube videos that have been posted on YouTube, then using YouTube’s native video editor could be the best choice because you don’t need to download it for editing and it’s 100% free.

Edit YouTube video by YouTube video editor
Within the YouTube video editor, you can make 4 main video edits:
1. Trim and Split YouTube Video
Go to your YouTube channel > find a video you want to edit > click Edit Video > click the Editor on the left menu. This will open the YouTube video editor.
Trim or split a YouTube video by YouTube video editor
2. Blur YouTube Video
Click the “+” button on the Blur tab, you have two options to blur a YouTube video:
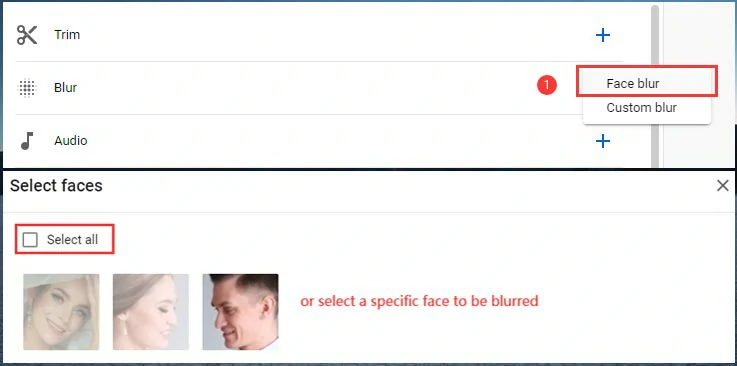
Face blur feature in YouTube video editor
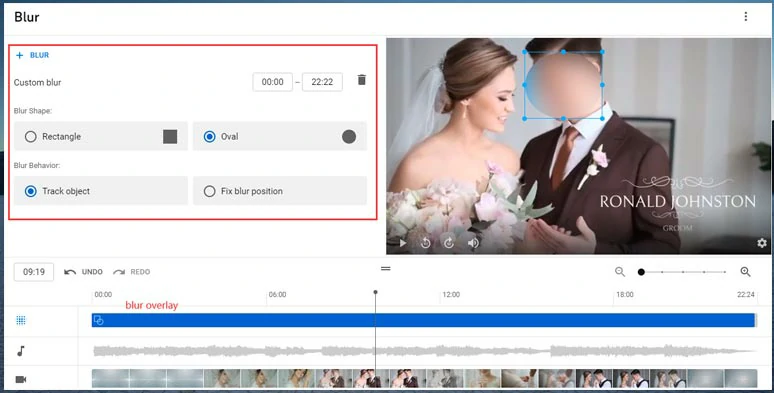
YouTube video editor’s custom blur
Likewise, once you’ve applied a blur mode, you can trim its blurry overlay to decide its duration. If you don’t like the blur position, you can delete it as well.
3. Add Audio to YouTube Video
Hit the “+” button on the Audio tab > then you can search for royalty-free music and sound effects in youtube’s Audio Library.
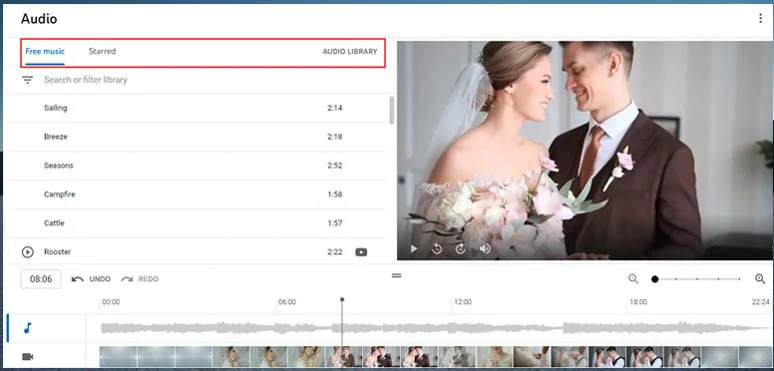
Add royalty-free audio from YouTube Audio Library
Or you can click the “Audio Library” tab to open the full version of it for searching for more free music and SFX. Once you find a piece of ideal music, you can hit the “Star” icon, and this music will be added to your favorite collection in the video editor.
Click the “Add” button. The music or SFX will be added to the timeline.
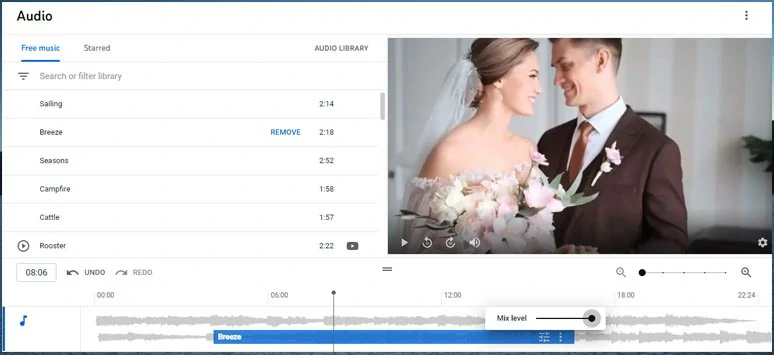
Add and adjust the audio’s volume and duration in the YouTube video editor
4. Add End Screen to YouTube Video
Adding an end screen to your Youtube video is a great way to extend the watch time. Only videos with at least 25 seconds or longer are qualified to add an end screen. YouTube offers you 6 ways to add an end screen to your YouTube videos:
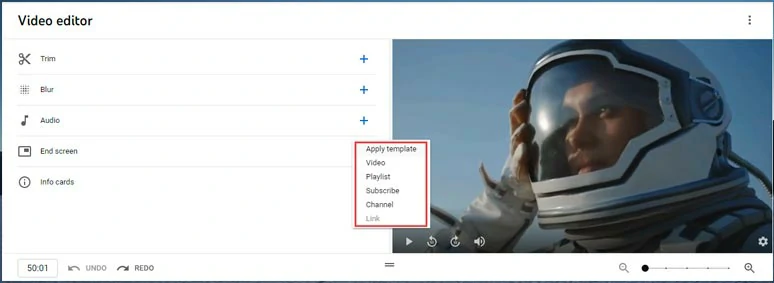
Add an end screen to YouTube video by YouTube video editor
Once you select this option, some preset templates layouts will be available for you to choose from; you can trim the length of the end screen by dragging it or import a YouTube video you choose.
5. Save the Edits
Hit the “Save” button to save your edits or click three dots on the top right corner to save it as a new video. Then YouTube will automatically process your saving and display the latest version of your video to the viewers.
How to Edit YouTube Videos by FlexClip Online
If you find the features of YouTube’s built-in video editor too limited, a flawless alternative to editing YouTube videos would be FlexClip. It is a feature-packed online YouTube video maker that will take your YouTube videos to the next level, with no software download and video editing experience needed.
Edit footage into compelling YouTube videos by FlexClip online.

With FlexClip, you can:


Step 1: Select a Free YouTube Video Template.
Pick a YouTube template you like, preview it, and click the customize button.
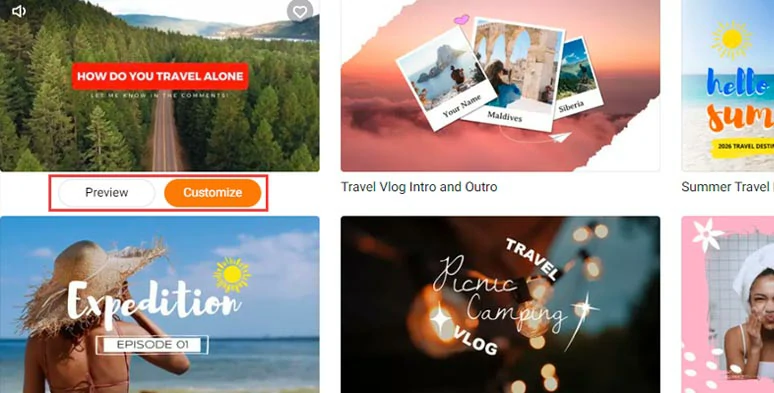
Select a YouTube video template.
Step 2: Upload Your Video Assets from PC or Mobile Phone.
You can upload footage from your PC or directly scan the QR code to upload from your mobile phone.
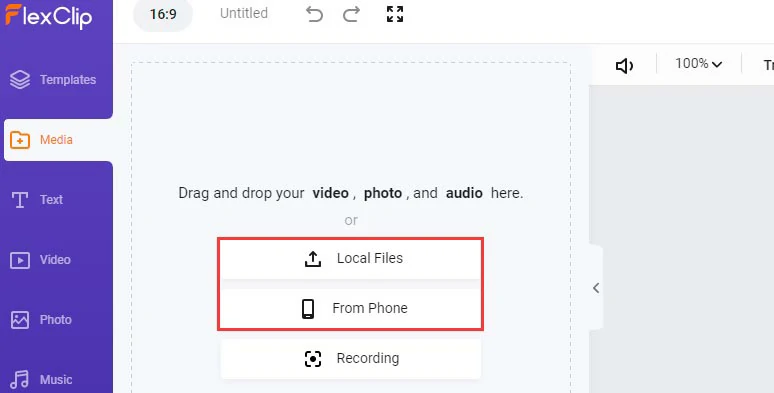
Upload your clips, images and audio files to FlexClip.
Step 3: Drag and Drop Footage, Images to Replace the Preset Ones.
Just drag and drop your video assets to quickly replace the original video assets in the video templates. You may crop mask add styles to videos and images as well.
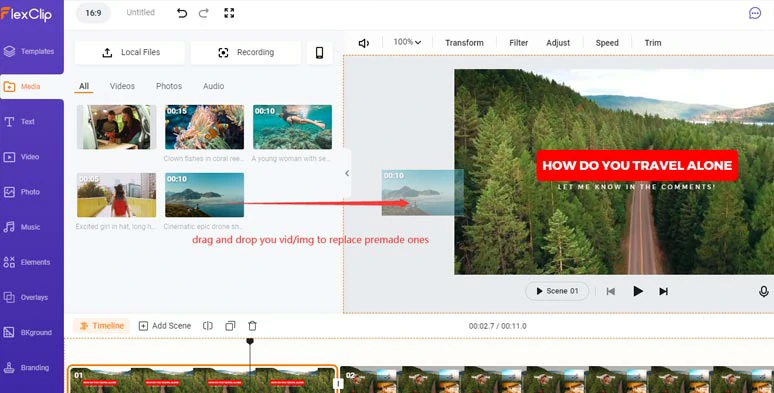
Drag and drop your clips or images to replace the preset’s elements.
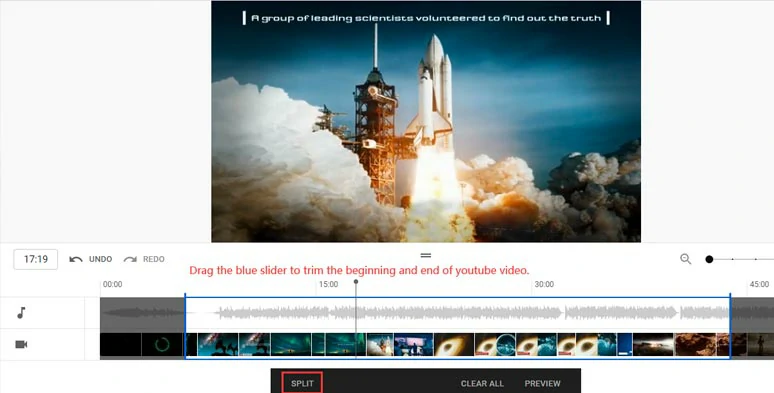
Step 4: Trim, Split and Merge Video Footage.
Click the “+“ button to add clips to the timeline. Drag the slider inward to easily trim your clips. Or move the playhead and click the Split tool to cut a clip into two and delete the unwanted video moments. You may also drag and drop the clips on the timeline to reorder their sequence.
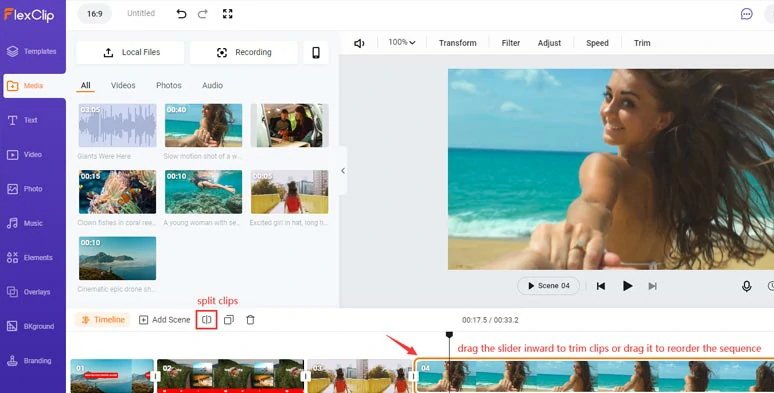
Trim, split YouTube videos, and reorder their sequence on the timeline.
Step 5: Customize and Animate the Texts.
Click a pre-made text > type in your texts and customize its style, color, font, spacing, etc. Then click the Motion tool to animate the text, such as a typewriter, glitter, glitter, bounce, etc. animations. Or you can click the Text tab and scroll down to discover more text animations, such as social media, lower third, news titles, speech bubbles, quotes, call-out titles, etc. All of them are fully customizable.
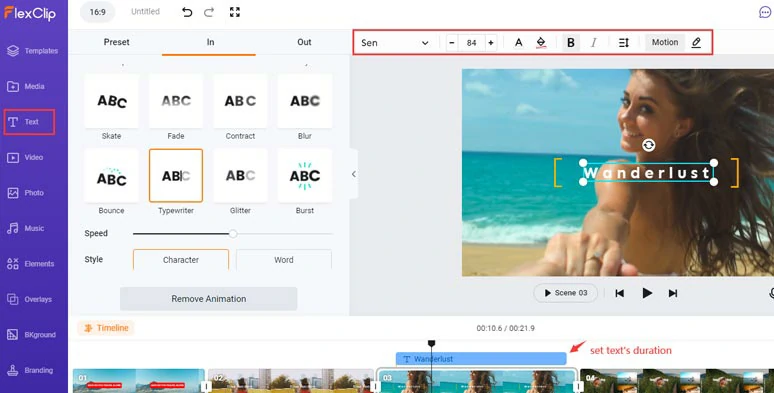
Customize texts, text fonts, styles, text animations, etc.
Step 6: Adjust Video Speed.
You can split a video and click the Speed tool to slow down a clip to 0.2x or increase its speed to 8x times faster than the original video.
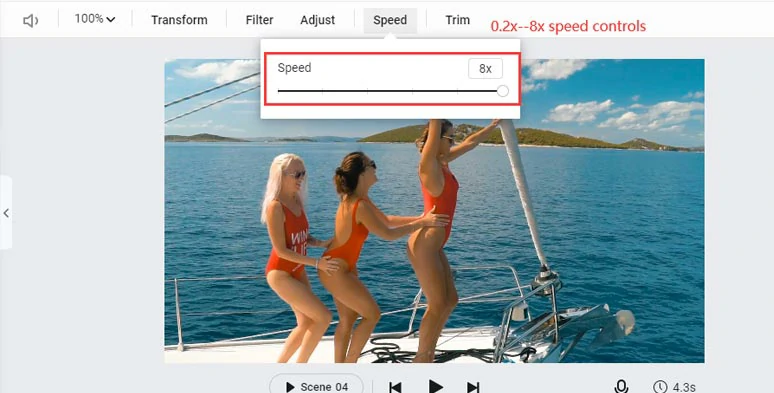
Speed up or slow down YouTube videos (0.2x-8x speed control).
Step 7: Add B-roll with Picture-in-picture Effect.
Click the picture-in-picture tool and then a video or multiple photos can be added to the video as a video overlay. You can decide its duration, its shape, and how it appears or disappear in the video.
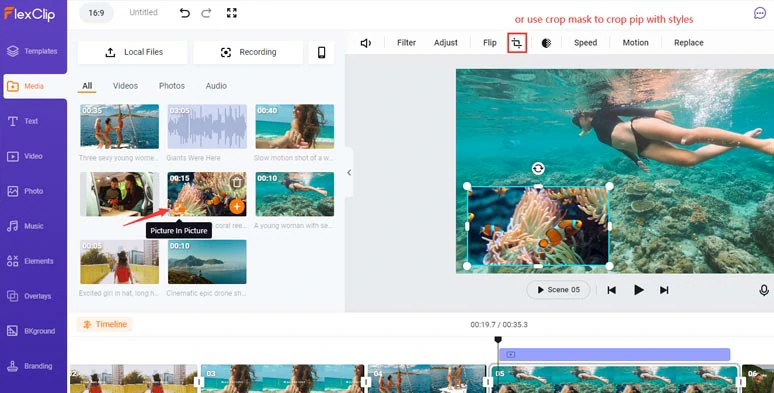
Add B rolls with a picture-in-picture effect for storytelling.
Step 8: Add Cool Video Transitions.
Click the transition tool, then you can select from 100+ video transitions, such as trendy liquid transitions, glitch transitions, and classic fade-to-black transitions, etc. They help connect different scenes smoothly with styles.
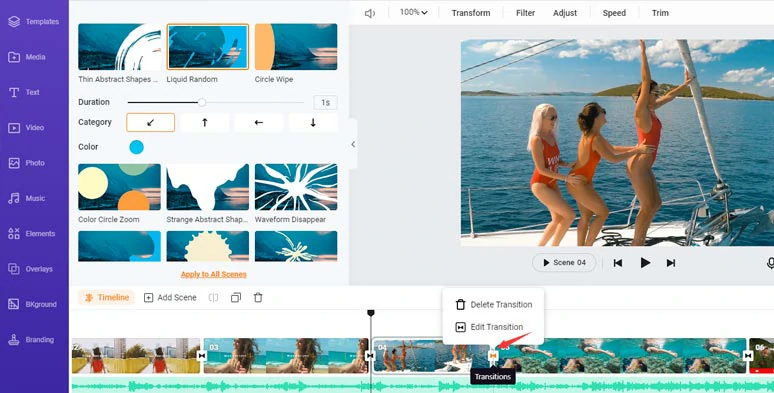
Add trendy video transitions to clips.
Step 9: Add Royalty-free Music and Sound Effects.
Click the Music tab, where you can search for thousands of royalty-free and studio-like music and transition sound effects for your YouTube videos. You can easily drag and drop to add them on the timeline to cut to the beat. It saves you tons of time for finding royalty-free BMG and SFX and prevents copyright issues.
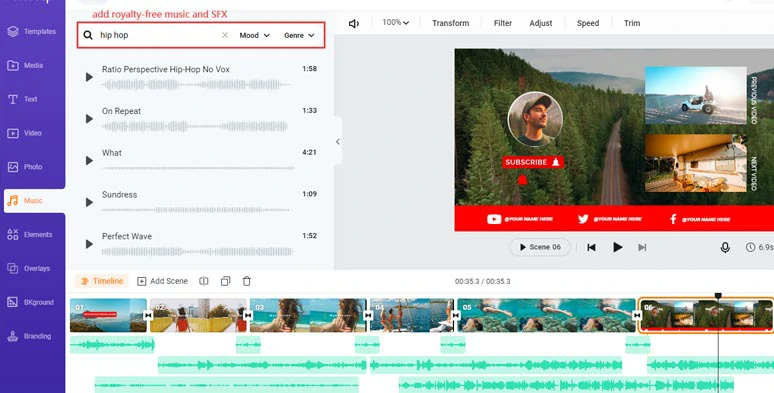
Add multiple royalty-free BGM and sound effects to your YouTube videos.
Step 10: Preview and Share.
Done with the editing. Hit the Export button. You can export the video in MP4 to your hard drive. Or directly share it on YouTube, Google Drive, and Dropbox. FlexClip will also generate a clickable link, and embed code for your blogging or a private share.
Best YouTube Video Editing Workflow Recommended
Having an organized YouTube video editing workflow is essential to boosting YouTube video editing efficiency and will save you tons of valuable time.
Widely-accepted workflow for editing YouTube videos
Through talks with many YouTube content creators around us, we’ve summed up a highly productive YouTube video editing workflow for you to follow. No matter what video editor you use, the editing process applies to all.
Step 1: Collect and Sort Out all the Video Assets Needed
Create multiple folders on your PC for A roll, B roll, images, audio recordings, BGM, sound effects, GIFs, etc., and put them in different folders respectively. Check top 4 sites for royalty-free YouTube background music.
Step 2: Import Video Assets into Video Editor for the Rough Cut
What you are expected to do is:
Step 3: Preview the YouTube Video
Done with the initial cut, it’s advisable to watch the whole YouTube video as a viewer and ask yourself the following questions:
Then, work on fixing the problems found and watch it over till you are satisfied with it.
Step 4: Place a Hook at the Beginning of the Video
A great YouTube video is engaging, helpful, entertaining, informative, and relatable. A proven strategy to grasp viewers’ attention is to edit a hook and place it in the first 20 secs of your youtube video.
Step 5: Add in B-roll
B-rolls are secondary footage that adds interest and explanations for the storytelling of your main video.
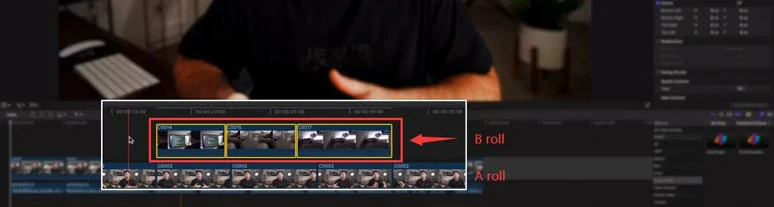
Add B-roll over the A-roll on the timeline
Step 6: Add Video Effects Needed
Apart from the great video content and unique storytelling, adding video effects can effectively a professional touch to your YouTube video.
Some of the frequently-used video effects involve:
Step 7: Watch Your Video Again and Check If Everything Is Alright
Check the spelling, transition, audio, etc. Make sure everything is exactly what you want in the video.
Step 8: Export Your YouTube Video
For the best viewing experience on YouTube, export the video with a 16:9 aspect ratio and at least 1080P (FHD) resolution, and 24-60 FPS.
Now, It's Your Move
So, hopefully, our tutorial helps you a lot in editing YouTube videos. If you have more questions about YouTube video editing, don’t hesitate to reach us on Facebook. Now, start editing your YouTube videos online with either YouTube video editor or FlexClip.


FlexClip AI Video Maker
Reach professional-quality videos faster with easy editing tools, templates, and smart AI.
Start Now for Free
Hot & Trending
-

7 Best Ways to Find Music in YouTube Videos
-

Instagram Story Video Quality Bad After Upload? Fix It!
-

How to Repost Video on TikTok & How to Remove TikTok Repost
-

Improve Video Quality Online: 3 AI Video Quality Enhancers You Can't Miss
-

4K Convert to HD 1080p without Watermark: Best 4k Video Converters
-

Top 13 Birthday Video Makers with Music and Effects Free
-

How to Search Filters on TikTok & Use a Filter You See - TikTok Filter Guide
-

Large Collection of Creative and Funny Birthday Video Ideas for Ones You Care