Do you wanna make your everyday boring video have the cinematic look like those on the big screen? Or do you find that your videos lack a bit of taste and style?
Chances are it all has to do with the color grading of your video.
So, in this tutorial, we will walk you through essential color grading definitions and break down the myth of color grading in videos into actionable strategies. So, you know how to color grade a video with the right color scheme and color adjustment tools for your styles.
Here is what you will learn:
Here is a quick takeaway for color grading a video:
If you are unfamiliar with any color grading concepts mentioned above, no worries! We will explore them in detail in the later parts of the article. Please, read on.
What Is Color Grading in Video?
Color grading is how you use the color adjustment tools like Curves, Color Wheel, or HSL (hue, saturation, and lightness) to alter or enhance the color of video footage for a particular color tone or mood needed in a video or film.
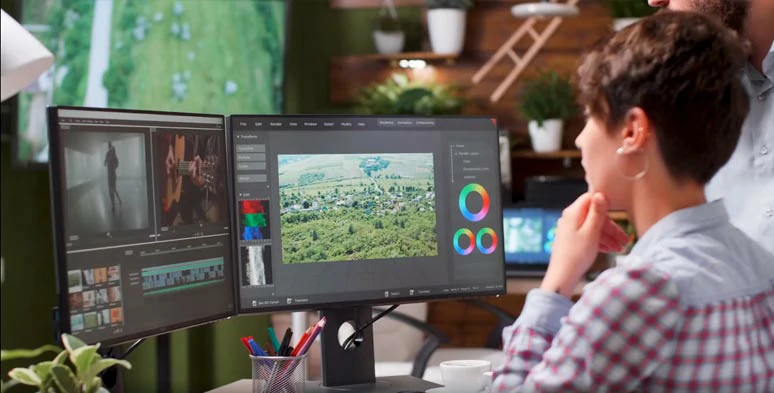
Color grading in post-production
Color grading is so crucial in the post-production of a video or filming making because it sets the tone and mood for the video and evokes the emotions videographers or filmmakers want for the viewers. Check 9 best hacks to make a cinematic video.
For example, in the horror film—Silent Hill, the colors of black, green, and grey are used to give viewers the creeps. While in Quentin Tarantino’s action movie—Kill Bill, the bright yellow and red symbolize the heroine’s anger, revenge, power, and violence.
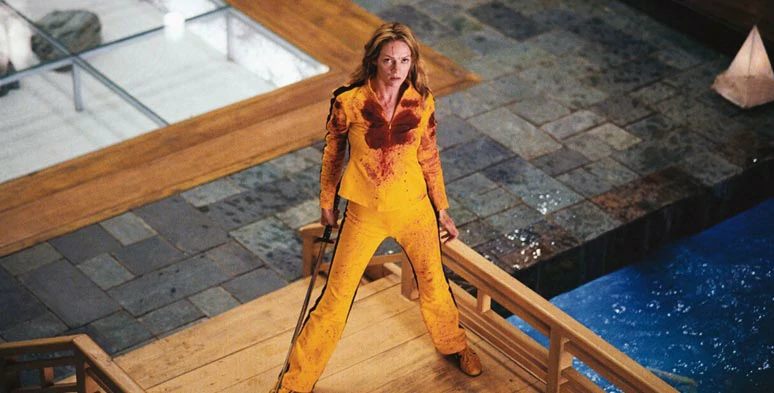
Massive yellow and red and blue in the shadow in the movie--Kill Bill
Meanwhile, the dominant yellow and red and the blue in the shadows constitute a sharp contrast and grasp viewers' attention effectively.
Color Grading VS Color Correction, Any Difference?
Well, many mistakenly believe that color grading is color correction. However, color grading and color correction are the utterly different steps of editing colors in the post-production of a video or film.
Here are the main differences:
Understand the Highlights, Shadow, Midtone, and HSL
To master the color grading of a video, you are expected to understand these 6 key concepts, ie. Highlights, Shadows, Midtone, Hue, Saturation, and Luminance. They will help you locate the specific area in a video for color grading and do better color correction and make coloring edits easier.
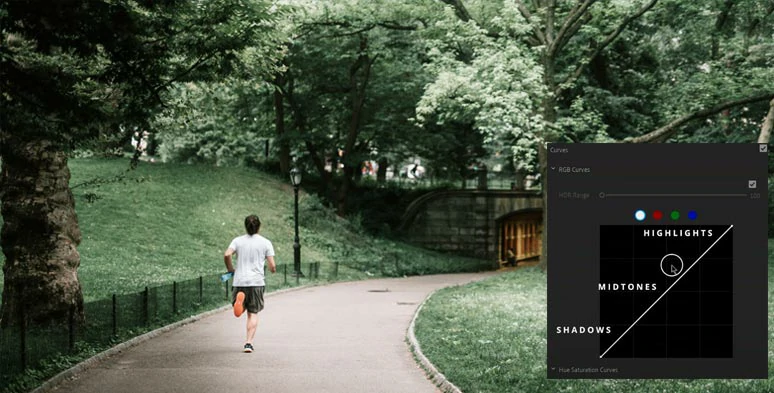
Use the Curves tool to tone highlights, shadows, and mid-tones in a video.
In actual color grading, you can manually use Color Wheels or drag the Red, Green, Blue channel of Curves to alter or add a new color to the Highlights, Shadows, or Midtones to add personal flair or style to your video.
For example, if you pull up the blue curve in the highlights, it will add blue in the highlights. If you drag the blue curve down in the shadows, it will add yellow in the shadows.
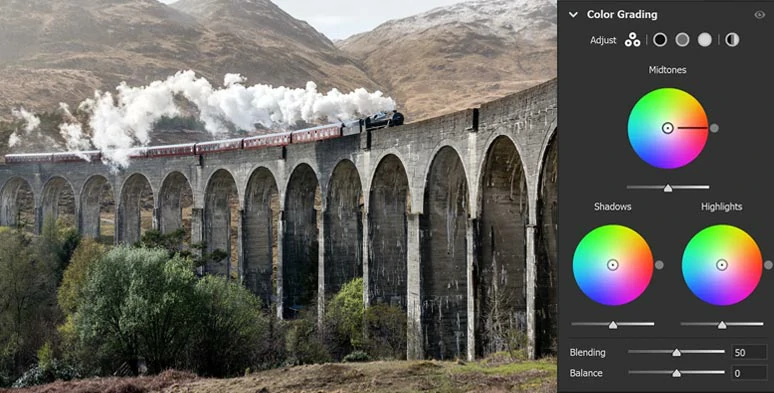
Use Color Wheels to color grade the highlights, shadows, and mid-tones of a video.
So, no matter what color grading software you use, let’s say Final Cut Pro, Adobe Premiere Pro, or the ultimate Davinci Resolve 17, you can alter or enhance the hue, saturation, and luminance to tone highlights, shadows, or mid-tones. It all depends on your style, aesthetics, and actual needs for the video project.
4 Popular Color Schemes for Color Grading
If you are new to color grading, here we would like to offer you 4 popular and can’t-go-wrong color schemes for color grading in videos and films. So, you can use them accordingly to your needs.
1. Complementary Colors
Complementary colors are 2 colors that are opposite on the color wheel. Colors like red and green, orange and blue, and yellow and purple are typical complementary colors.
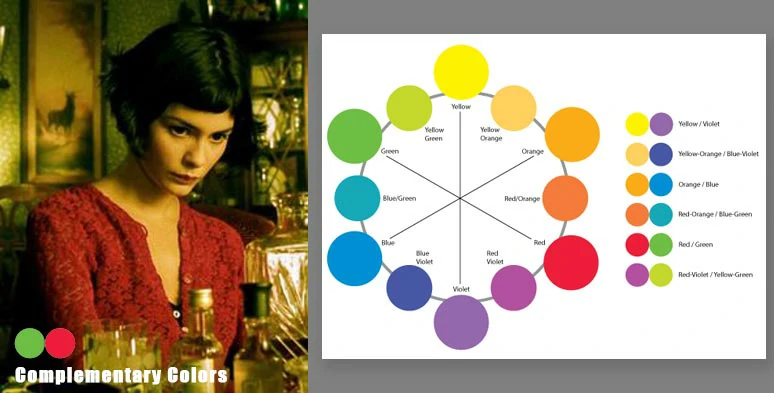
Complementary colors green and red are used in the film-- Amelie
Since complementary colors show a stark contrast, If you want to evoke the strong contrast in a character’s inner feeling or grasp viewers’ attention through colors contrasty colors, using the complementary colors for color grading can be the best option.
In reality, many YouTubers colored grade their YouTbue videos with popular “Teal and Orange”, a pair of complementary colors, to make their videos more cinematic and eye-catching.
2. Analogous Colors
Analogous colors are colors that sit next to each other on the color wheels, like neighbors. Iconic analogous colors are Yellows, Orange Yellows, and Orange.
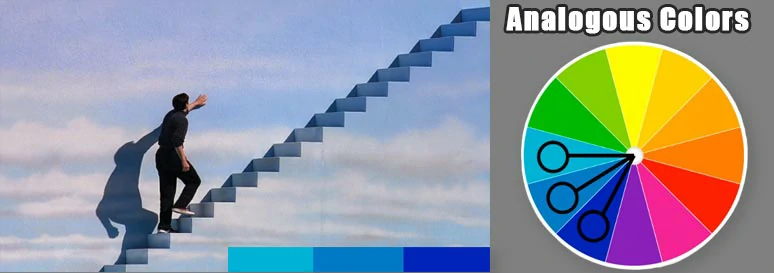
Analogous colors used in movie-Truman Show
As analogous colors give the impression of harmony and consistency, if you want the colors in your videos to look extremely eye-pleasing and comfortable, analogous colors are your best bet.
3. Triadic Colors
Triadic colors are 3 colors that constitute a triangle on the color wheels. Yellow, Blue, Red, and Orange, Green, Purple are standard triadic colors. Triadic colors are neither too contrasty nor too consistent. They can make your videos keep a subtle balance between harmony and vibrance.
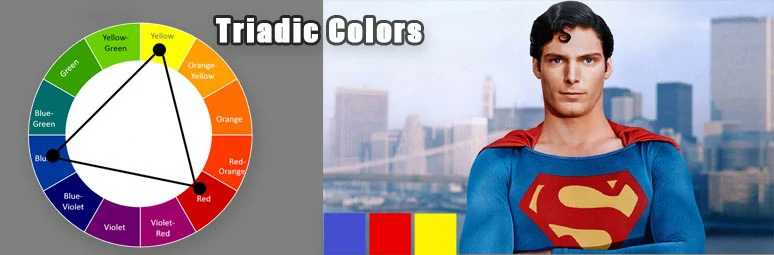
Classic Red, Yellow, and Blue triadic colors used in the movie—Superman
The movies Superman, Hulk, and Joker applied triadic colors to acquire distinct comic colors and vibes.
4. Monochromatic Colors
Monochromatic Colors are any single color on the color wheels. Monochromatic colors convey extreme calm and harmony in a video or film. Typical examples are the dominant green color in the movie—Matrix. Check how to make an animated Matrix TikTok profile picture.
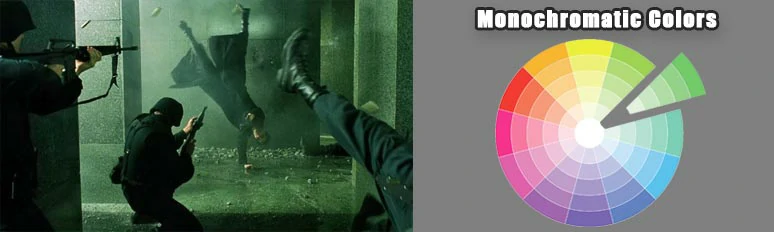
Monochromatic colors green in the blockbuster film--Matrix
In the actual color grading of a video, you can remove the saturation of all colors and use a masking tool to restore a single color. Then, the distinct monochromatic color is created. In movies, Schindler’s List or Sin City, such technique has been applied.
Great! Having discussed so much about color grading a video, let’s explore how to color grade a video using a free and versatile online video and Adobe Premiere Pro.
How to Color Grade a Video by Online Color Grading Tool-FlexClip?
For beginners, applying a video filter and latterly manually adjusting the Hue, Saturation and Lightness can be an easier and more efficient option. The tool you may use is FlexClip. It’s an easy-to-use and feature-packed online video maker.
Color grade a video with FlexClip online video maker

With FlexClip, you can use the color adjustments tool to do color correction of the video footage and select an ideal video filter and make detailed color adjustments to tone highlights, shadows, and mid-tones. No software download and experience is needed.
While more video tools like speed controls, video transitions, animated texts, royalty-free videos, music and sound effects, fully-customizable video templates, etc.
Step 1: Upload Video Footage to FlexClip
You can upload clips from your local PC or scan the QR code to directly upload video files from your mobile phone. Then add the video to the storyboard. You may trim, split or, merge the clips as you wish.
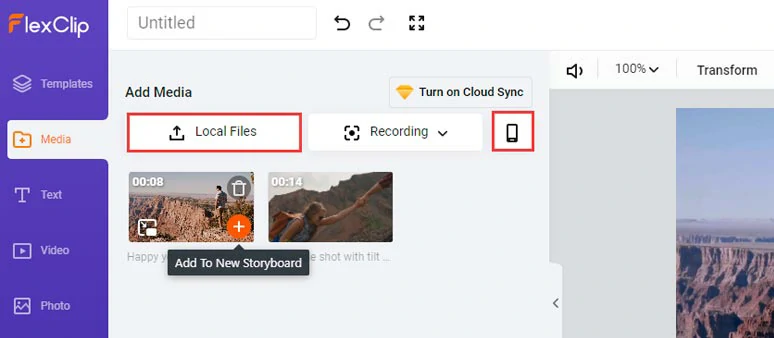
Upload video footage to FlexClip
Step 2: Color Correct the Video
Hit the “Adjust” tool. You can drag the slider of Highlights to bring out more detail in the blown-out sky or recover more details in the shadows or increase the contrast of highlights and shadows to remove the washout effects in the video.
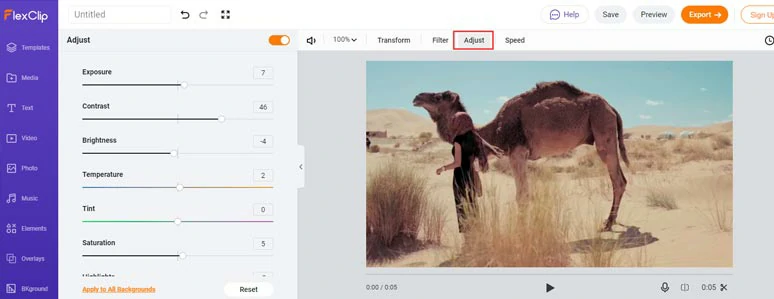
Do the color correction first with the adjustment tool
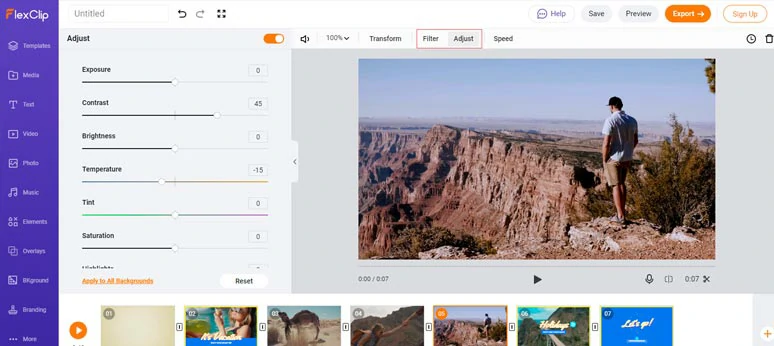
Step 3: Color Grade the Video
You can hit “Filter” to select and apply a video filter to the video footage and go back to “Adjust” and make detailed color grading adjustments like Hue, Saturation, Brightness, etc.
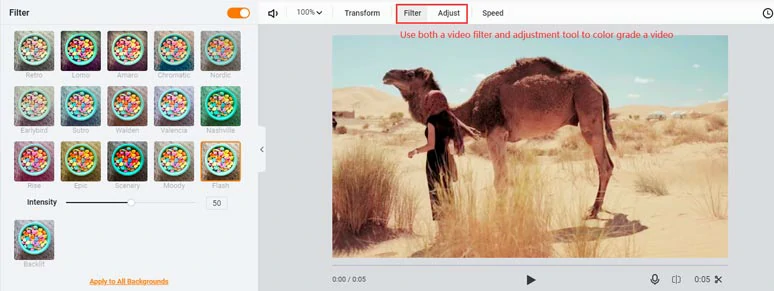
Color grade a video using both video filter and adjustment tool
Step 4: Export and Share
Done with the editing. You can directly download the video to your hard drive or save your video project to Google Drive, Dropbox. FlexClip will also generate a clickable link or embed code for private sharing or blogging.
How to Color Grade a Video in Adobe Premiere Pro?
If you want to have more controls for detailed color grading, Adobe Premiere Pro will give you the best flexibility. Here we quote a color grading tutorial from YouTuber Lila.
How to color grade a video to get the cinematic film look by Adobe Premiere Pro
Now, It's Your Move
To create a video with styles, color grading is one of the best solutions. Make sure your color grading is subtle, balanced, consistent, and harmonious, and most importantly works for the tone and vibes of your video project.
Hopefully, you enjoy our tutorial and if you find it informative and useful, don’t forget to share it with your friends on Facebook or Twitter, etc. Much appreciated! So, start color grading your clips with FlexClip or Premiere Pro now!


FlexClip AI Video Maker
Reach professional-quality videos faster with easy editing tools, templates, and smart AI.
Start Now for Free
Hot & Trending
-

Best Ways to Find Music in YouTube Videos
-

Instagram Story Video Quality Bad After Upload? Fix It!
-

How to Repost Video on TikTok & How to Remove TikTok Repost
-

Improve Video Quality Online: 3 AI Video Quality Enhancers You Can't Miss
-

4K Convert to HD 1080p without Watermark: Best 4k Video Converters
-

Top 13 Birthday Video Makers with Music and Effects Free
-

How to Search Filters on TikTok & Use a Filter You See - TikTok Filter Guide
-

Large Collection of Creative and Funny Birthday Video Ideas for Ones You Care