Training videos, tutorials, gameplays, and much more other video creations require screen recording, a powerful way to help us walk the viewers through a process with detailed steps. However, if you want to make a professional video, it's not enough to simply record the screen; you also need to know how to edit your screen recording to make it a professional one.
Here in this article, we'll share the complete process of editing a screen recording, which works on Mac, Windows, Chrome OS, and Linux. So, we have all covered if you’re looking for a way to edit screen recording video on Mac, Windows, or Chromebook.
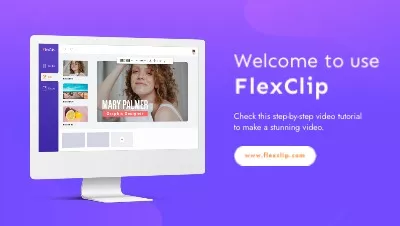
Free Templates for Your Screen Recording Video Inspiration

Also Read: How to Combine Two Zoom Recordings into One Online Free >
How to Edit a Screen Recording Video - for Mac/Windows/Chromebook
If you want to make a video using the screen recordings, whatever the sort of the video, from the how-to videos and tutorials to gameplays, you need to learn how to edit those screen recordings into a complete video.
The screen recording editing process will require lots of creativity and some editing techniques, which may make some of you guys feel challenged to handle it.
No worries! Just check the step-by-step guide below and learn how to edit a screen recording video, from choosing the right screen recording editing software to putting the footage together to applying the best visual and audio effects.
Step 1 Pick the Right Screen Recording Video Editing Tool
After you capture the video content, the first step to editing is to pick the most convenient yet functional video editor. Here FlexClip is recommended to work as a quick online solution.
As an online screen recording editor, FlexClip helps you edit your screen recording across systems as it is available in your browser on Mac, Windows, Chromebook, etc. Besides, with an online editor, you will no longer have to worry about storage space on your computer.
Pick the Right Screen Recording Video Editing Tool - FlexClip
FlexClip offers rich functions but an intuitive and straightforward interface for editing screen recording videos. Besides, it has thousands of pre-made video templates that inspire and help you edit your screen recording videos effortlessly.
What's more, with FlexClip, you don't need separate recording and editing software, as it also works perfectly as a free online screen and webcam recorder. Once you capture the video, the recording will be uploaded into its editor where you can add annotations or subtitles, and make more edits.
Feature Highlights
All in all, with FlexClip, whether Mac, Windows, or Chromebook users can edit their screen recording easily and effectively.


Step 2 Organize Your Screen Recording Footage
If you used another screen recorder and got your recording ready, you'd better organize that footage as well as the materials you're planning to use in your project, like audio tracks, sound effects, and more, within one folder before you start editing, which can help you simplify your editing process.
Once you have all the files within one folder on your computer, we suggest you to review all the recording footage and make an initial screening to choose the most critical parts and eliminate those poor-quality footage. In this process, you can mark or rename the clip to help you find the right parts easily and quickly when you start editing your screen recording.
Make sure you've marked every clip you want to use in your project, and now let's go to FlexClip and dive into the actual editing to assemble the video.
Step 3 Rough Cut the Screen Recording Video
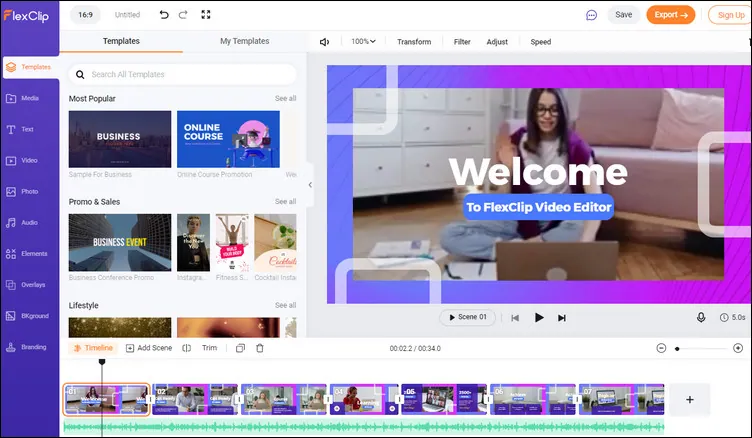
Whether you're trying FlexClip to record a new video or edit your existing footage directly, simply click Recording or drag and drop your files into the Media section.
When you get your footage ready, simply add them to the Timeline, you can trim the footage or zoom and crop to cut out the unnecessary part, rotate to fix the orientation problem or horizon issue, and then change or rearrange the clips within the video timeline by dragging the clip to the place you need it most.
After you capture the video content, the first step to editing is to pick the most convenient yet functional video editor. Here FlexClip is recommended to work as a quick online solution.
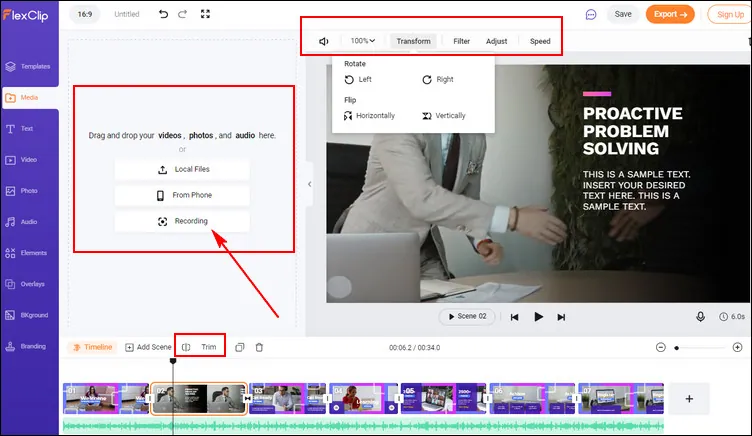
Rough Cut the Screen Recording Video with FlexClip
Here, you can use FlexClip's various basic editing tools to make the rough cut on your screen recording and adjust them in the way you want.
Step 4 Add the Visual Effects and Background Music
Now, you can start adding visual effects and audio tracks to the screen recording to make it far more appealing and professional.
To strengthen the comprehensibility of your screen recording video, you can add titles, subtitles, and descriptions to highlight the main ideas at every stage in your video, which is especially important for a how-to or tutorial video. FlexClip offers a fantastic collection of text animations for you to choose from, and you can also modify the font, color, and motion on each of them.
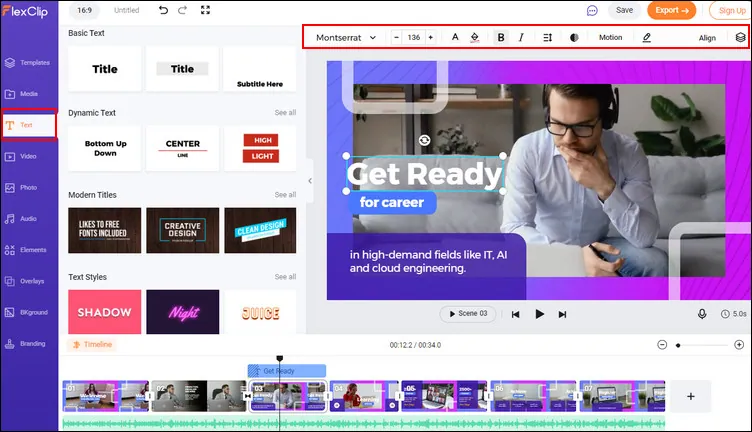
Add Text to the Screen Recording Video with FlexClip
For more visual effects, you can add transitions, overlays, filters, as well as plenty of animated elements, like subscribe buttons, emoji stickers, speech bubbles, etc., to enhance your video. Moreover, you can even put your face in the corner of your video using the pip effects!

Add Effects to the Screen Recording Video with FlexClip
Oh! Never forget to add some sound effects and background music to go along with your video to make the overall video more engaging and interesting for your audience. Moreover, you can also do the voice-over to clarify your points.
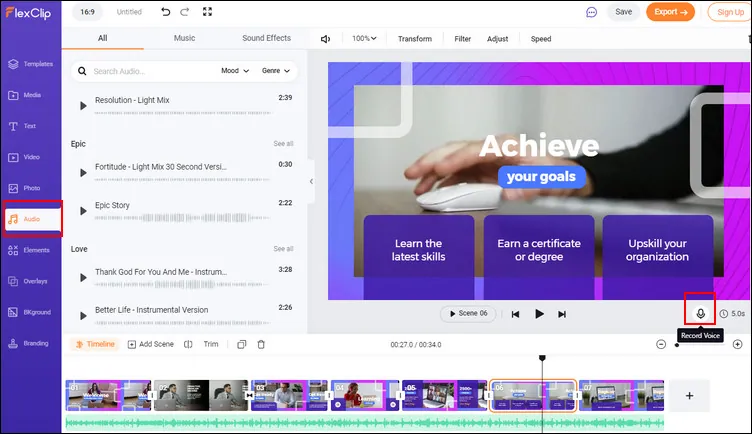
Add Music to the Screen Recording Video with FlexClip
Have no ideas on how to edit and add visual effects to your screen recording video? Just check out FlexClip's professionally designed templates for some inspiration.


One thing you must remember when you add the visual effect is that visual effects can make or break your video! Just remember the concept of less is more, and never make the visual effect supersede the video content itself.
Step 5 Export and Share the Video
You can preview and check the final effect when the video is finalized. If satisfied, you can download and share your screen recording video to YouTube directly.
Congratulations! You've now edited and made your screen recording footage into a professional video!


FlexClip AI Video Maker
Reach professional-quality videos faster with easy editing tools, templates, and smart AI.
Start Now for Free
Hot & Trending
-

Best Ways to Find Music in YouTube Videos
-

Instagram Story Video Quality Bad After Upload? Fix It!
-

How to Repost Video on TikTok & How to Remove TikTok Repost
-

Improve Video Quality Online: 3 AI Video Quality Enhancers You Can't Miss
-

4K Convert to HD 1080p without Watermark: Best 4k Video Converters
-

Top 13 Birthday Video Makers with Music and Effects Free
-

How to Search Filters on TikTok & Use a Filter You See - TikTok Filter Guide
-

Large Collection of Creative and Funny Birthday Video Ideas for Ones You Care