The Zoom recordings of your company’s webinar, teacher’s presentation, or lively podcast interview are precious video assets for sharing valuable information on social media.
After the recording is done, you do need to polish Zoom recordings before sharing them online. For example, cut off unwanted parts of a Zooming recording or break up hours of a webinar into smaller chapters and add text animations, motion graphics, and music to make it more engaging.
So, in this tutorial, we will walk you through where to find Zoom recordings and how to edit a Zoom recording for free online and on Mac and on Windows to spice it up for YouTube or other repurposings.


Here is what you will learn:
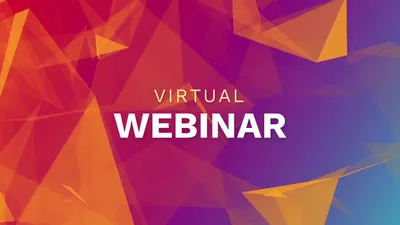
Also Read: How to Create A Catchy Webinar Teaser Video with Ease.
Where to Find Zoom Recordings
Well, before you can edit a Zoom recording, the first and foremost is to access your Zoom recordings. Here are 3 main ways to find your Zoom recordings:
Where to Find Zoom Recording on Mac:
Open your Zoom app on your Mac > click Zoom > Preferences > Recording > Local Recording > click the Open button to find Zoom recordings stored on your Mac.
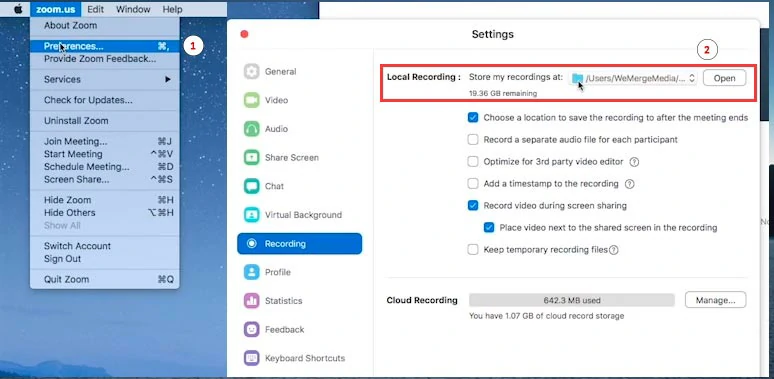
Access the Zoom recordings on Mac.
A typical Zoom recording file contains an MP4 file (video and audio) and an M4A file (audio only) and an M3U file (audio only).
Where to Find Zoom Recordings on Windows:
Open your Zoom app on Windows > Settings > Recording > Local Recording > click the Open button to access Zoom recordings.
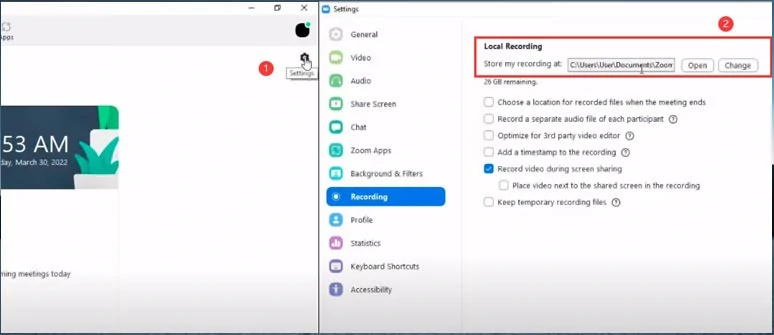
Find the Zoom recordings on Windows.
Alternatively, if you don’t like Zoom’s default location to save your Zoom recordings, you can click the “Change” button to designate the saving place for your Zoom recordings.
Where to Find Zoom Recordings on Cloud:
If you are a subscribed Zoom user, you may also find your Zoom recordings on Cloud on Zoom’s website as well.
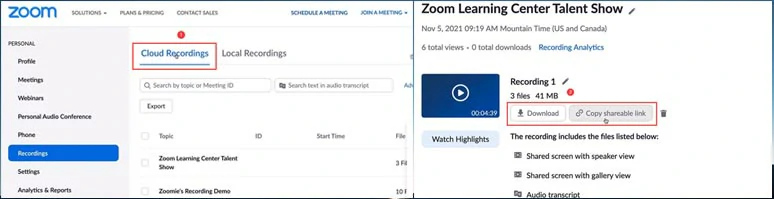
Where to access Zoom recordings on Cloud for paid users.
Log into your Zoom web portal > navigate to the Recordings tab > click Cloud Recordings to view your Zoom recordings on Cloud > click any Zoom recording to download it locally or copy the shareable link for sharing.
How to Edit a Zoom Recording Online
You might think you need a robust video editor to edit a Zoom recording. However, the best video editing software for Zoom recordings is the one that is easy to use with rich video assets and can work across platforms.
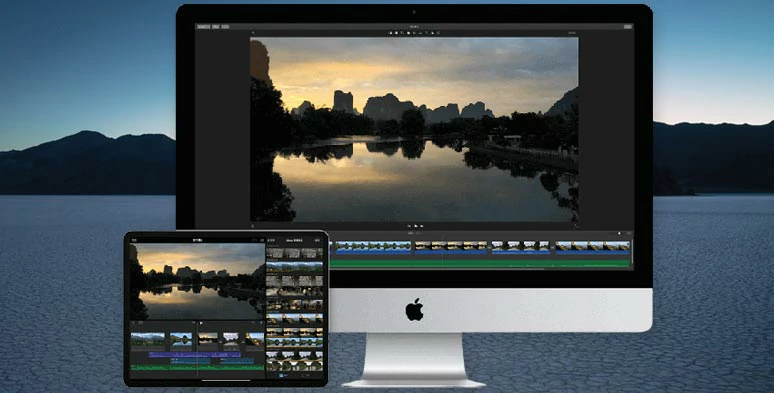
So, if you are always on the go for business or webinars, the top option we recommend is using FlexClip, an AI-powered and feature-packed online video editor to edit Zoom recordings with ease.
Edit Zoom recordings with FlexClip online video editor

How Can FlexClip Make Your Zoom Recording Edits Easier:


How to Edit a Zoom Recording Online with FlexClip:
You can easily upload Zoom video recordings and other video assets to FlexClip from your PC, phone, Google Drive, One Drive, Dropbox, or Google Photos,etc. Then you can click the plus sign to add Zoom recordings to the intuitive and magnetic timeline for edits.
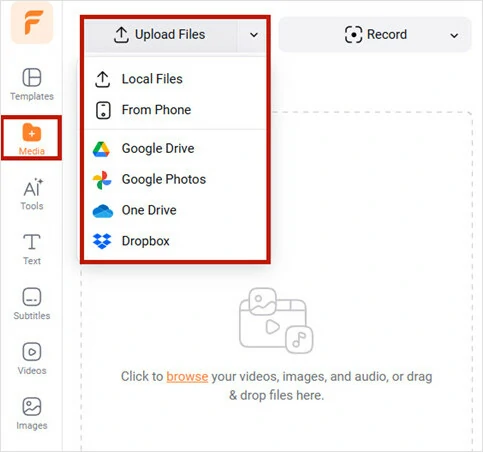
Easily upload your Zoom recordings and other video assets to FlexClip for edits.
Click the Split tool to cut the middle of a Zoom recording into two and drag the slider inward to trim a Zoom recording. So, you can easily delete unwanted recordings like “let’s wait for another guest to join our meeting”, or any pause and stutter in the Zoom recordings to enhance the quality of your video. You can drag and hold to adjust the order of trimmed Zoom recordings on the intuitive timeline.
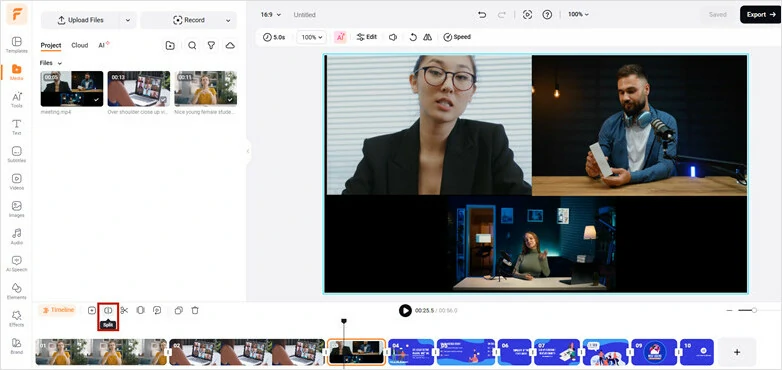
Drag slider to trim long Zoom video recordings or split footage.
With FlexClip’s auto subtitle generator, you can automatically add open captions to your Zoom recordings with the click of a button, which is a great timesaver and help engage viewers on different social media.
All you need to do is click the Subtitle tab > Auto AI Subtitle > select your source language and subtitle styles. Then FlexClip can generate subtitles for you in a few minutes.
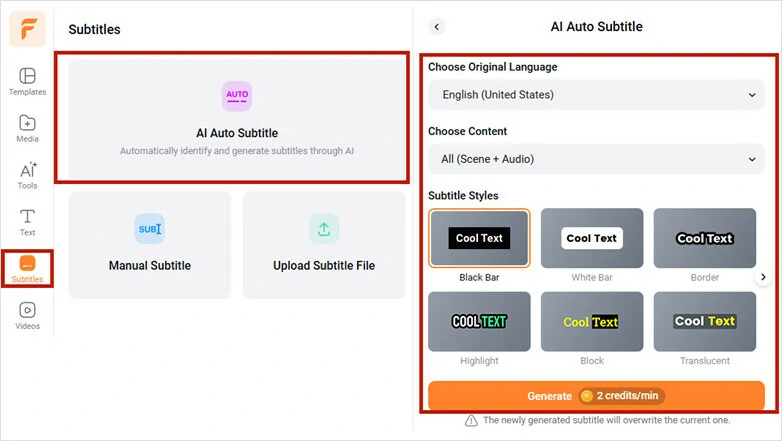
Automatically generate subtitles for Zoom recording.
After that, you can skim through the subtitles to check for any misspellings or split and merge subtitles, or change text fonts, colors, styles, and color and opacity of background fill, etc. to your liking.
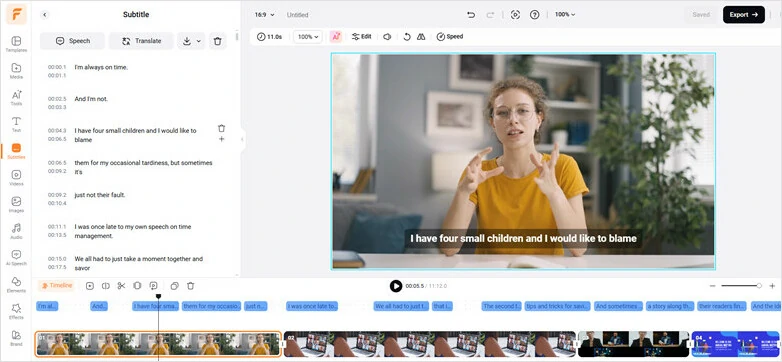
Proofread the auto-generated subtitles for Zoom recording and customize it style.
Besides, in the Text tab, you can select from hundreds of text styles like the lower thirds, social media, quotes, speech bubbles, callout titles, etc., and replace them with your texts. All the fonts, colors and styles, and motions are fully customizable.
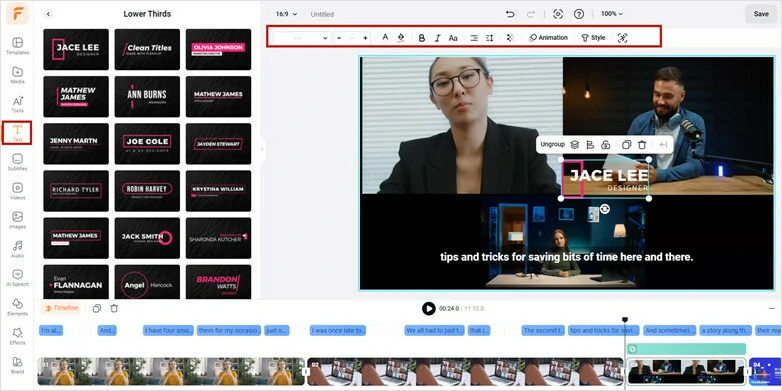
Use the lower thrids to add captions or titles to speakers in a Zoom meeting.
Click the in-between area of the two Zoom recordings and add a trending overlay transition effect like liquid or circle to smooth out different clips and make a sequence more exciting. You can customize the duration, direction, and color of the overlay transition effects.
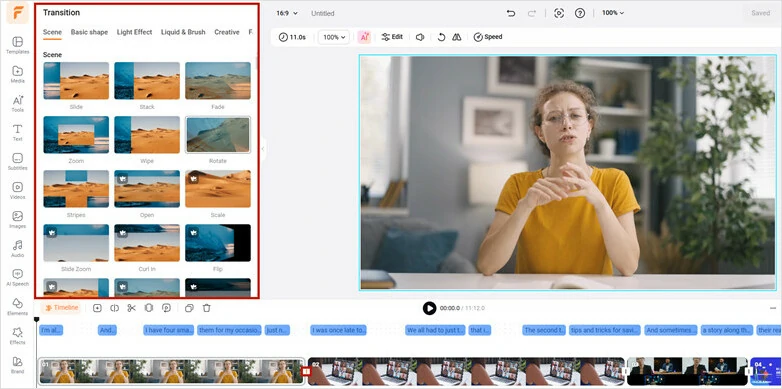
Add an overlay video transition to smooth out Zoom recordings on the sequence.
You may also add an intro of VIP speakers in your Zoom conference. Click Add AS Layer to add your image to the video background > click Remove Background. Then, the FlexClip will automatically remove the background from the image. You can use Erase or Restore brush tools to refine the edges.
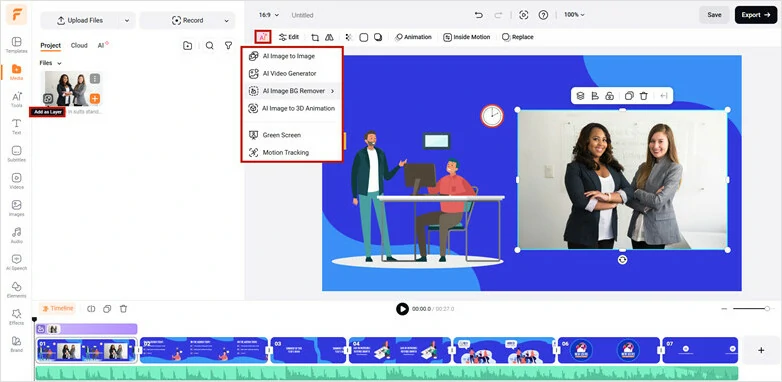
Overlay the photo on the video background.
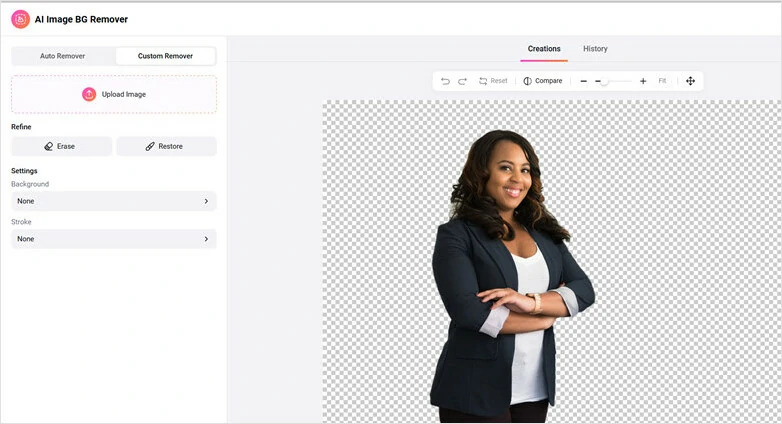
Automatically remove the background from the image.
Then, you can put the speaker layer behind the text layer, adjust its size, duration, and position and animate it with the Motion tool.
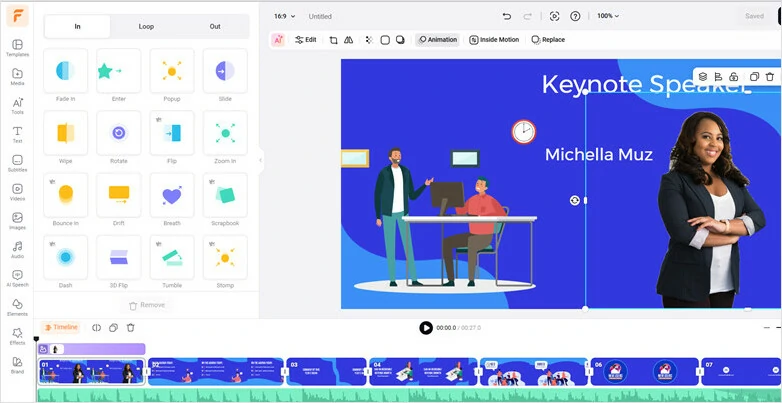
Properly position the image of the keynote speaker and animate it.
Click the Audio tab and search and add multiple royalty-free music or sound effects to add styles and rhythm to your Zoom recordings. When sound effects like Pop up SFX are paired with dynamic elements or animated arrows as an annotation, they can help you draw viewers’ attention to the key points in the speech.
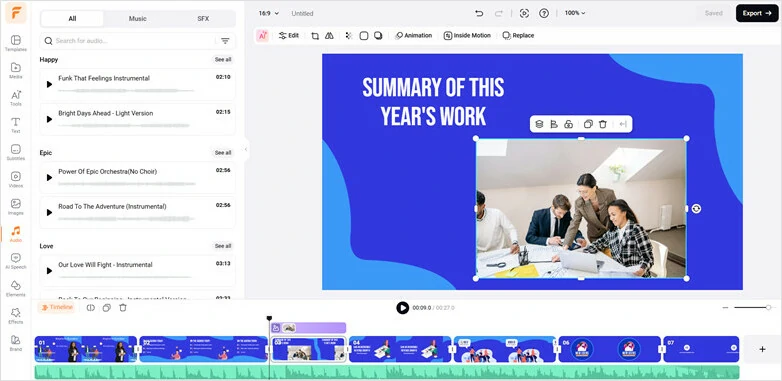
Add royalty-free music and sound effects to create the vibes and rhythm for Zoom recordings.
To protect speakers’ privacy or hide confidential information in a Zoom video recording, you can add a mosaic to it. Go to Video > type Mosaic in the search bar > click picture-in-picture to add a mosaic > click Elements tab > drag a Mask to the mosaic > adjust mosaic’s size, opacity, and position to block sensitive information.
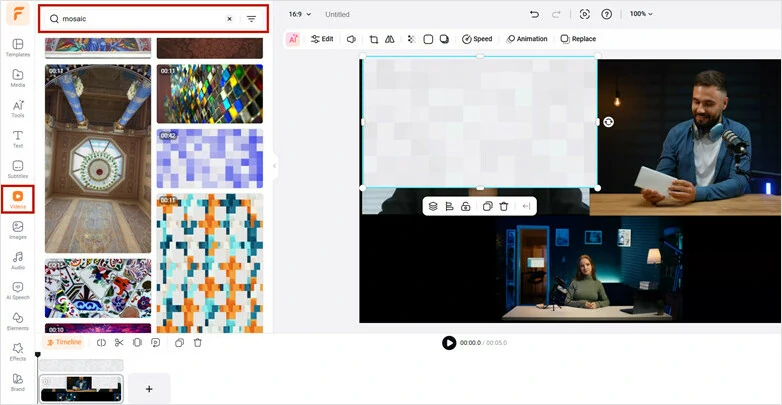
Add a mosaic over a Zoom video recording.
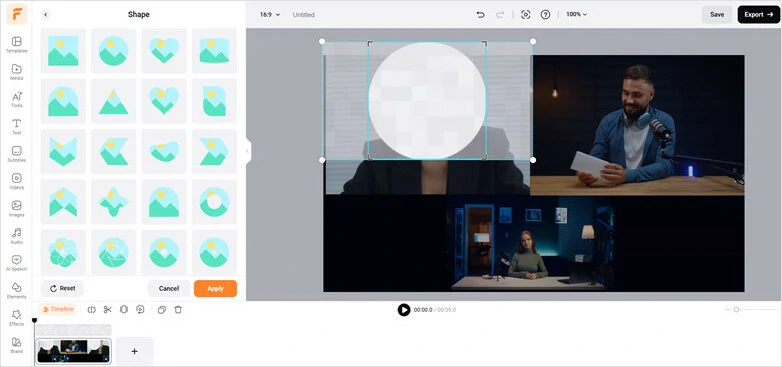
Adjust the mosaic’s size and position to hide the speaker’s identity.
Add a logo or watermark for copyright protection or apply filters, change video speed and add webinar’s intro or outro video templates, GIPHY stickers, and aesthetic illustrations to add styles and vibes to your Zoom recordings.
Personalize Zoom recording edits with video templates and motion graphics.
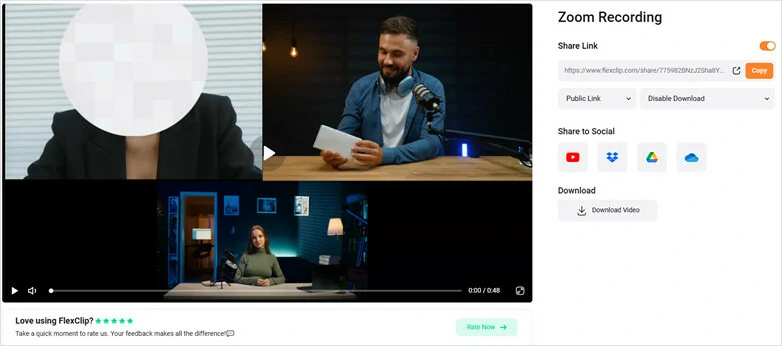
Done with the editing. Click the “Export” button to directly download it as a 1080P MP4 to your hard drive or directly share it to YouTube, Google Drive, Dropbox, One Drive, even to TikTok. A clickable link and an embed code are also available for your blog, newsletter, or other repurposing.
Share polished Zoom Recordings in multiple ways.
Pro Tips: Want to turn hours of Zoom recordings into snackable content for TikTok, YouTube Shorts, and Instagram Reels? With FlexClip’s AI long-to-short converter, you can effortlessly transform lengthy Zoom recordings into engaging short-form videos. The AI automatically analyzes your recording to identify the most compelling moments based on hooks, storytelling flow, and topic relevance. In just minutes, you’ll get multiple ready-to-share clips complete with auto-generated captions, optimized framing, and virality scores to help predict engagement potential.
Edit Zoom Recordings with FlexClip's AI Long-to-short converter.
How to Edit a Zoom Recording on Mac
Another workaround to edit a Zoom recording on Mac for free is using the built-in video editor—iMovie. It supports up to 4K video edits and can handle all the basic video editing needs to trim, split, crop, and merge Zoom recordings, add titles and audio, simple transitions, etc. you can export the edited Zoom recordings without watermarks.
Use iMovie to edit Zoom recording on Mac
How to Edit a Zoom Recording on Mac Using iMovie:
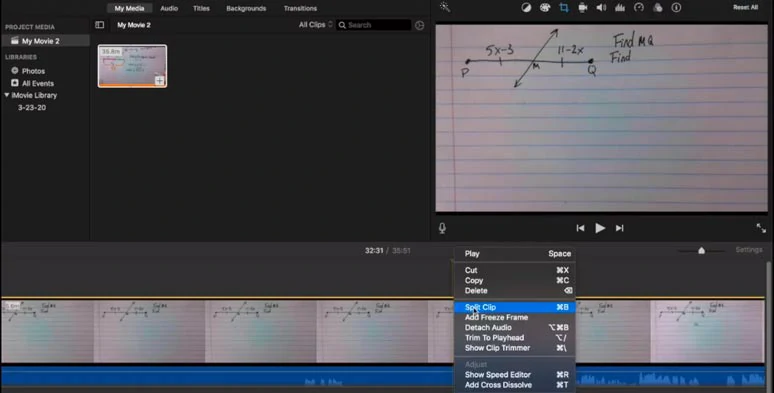
Split a Zoom recording into two and trim it in iMovie on Mac.
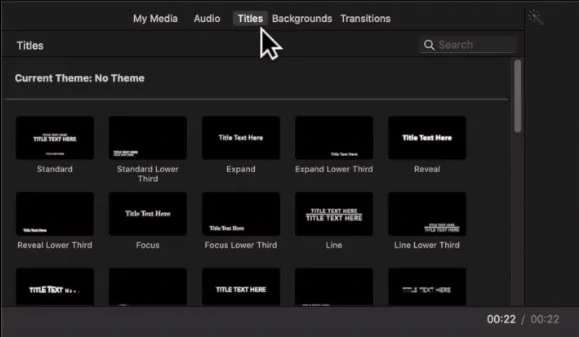
Add titles to Zoom recording videos in iMovie.

Drag the audio level to increase or decrease the audio in Zoom recording in iMovie.
The only drawback with iMovie is that it can’t export a vertical video. Also, read why does iMovie crop my videos and solutions.
How to Edit a Zoom Recording on Windows
VSDC Free Video Editor is your best bet if you want to edit your Zoom recordings on Windows. It is a lightweight video editing software that works well even on computers with little memory. It comes with rich video editing features, meeting all your basic video editing needs. Its interface may look a bit complicated, but once you try it, you'll find it's an excellent video editing tool.
How to Use VSDC Free Video Editor
how to Edit a Zoom Recording on Windows with VSDC for Free:

Use VSDC to cut, split, crop, or rotate a Zoom recording
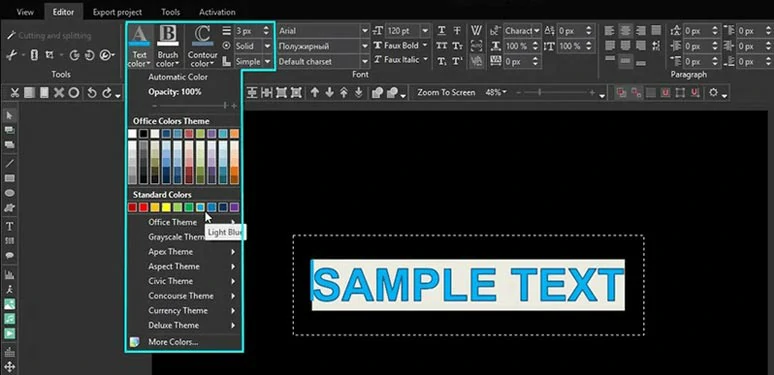
Add text, subtitles and shapes to Zoom recording by VSDC

Export the edited Zoom recording by VSDC
Now, It's Your Move
That’s all for how to edit a Zoom recording for free online, on Mac and Windows. Start to make your Zoom recordings more engaged now. Find this post helpful? We'd appreciate it if you could share it with your friends.


FlexClip AI Video Maker
Reach professional-quality videos faster with easy editing tools, templates, and smart AI.
Start Now for Free
Hot & Trending
-

Best Ways to Find Music in YouTube Videos
-

Instagram Story Video Quality Bad After Upload? Fix It!
-

How to Repost Video on TikTok & How to Remove TikTok Repost
-

Improve Video Quality Online: 3 AI Video Quality Enhancers You Can't Miss
-

4K Convert to HD 1080p without Watermark: Best 4k Video Converters
-

Top 13 Birthday Video Makers with Music and Effects Free
-

How to Search Filters on TikTok & Use a Filter You See - TikTok Filter Guide
-

Large Collection of Creative and Funny Birthday Video Ideas for Ones You Care