Creating a fast forward effect in videos offers you a dynamic way to add rhythm and style to the boring footage.
You can use the fast forward effect to skip over repetitive or less important steps in a tutorial video, create a time-lapse video to highlight the passage of time for storytelling, or inject the vibes and emotions into your sports and hype videos, etc.
In this tutorial, we will walk you through how to easily create a smooth fast forward effect in your video using speed curves, both online and in Premiere Pro. So, you can take your video to a whole new level.


Here’s What You Will Learn:
Also, read how to create compelling app promo videos online.
Why Create a Fast Forward Effect Video Using Speed Curves
Well, compared with the traditional linearly way of speeding up a video where you can only fast forward or slow down a video as a whole, using speed curves to create fast forward effect offers you three unparalleled benefits:
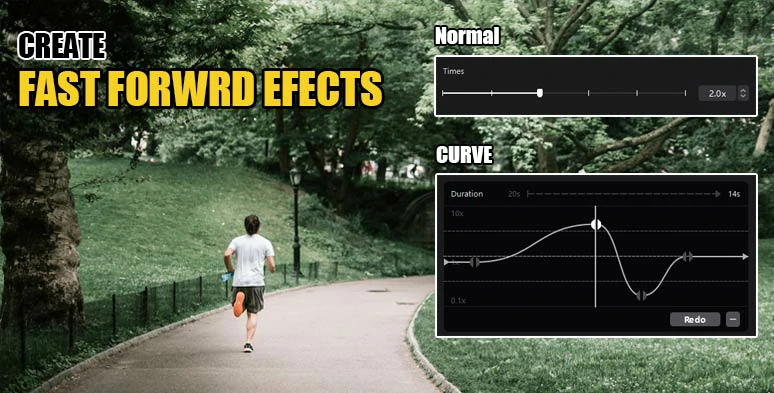
Create fast forward effect: Normal Speed Change vs. Speed Curve.
Having understood the benefits of adding a fast forward effect to videos using speed curves, now, please walk with me to create a fast forward effect in your videos using a versatile online AI video maker and Premiere Pro.
How to Create Fast Forward Effect by FlexClip Online
If you are new to video editing or always on the go, using a versatile and online video editor with fast forward effect brings you the flexibility to adjust video speed with ease. In this case, the user-friendly and feature-rich FlexClip AI video maker can be your go-to choice to use speed curves to create fast forward effects.
Effortlessly create fast forward effects in videos by FlexClip online.

With FlexClip, you can:
Seamlessly create smooth a fast forward effect in videos by FlexClip online.
Extract audio from the video to keep important audio before you fast-forward a video.

Use vast royalty-free music and transition sound effects for your fast forward effect video.


Effortlessly convert text to realistic AI voices for your video projects.
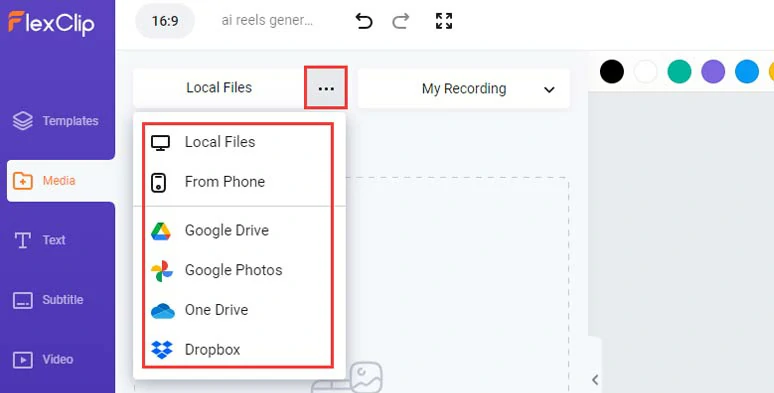
Upload your video assets to FlexClip.
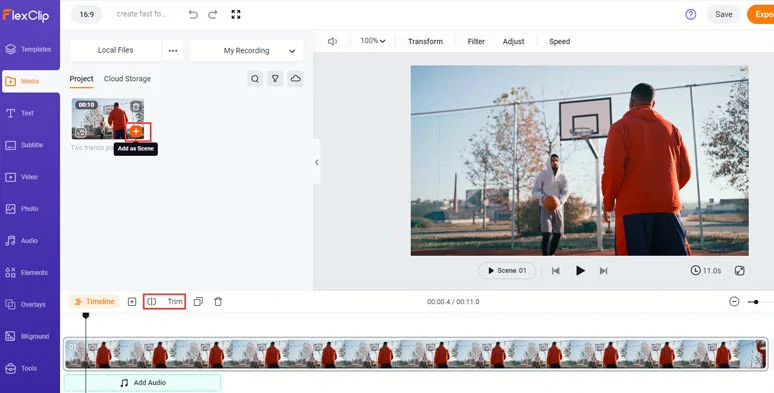
Add your clips to the intuitive timeline.
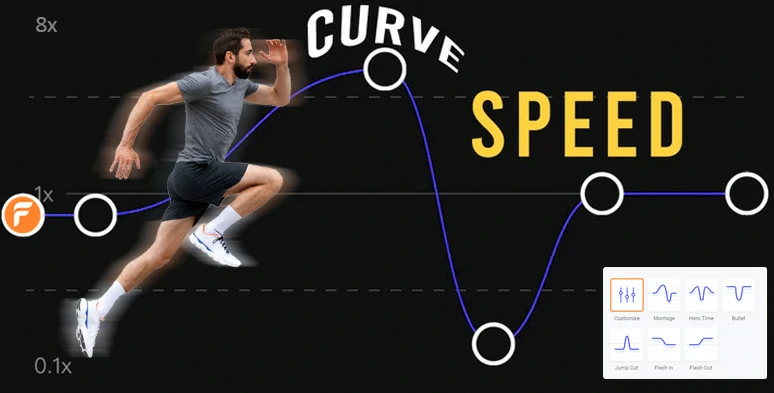
With the video selected, click the Speed button > Curve Speed > select Customize > move the playhead to where you want to speed up the video > click “+ Add Point” to add a speed point > drag the point upward to speed up the parts of the video. If you want to slow down parts of a video just drag the speed point downward.

Add a new speed point and use the speed curve to create a fast forward effect in the video.
To ensure a smooth flow from regular speed to fast forward speed, just drag two speed points further away to ease out the transition and vice versa.
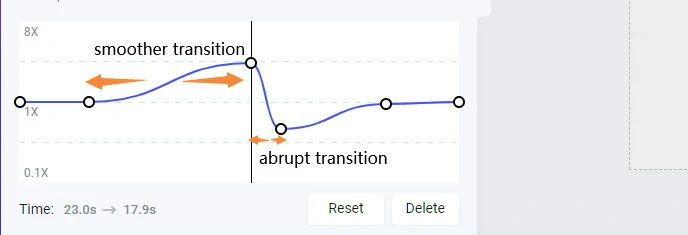
Drag two speed points further away to ensure a smooth speed transition.
The Time indicator will show you the original video duration and the new video duration as a result of the speed change. You can create multiple points to speed up or slow down different sections of a video.
To delete the speed curve, simply select a speed point > click the delete button or hit the Reset button to undo all the speed changes.
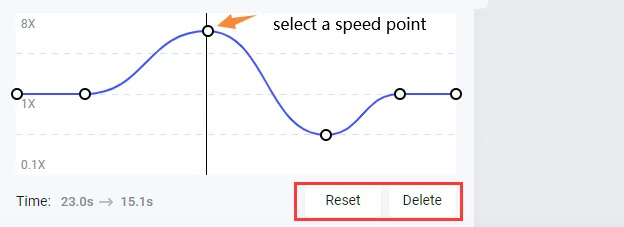
Easily reset all speed changes or delete a specific speed point.
One kind reminder is that since the change of speed will result in a distorted or high pitch of the original audio, FlexClip will automatically mute the video by default.
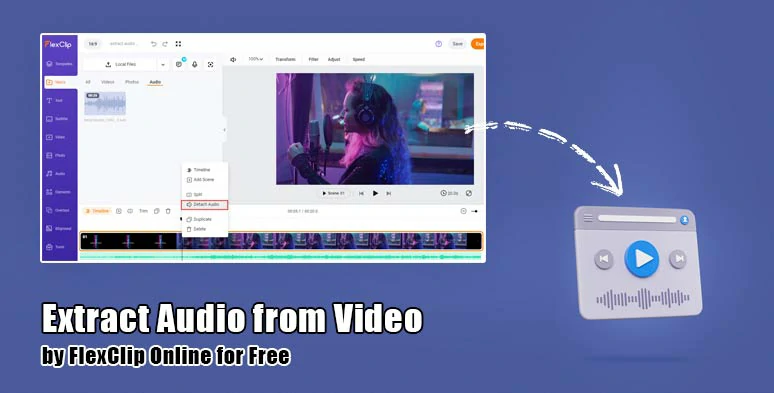
Alternatively, if you want to keep the original audio before you change the video speed, you can select the video > right-click on it > select “ detach audio” to extract audio from the original audio and keep parts of the audio for normal speed video.
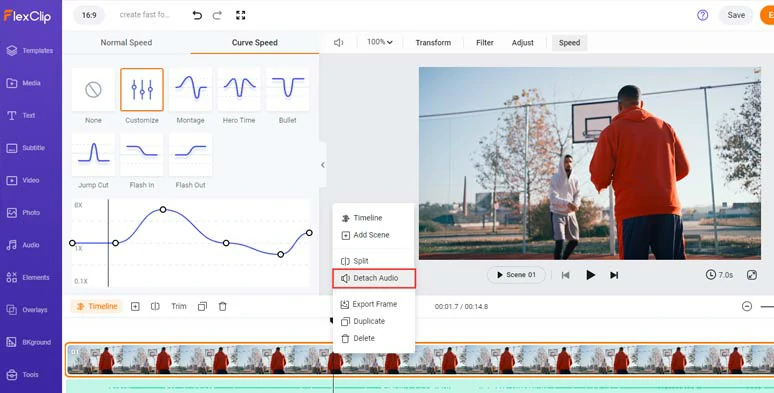
Extract the audio from the original video before you speed up the video.
Click the Audio tab > Music > search for “pop”, “electronic” or any upbeat music for your fast forward video > click the Sound Effects tab > search for “swoosh”, or “whoosh” sound effects and add it to where the speed goes up to enhance the auditory experience for the fast forward effect. Don’t forget to adjust the background music and transition the sound effect’s volume to achieve the best result.
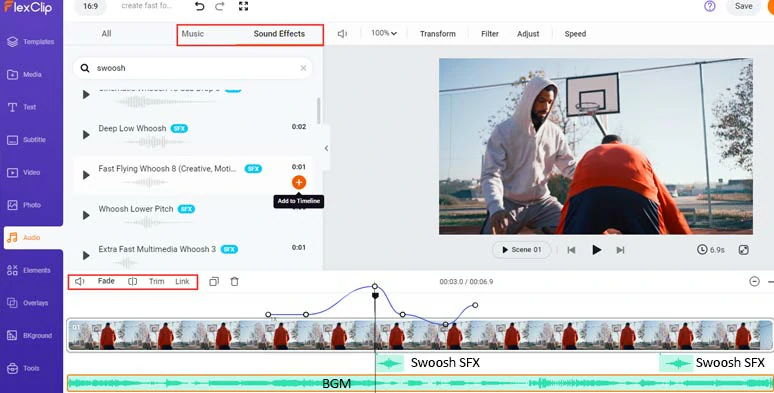
Add swoosh transition sound effects and upbeat music to create the vibe for fast forward effect video.
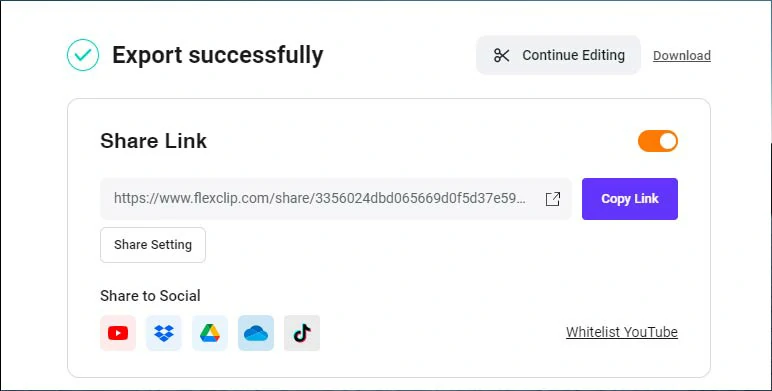
Done with the editing. You can click the Export button to save the 1080P MP4 video to your computer or directly share it to YouTube, Google Drive, One Drive, Dropbox, or even TikTok; a clickable link is also available for your blog posts, newsletters or other repurposings.
Easily share and repurpose the video content.
How to Add Fast Forward Effects in Premiere Pro
As a powerhouse of video editing, Premiere Pro also offers you an easy way to add fast forward effect to video using speed curves, which is called Time Remapping in Premiere Pro. With Time Remapping in Premiere Pro, you can easily create speed curves or speed ramping to add a smooth fast forward effect or slow motion to the video.
How to create a fast forward effect in Premiere Pro.
Select the video > click and drag the line of this video track upward to expand this video track > right-click the FX icon to the left corner > select Time Remapping > Speed > move your playhead to where you want to fast forward the video > hold Ctrl and click on the white line to add a bracket for speed curves > do it again to add another keyframe > click and drag the white line up to speed up the video and create a speed curve.
To adjust the transition from regular speed to fast-forward speed, click one part of the brackets icon > drag it away from the other. The further away the two brackets, the smoother the transition and vice versa. You can even click one bracket and change how the speed curve eases in/out for the transition as well.
Since the Time Remapping will distort the original video’s audio, to fast forward the video without changing the pitch in Premiere Pro, please do as follows:
How to fast forward the videos in Premiere Pro without changing the pitch.
Go to the Effects tab > search for “pitch shifter” in the search bar > drag and drop this pitch shifter effect to the audio track > with the audio track selected, head to Effect Controls > Pitch Shifter> select Individual Parameters > Transpose Ratio > drag the slider to the left to change the high pitch to the normal pitch. Done.
Now, It's Your Move
So, that’s how you can create a fast forward effect in videos using speed curves both online and in Premiere Pro. Please feel free to try out these two methods and share this post on your Facebook or Twitter and tell us which one works best for you. Cheers!


FlexClip AI Video Maker
Reach professional-quality videos faster with easy editing tools, templates, and smart AI.
Start Now for Free
Hot & Trending
-

Best Ways to Find Music in YouTube Videos
-

Instagram Story Video Quality Bad After Upload? Fix It!
-

How to Repost Video on TikTok & How to Remove TikTok Repost
-

Improve Video Quality Online: 3 AI Video Quality Enhancers You Can't Miss
-

4K Convert to HD 1080p without Watermark: Best 4k Video Converters
-

Top 13 Birthday Video Makers with Music and Effects Free
-

How to Search Filters on TikTok & Use a Filter You See - TikTok Filter Guide
-

Large Collection of Creative and Funny Birthday Video Ideas for Ones You Care