So, you’ve got the long voice recordings of your podcast, interview, or online courses, and wondered is there an easier way to convert voice recording to text in minutes without sitting there manually typing up everything for hours?
Luckily, that’s why we are here to put your misery to an end.
In this tutorial, we will walk you through 4 great voice recording to text converters online that use powerful AI transcription algorithms to automatically convert voice recording to text with high accuracy. So, you can easily get the transcript of your audio files for different uses.

Here is what you will learn:
Also, read how to automatically transcribe video to text.
1. FlexClip
If you need to convert voice recordings to text and use the transcript as subtitles for video projects like podcast videos, YouTube, educational videos, etc., then look no further than FlexClip online video maker.
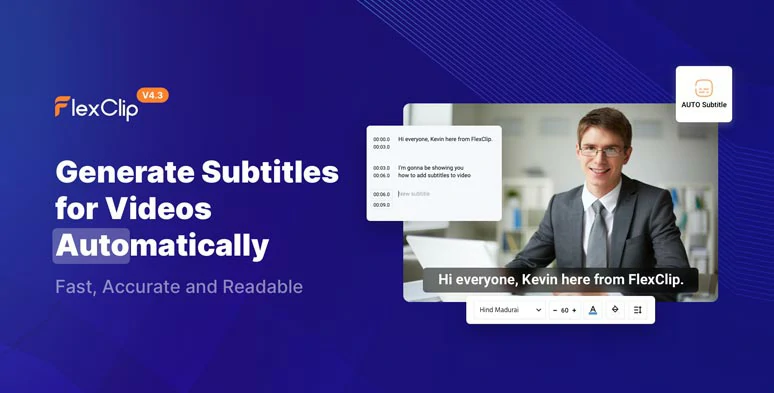
Automatically convert voice recording to text by FlexClip online.

With FlexClip’s Auto AI subtitle generator, you can automatically convert both voice recordings and video to text with 99% accuracy in one click. More than 140 languages with different accents are available for auto transcription.
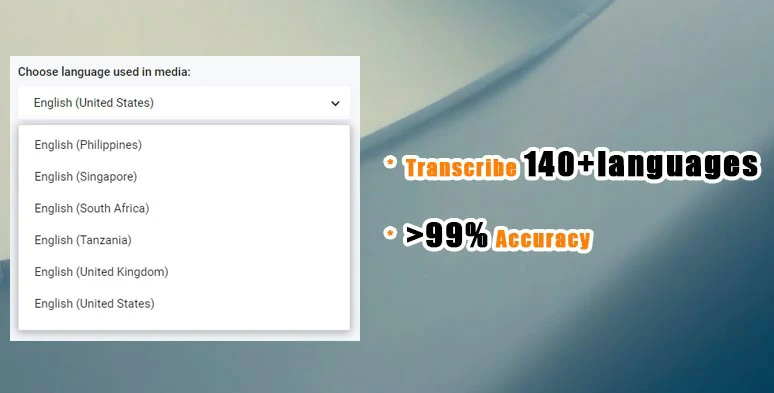
Transcribe 140+ languages with more than 99% accuracy.
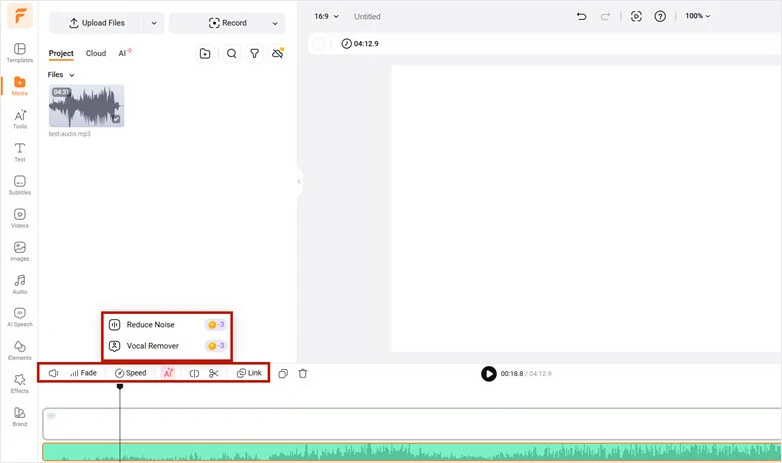
Moreover, FlexClip can convert spoken words in your voice recording into editable text and edit the soundtrack like editing a document. For example, you can remove filler words pr long pause to make the speech smooth. Just delete the transcript and the corresponding clip in the video will disappear.
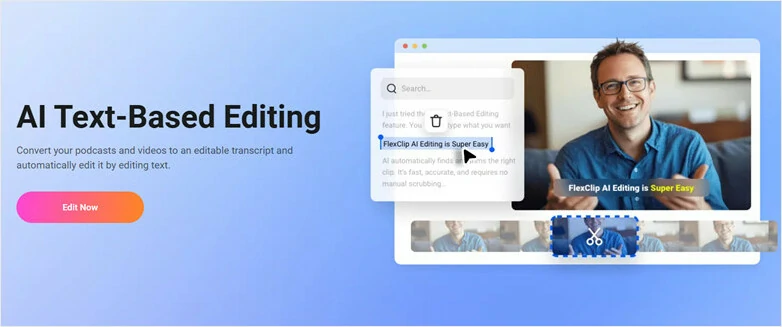
Text-based Editing Feature to Transcribe Voice Recording.
Later, you can easily proofread and stylize the auto-generated texts or subtitles, such as text font, color, background fill, alignment, opacity, etc. or add images, footage, text animations, royalty-free music, sound effects, and video effects to create compelling video content.
So, now let me walk you through the details:
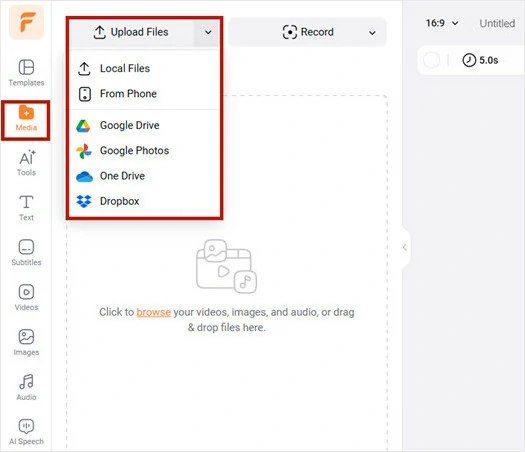
Upload your video assets to FlexClip.
Add the voice recordings to the timeline and you may trim or split the audio file.
Click the Subtitle tab > Auto AI Subtitle > select the source language in the audio file and Audio > select the style of the subtitles. But, no worries. You can change it later. > hit the Generate Subtitles button. Then, FlexClip shall automatically transcribe the audio to text, and how long it will take depends on the audio length and your bandwidth.

Use Auto AI Subtitle generator to automatically convert voice recording to text.
As you wait for the completion of the transcript, please feel free to browse through the stylish and fully-customizable video templates available in FlexClip. Just drag and drop your video assets to replace premade video elements, and you can create an engaging video in minutes.


Now, you can skim through the auto-generated texts to check for any misspellings. If one subtitle seems too long, you can press Enter to split it into two without changing the timestamps or merge two short subtitles.
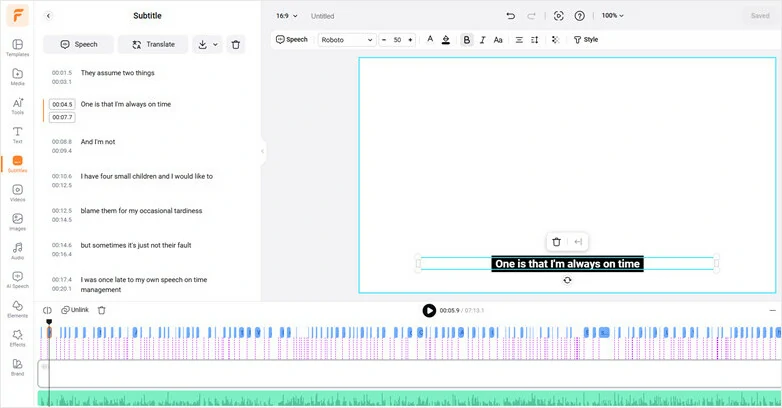
Proofread the auto-generated text and split or merge subtitles.
You may also click Styles and customize the text fonts, size, color, text background fill, opacity, alignment, etc. Pretty convenient!
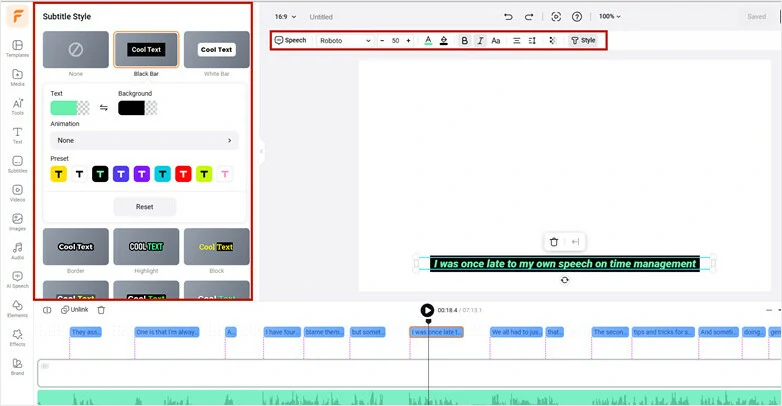
Customize the styles of the subtitles.
You can add images, motion graphics, or footage for the video background, or go to the Elements tab and add animated audio waveforms to add styles to your video.
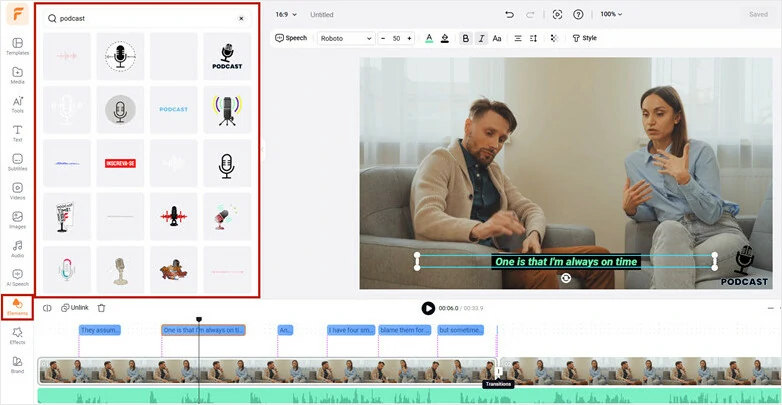
Add images, motion graphics, and audio waveform to the video.
Click the Audio tab where you can select from 74,000+ music tracks and sound effects to add emotions and rhythm to your video. You can layer multiple audio tracks to create depth as well. Fade in/out effect, volume controls, and trimmer and split tools are also available.
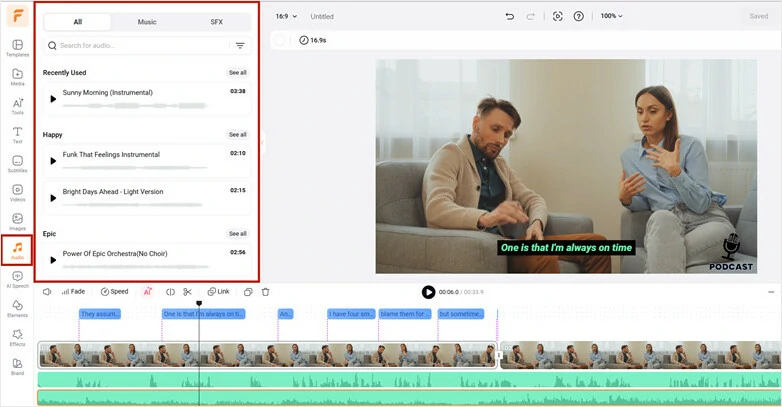
Add royalty-free music and sound effects to create the vibes.
Done with the editing, you can download the video to your PC or directly share it to YouTube, Google Drive, Dropbox, One Drive, or TikTok; a clickable link and an embed code are also available for your blogs, newsletter, or other repurposing.
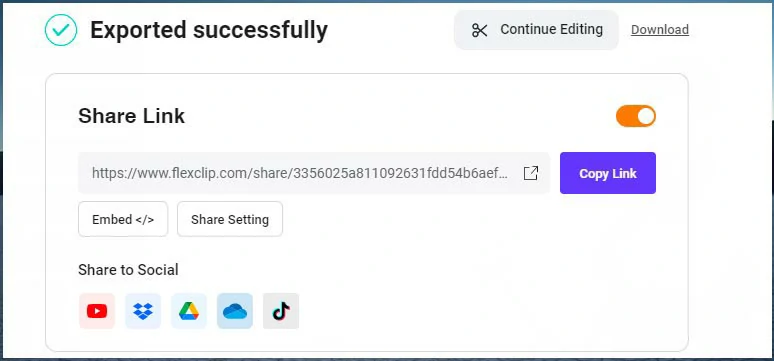
Different ways to share or repurpose your video.
2. TEMI
Another workaround to quickly convert voice recording to text is TEMI. This dedicated speech-to-text service provider uses AI to transcribe audio and video to text at $ 0.25 per minute.
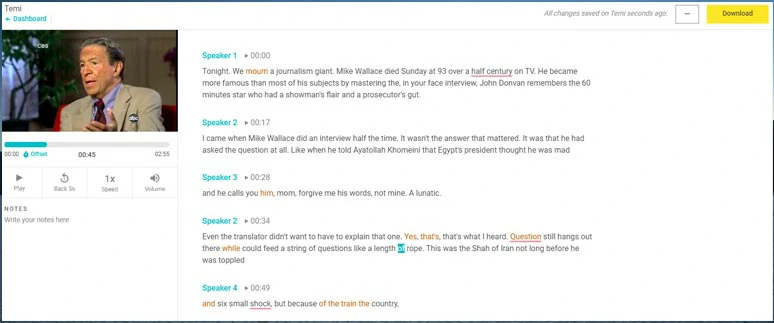
Convert voice recordings to text by TEMI.
Unlike most audio and video to text converters, TEMI allows you to batch convert voice recordings and videos to text. If you have lots of audio and video recordings to be transcribed to text, this feature can be quite helpful.
Besides, you may also paste the URL of published videos on YouTube or Vimeo to get the transcription.
3. Notta.ai
Built to make real-time transcription easier for online meetings and live video calls, Notta is another versatile voice recording to text converter that can automatically transcribe your audio recordings to text in minutes.
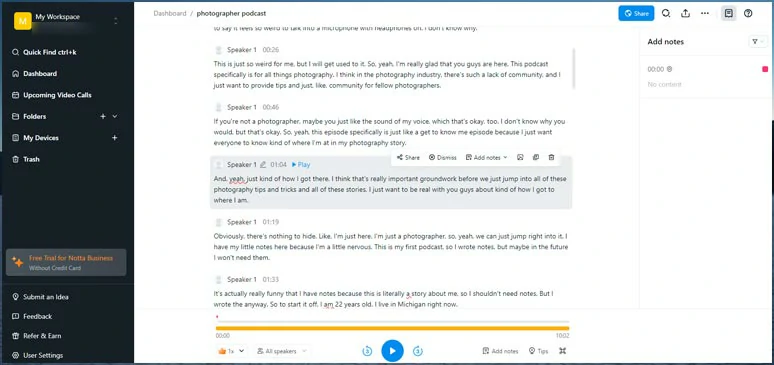
Convert voice recordings to text by Notta.
With Notta, you can also connect to Google Calendar for real-time meeting transcription. So, for business professionals who often need the transcript of long hours (up to 5hrs, 1GB file) of webinars or Zoom meetings, Notta can be a great choice to convert voice recordings to text. Also, read how to make a webinar teaser.
4. Sonix
Last but not least, Sonix integrates AI transcription with automated translation to take audio and video transcription to a whole new level. It allows you to convert mega audio and video files (max 4 GB) to text and supports 38 languages for auto transcription.
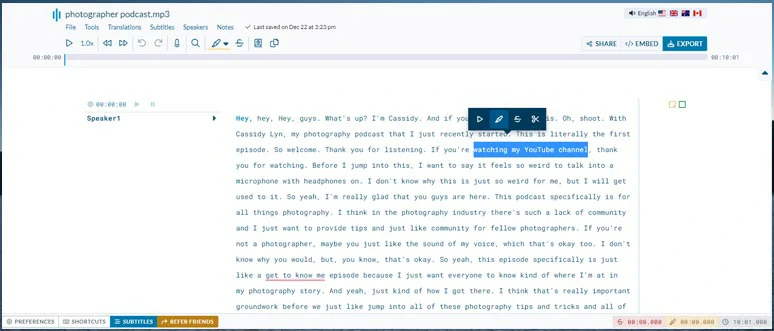
Convert voice recordings to text by Sonix.
Sonix also offers you many options to customize the editor’s interface, and editing preferences, such as smart capitalization, smart paragraph splitting, etc.
Sonix will identify multiple speakers in the voice recording. You can easily play the audio in different parts and skim through the transcript with words automatically highlighted in real-time. You may also add notes and images to certain words or translate all the text to another language or add commonly used words in your custom dictionary for future transcription, etc.
Now, It's Your Move
So, with these AI-powered voice recording to text converters, you no longer need to waste tons of time typing out every word to get the transcript. Feel free to experiment with all these 4 tools. For creating videos, FlexCLip has the edge over others. If you find this post helpful, do share it on your Facebook or Twitter and leave your thoughts to us. Much appreciated!


FlexClip AI Video Maker
Reach professional-quality videos faster with easy editing tools, templates, and smart AI.
Start Now for Free
Hot & Trending
-

Best Ways to Find Music in YouTube Videos
-

Instagram Story Video Quality Bad After Upload? Fix It!
-

How to Repost Video on TikTok & How to Remove TikTok Repost
-

Improve Video Quality Online: 3 AI Video Quality Enhancers You Can't Miss
-

4K Convert to HD 1080p without Watermark: Best 4k Video Converters
-

Top 13 Birthday Video Makers with Music and Effects Free
-

How to Search Filters on TikTok & Use a Filter You See - TikTok Filter Guide
-

Large Collection of Creative and Funny Birthday Video Ideas for Ones You Care