Applying film grain overlays to your footage is a proven way to add texture and a kind of vintage film look to your video project.
In this tutorial, we will walk you through how to easily apply a film grain overlay to your video both online and in Premiere Pro and offer you the 3 other great sites to get cinematic film grain overlays for your project.
Here is what you will learn:
What Is Film Grain Overlay
In a nutshell, film grain overlay refers to a video overlay with a grainy visual texture imitating the optical effect captured using vintage photographic films, such as random film grain, dust, scratches, etc.

35mm film grain overlay for videos.
Applying a film grain overlay to your footage can instantly adds grungy, vintage, and cinematic vibes to your videos. Also, read the 9 best hacks to make cinematic videos.
Besides, film grain overlays can be used creatively for different scenes, such as a series of flashbacks, B&W documentaries, or even evoking emotions of horror & suspense like what you’ve seen in the movie—Silent Hill.
Some of the popular film grain overlays involve:
How to Apply Film Grain Overlays to Videos Online
If you don’t have the film grain overlay packs available in Adobe Premiere Pro now, then a great workaround is to use FlexClip online video maker to create film grain effects with one click, with no downloads and experience needed.
Create film grain effects with film grain overlays in FlexClip.


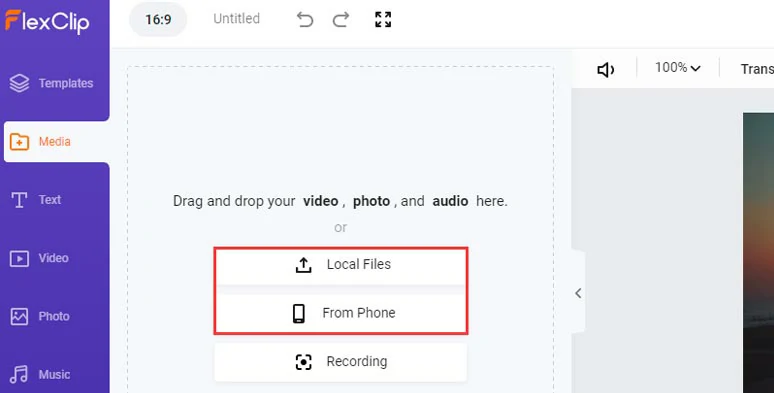
Upload your footage to FlexClip.
Click the “+” icon to add your footage to the timeline. Then you may drag the slider inward to trim its duration or split the clip or drag and hold to adjust their sequence on the timeline.
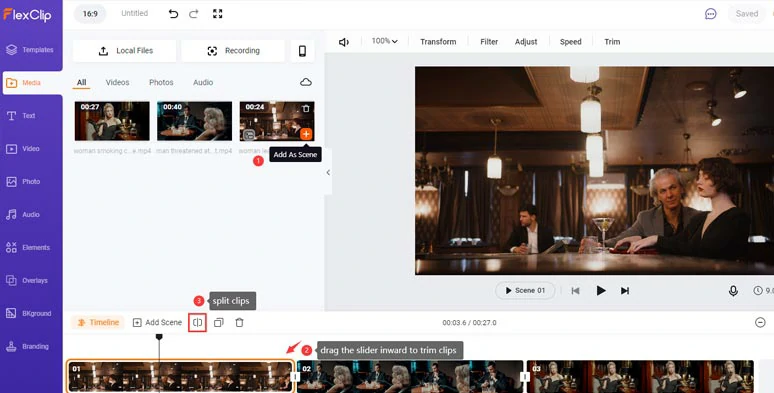
Add footage to the timeline and trim and split it.
To make the realistic film grain effect, it’s highly recommended to color-grade your original footage with a vintage or B&W filter to set the tone for the cinematic look of your video. With the clip selected, click the Filter > choose either Sepia or Vintage filter to add a vintage film look to your footage.
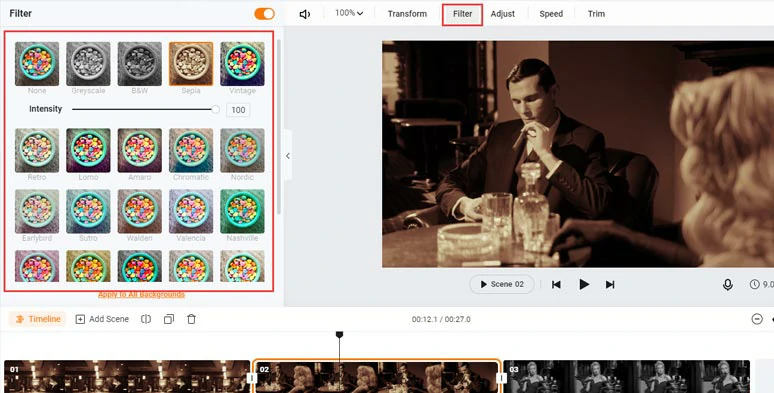
Color grade the footage to give it a vintage and cinematic look.
With the footage selected, click Overlay > scroll down to select from 12+ transparent film grain overlays with dust, scratches, film burns, and sprocket holes to your liking > you can adjust the Blending Mode and Opacity of the film grain overlay or flip it to get the best look.
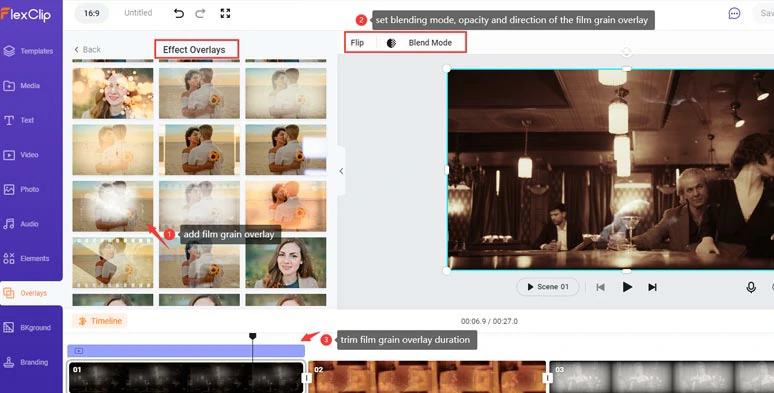
Add transparent film grain overlay to footage and set its blending mode, opacity, and direction.
To add a cinematic touch and emotions to your footage, you can add royalty-free film project running sound effects and music to enhance the cinematic vibes. Just click the Audio tab > Sound Effects > type in “Film” and select either 35mm film project SFX or 16mm film project loop SFX to make your footage come alive. You can just the volume, and fade in/out effect of the film sound effects as well.
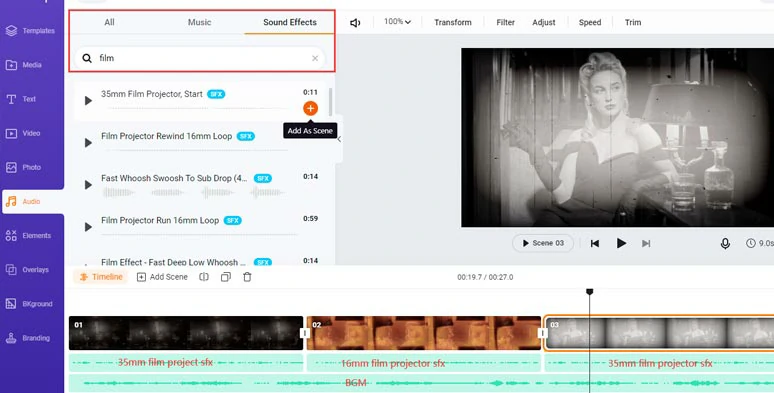
Add royalty-free 35mm and 16mm film project sound effects and BGM to the footage.
Finally, to take the vintage film look of your video to the next level, you can add fade to black or fade-to-color transitions to emulate the old films in 60s and 90s. Just click the transition tool between two clips > select fade color or fade to black transition. You can adjust the duration of the transition as well. Also, read how to create liquid transitions online.
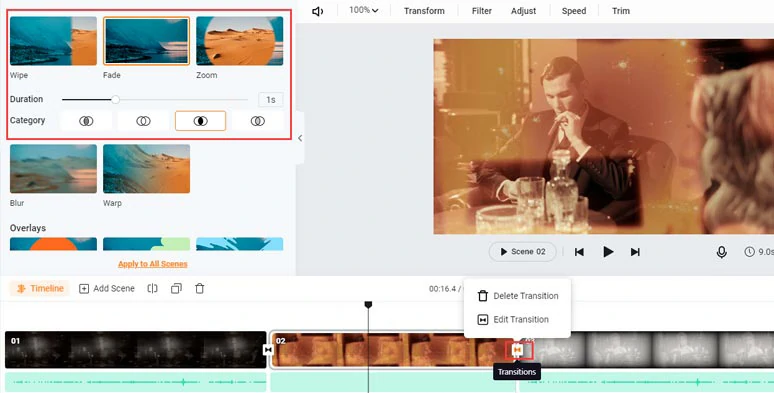
Add fade-to-black or fade-to-color transitions to create a realistic vintage film look.
So, let’s check the resulting video from the example above:
Use free film grain overlays in FlexClip to create videos with a vintage film look.
Done with the editing. You can directly download the 1080P video to your PC or directly share it to YouTube, Google Drive, or Dropbox; a clickable link and embed code are also available for private share, blogging, and other repurposing.
How to Use Film Grain Overlay in Premiere Pro
If you are used to using Premiere Pro for editing videos and have film grain overlay packs available, then using Premiere Pro to add film grain overlay to your footage or create film grain from scratch is also a viable option.
How to create film grain effects with film grain overlays in Premiere Pro.
With the film grain overlay selected, go to the Effect Controls > Opacity > set the Blend Mode to Screen. Then the black background of the film grain overlay will be removed.
3 Great Sites to Get Cinematic Film Grain Overlays
Apart from FlexCLip’s ready-made transparent film grain overlays, we’ve also rounded up 3 great sites for you to get free or paid quality film grain overlays to create a vintage and cinematic film grain effects.
1. YouTube
If you don’t have an extra budget to purchase film grain overlay packs, a great alternative is to search and download free film grain overlays from YouTube. So, all you need to do is type in “free film grain overlay” in YouTube’s search box, and chances are that you can find free film grain overlays from many generous YouTubers, including freebies from the big name Shutterstock.
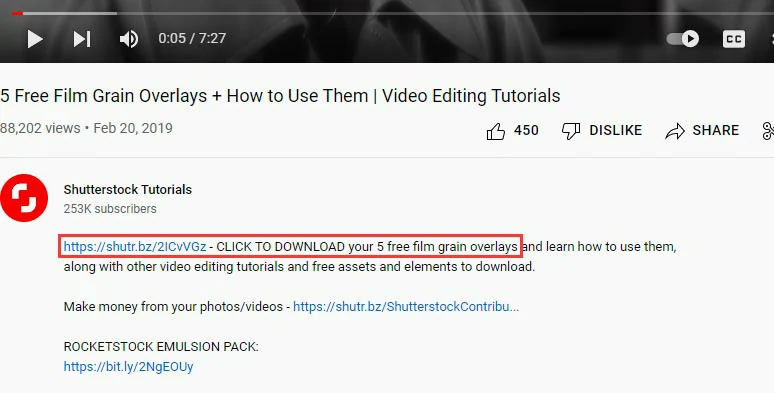
Download free film grain overlays available on YouTube.
One thing to mention is that these free film grain overlays are mainly made for personal uses. If you wanna use them for commercial purposes, you’d better get the license or permission from the owner.
Besides, another downside of using YouTube to download free film grain overlays is that sometimes the links to the free film grain overlays can be clickbait. And it takes time to check these links in the YouTube description.
2. Vecteezy
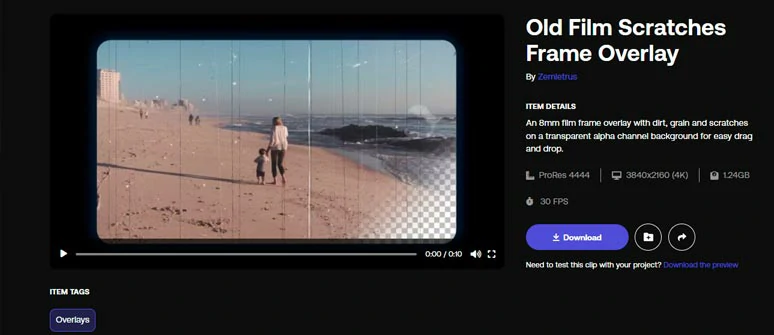
Built to offer free and affordable stock photos and videos for graphic designers and videographers, Vecteezy is another great option to download free film grain overlays. You can search and find tons of 8mm film grain overlays with dust, scratches, granules, film burns, rounded edges, etc. Many of the film grain overlays are even in 4K.
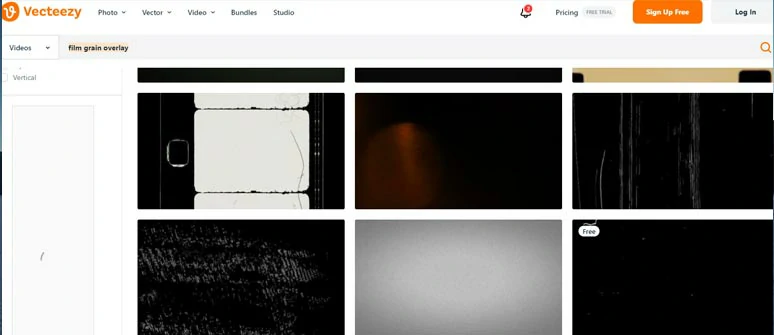
Download free film grain overlays from Vecteezy.
To use the downloaded free film grain overlay from Vecteezy, you need to provide clear attribution. If you don’t want to offer attribution, you can pay for the pro license.
3. Motion Array
Another workaround to get high-quality and diverse film grain overlay packs is from Motion Array, a professional stock site offering video templates, presets, audio, videos and photos, and plugins for videographers and filmmakers.
Download royalty-free film grain overlays from Motion Array.
With an affordable &29.9/mo subscription, you can get unlimited downloads for all the quality film grain overlays for PR and AE. The only downside is that currently no film project sound effects can be found in Motion Array’s audio library and all the downloaded creative assets can’t be used for new projects if your subscription ends.
Now, It's Your Move
Overall, applying film grain overlays to your footage is a great way to create a nostalgic and vintage film look for your video. So, the next big thing is which way works best for you to create the film grain effects. Share this post on your FaceBook and Twitter with friends and leave your comments to us. Cheers!


FlexClip AI Video Maker
Reach professional-quality videos faster with easy editing tools, templates, and smart AI.
Start Now for Free
Hot & Trending
-

7 Best Ways to Find Music in YouTube Videos
-

Instagram Story Video Quality Bad After Upload? Fix It!
-

How to Repost Video on TikTok & How to Remove TikTok Repost
-

Improve Video Quality Online: 3 AI Video Quality Enhancers You Can't Miss
-

4K Convert to HD 1080p without Watermark: Best 4k Video Converters
-

Top 13 Birthday Video Makers with Music and Effects Free
-

How to Search Filters on TikTok & Use a Filter You See - TikTok Filter Guide
-

Large Collection of Creative and Funny Birthday Video Ideas for Ones You Care