There are times when you want to do a screen recording with audio: making a gameplay tutorial, saving a webinar for the absent or just recording an education video for kids. However, extracting audio from these recordings can sometimes be a daunting task for those looking to use the audio separately or make further edits.
With various methods and tools available, understanding how to extract audio from screen recordings is essential. This article will delve into the process of extracting audio from screen recordings, guiding you through four free tools to obtain clear and high-quality audio, enabling you to repurpose your recordings effectively. Let’s dive in right now!
How to Extract Audio from Screen Recording Online
It’s extremely easy to extract audio from screen recordings using FlexClip - an online video editor. With a one-click operation, audio will be instantly separated from recordings and saved as WAV or MP3 without any quality comprise. Moreover, there are lots of audio editing features you may use in some cases: extracting a transcript from audio, replacing a new soundtrack to the original screen recording and applying sound effects or fading in the sound to create a fancy effect.
Whether you’re tech-savvy or a newbie who wants to extract audio from screen recording, FlexClip will be your best bet without any download or editing experience required!
The Ultimate Beginner's Guide of FlexClip


How to Extract Audio from Screen Recording Online Using FlexClip
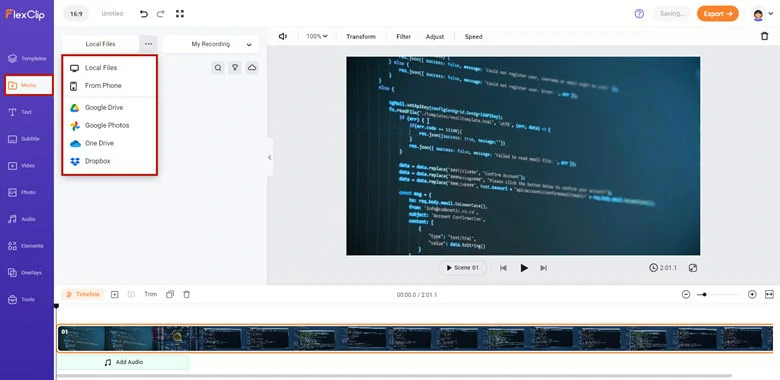
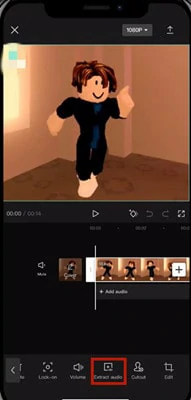
Upload Your Screen Recording to FlexClip
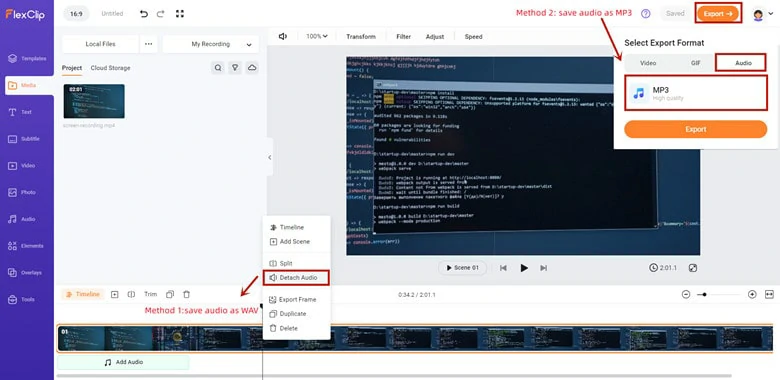
Extract Audio from Screen Recording Online
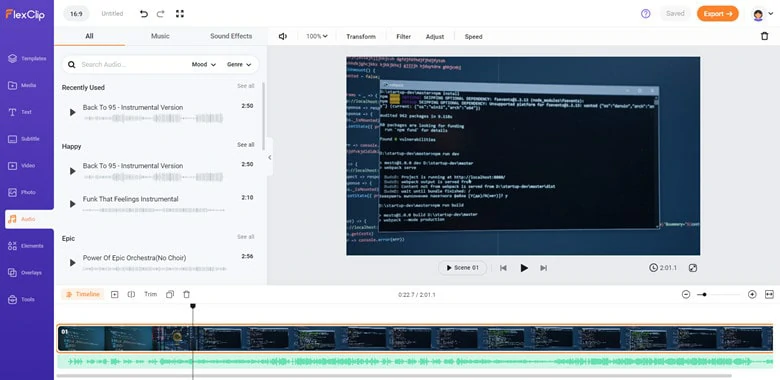
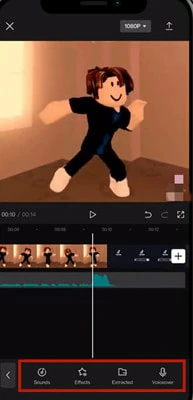
Edit the Extracted Audio or Add a New Voiceover
Besides audio editing, features like adding transitions, changing speed, applying overlays and more you can rely on to take videos to the next level.
How to Extract Audio from Screen Recording Desktop
VLC is not only a multiple-compatibility media player but also a straightforward tool for extracting audio from screen recordings on a desktop. It supports nearly all the video resources on the market and quickly turns it into an audio-file in a variety of formats. As a free and easy solution for audio extraction, VLC is an excellent option for desktop users.
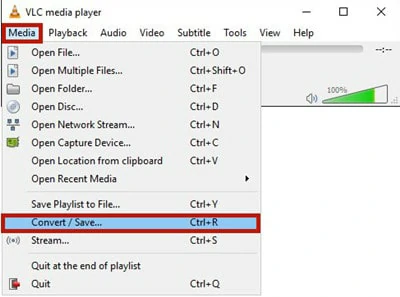
Launch VLC Media Player and Find Convert / Save Option
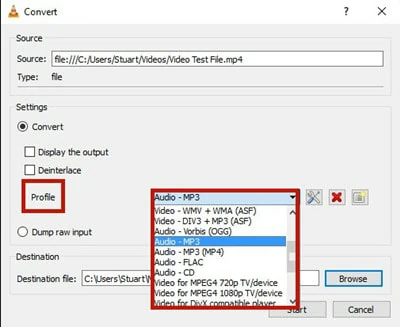
Choose the Audio Format Under the Profile Panel

Make Further Settings for the Audio Conversion
How to Extract Audio from Screen Recording iPhone
If you’re looking for a versatile yet powerful video editor to extract audio from screen recordings on iPhone, then CapCut must fall on the recommendation list from Google results. As an all-in-one video editor, it has a range of tools and features for editing stunning videos, including trimming, merging, adding filters, text and effects as well as extracting audio from videos.
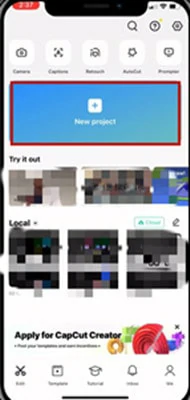
Load the Screen Recording You Want to Extract Audio from
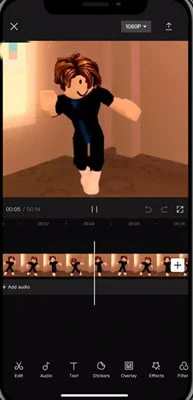
Drag and Drop the Screen Recording File to Timeline
Extract Audio from Screen Recording Using CapCut
Do More Editing to the Extracted Audio
How to Extract Audio from Screen Recording on Android
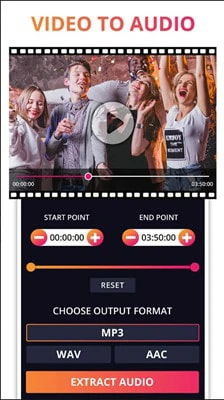
Audio Extractor is a well-known audio editing app for Android that provides a wealth of tweaks and options for adjusting your soundtrack. In addition to extracting audio from screen recording, advanced features like cutting, changing and converting audio or video files. As for the output format, it supports .mp3, .aac and .wav formats. Thanks to its easy and straightforward interface, it serves its purpose every time.
Extract Audio from Screen Recording on Android - Audio Extractor
How to Extract Audio from Screen Recording on Android Using Audio Extractor
The Bottom Line
Well, that’s all for extracting audio from screen recordings on desktop, iPhone, Android, and online. Directly pick the way you like and grab the soundtrack from your screen recording. Now it’s your turn!


FlexClip AI Video Maker
Reach professional-quality videos faster with easy editing tools, templates, and smart AI.
Start Now for Free
Hot & Trending
-

Best Ways to Find Music in YouTube Videos
-

Instagram Story Video Quality Bad After Upload? Fix It!
-

How to Repost Video on TikTok & How to Remove TikTok Repost
-

Improve Video Quality Online: 3 AI Video Quality Enhancers You Can't Miss
-

4K Convert to HD 1080p without Watermark: Best 4k Video Converters
-

Top 13 Birthday Video Makers with Music and Effects Free
-

How to Search Filters on TikTok & Use a Filter You See - TikTok Filter Guide
-

Large Collection of Creative and Funny Birthday Video Ideas for Ones You Care