Developed by Apple Inc., iMovie is one of the world's video editing tools software that gives users the opportunity to edit their videos like a pro. It has the capacity to give your video that Hollywood movie effect if you follow the right steps. Today, iMovie has over 5 million users, and its popularity keeps increasing over time, thanks to its clear user interface.
Can't Miss: How to Add a Voice over in iMovie on Mac and iPhone>
Benefits of Editing with iMovie
The benefits of using the iMovie tool cannot be over-emphasized. Because of the multiple functions of this tool, the benefits are just too many to be mentioned at once. But we have mentioned a few important ones below; they are listed thus:
1. User-friendly Interface
The developers of this app understand that not every user is a pro in video editing, so they are cutting them a slack. While some have no experience in video editing, others may have just the most basic experience. So, they have designed the app in a way where everyone can participate hence, the easy-to-use user interface.
2. Custom Elements
Remember we told you that iMovie comes with multiple functions; one of them is the custom elements. This feature lets you come out with that cinema-like video graphic and add custom cast names and credit rolls. Users can also choose from the array of fitting templates designed for different video genres.
3. Effects and Enhancements
iMovie video editing tool allows users to improve their videos using an in-built video enhancement and special effects features. It has ten filters and eight themes, accompanied by sounds and music effects to select from. Users can also add any song of their choice from their private music library. Another interesting benefit is the fact that it makes provisions where users can add voiceovers if they wish.
Away from the benefits of iMovie, there has been much debate about how easy it is to edit videos using the iMovie. As complex as this tool may look, it is easy to use; you don't need to be techy before navigating through it. Below is how to edit with iMovie with ease.
How to Edit with iMovie
Step 1. Download the iMovie
This is where you are from the Apple store. You can also download it from the apple.com platform. But before you go about this, there are some system requirements you need to have. For iMac users, you need a 3.1GHz Core i7 CPU and 16GB RAM. For MacBook Pro with Touch Bar, you need a 3.1GHz Core i5 CPU and 8GB RAM.
Step 2. Start a New Project

Start a New Project
How to Start With an iMovie Template
Some iMovie Templates Style
Currently, there are 14 pre-programmed templates styles in iMovie. Some of these templates include Bulletin Board, Photo Album, Scrapbook, Sports, Comic Book, Filmstrip, Neon, News, Travel, etc.
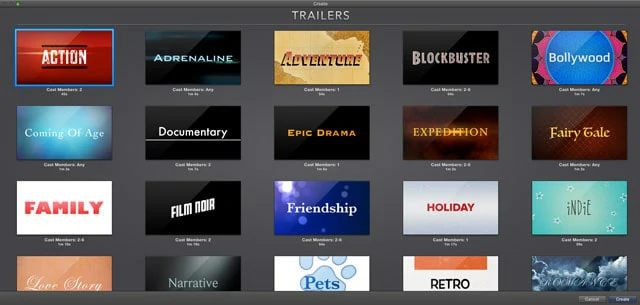
iMovie Video Template
Step 3. How to Cut video in iMovie
To add/remove frames with clip trimmer:
But in a case where edges are shown and an unused portion of the clip appears dimmed, do the following;
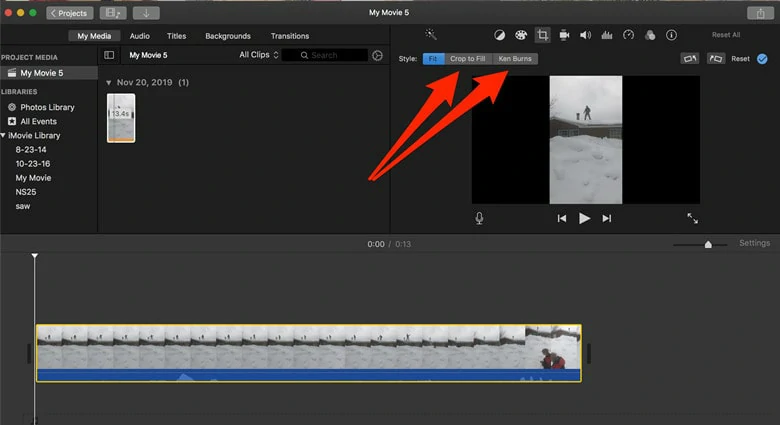
How to Cut video in iMovie
Step 4. How to Split Clips in iMovie
Splitting your videos allows you to adjust the duration of each video section. You can erase unwanted sections or add a new title to the video with this. Below is how you split your videos using iMovie:
You can also do it the other way round:
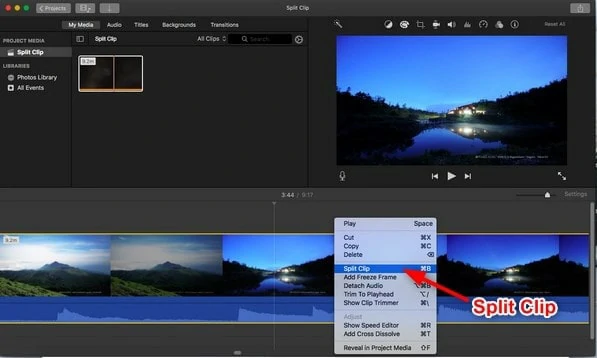
How to Split Clips in iMovie
Step 5. Add Text
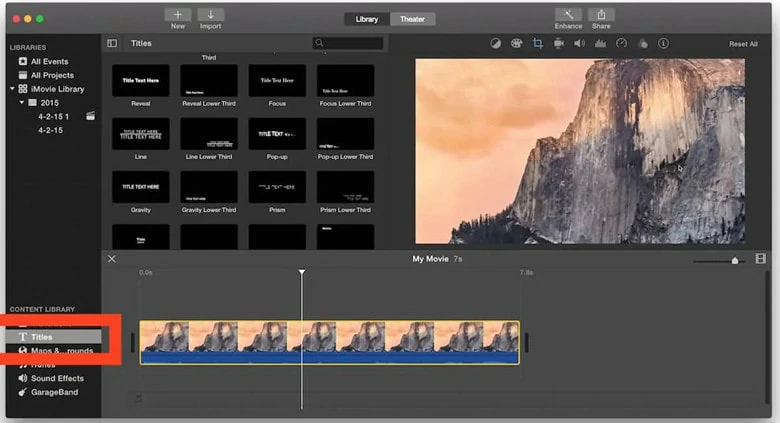
How to Add Text in iMovie
Step 6. Add Transitions
There are two ways to add a transition to your videos in iMovie. It's either you use the automatic or the manual method. But we will use the manual method, which is more common.
Then do either of the following:
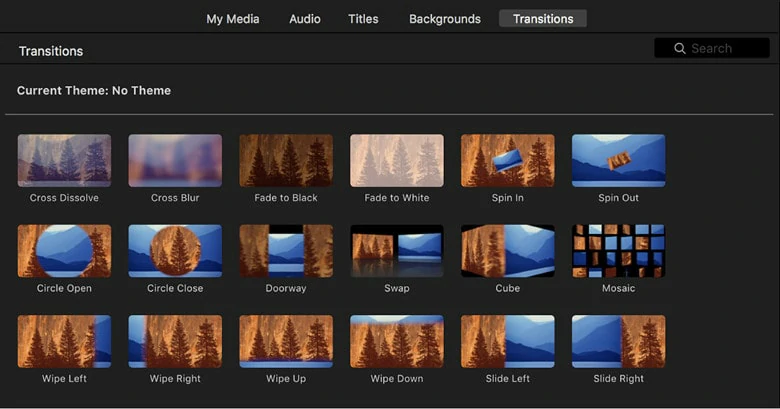
How to Add Transitions in iMovie
Step 7. Add Filters
To add a filter to the whole project:
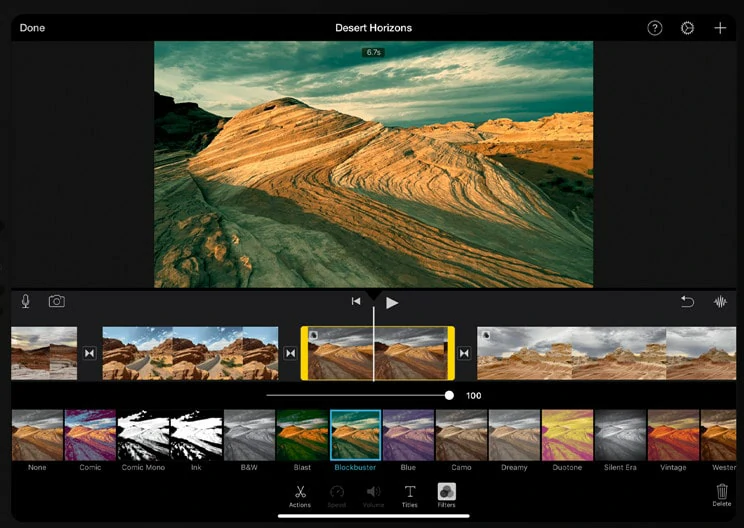
How to Add Filters in iMovie
Step 8. Change Themes
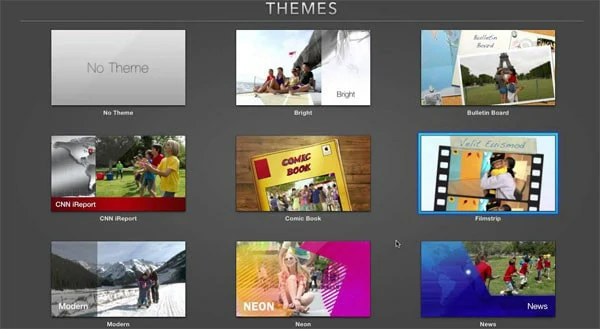
How to Change Themes in iMovie
Step 9. Change Video Speed
To set the ranges, do either of these:
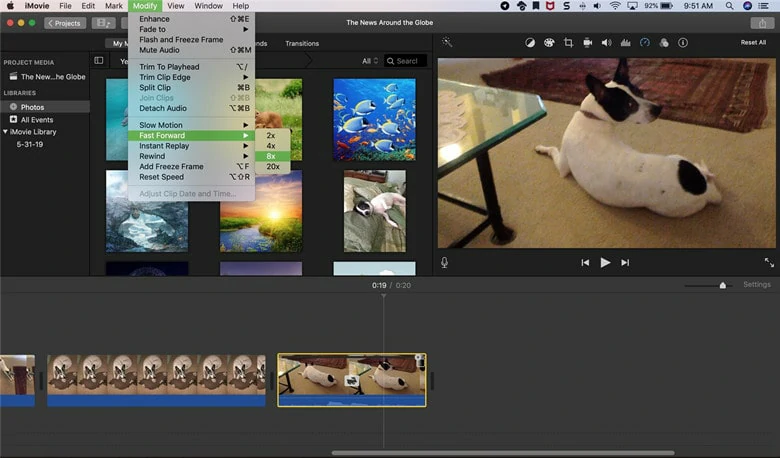
How to Change Speed in iMovie
Step 10. Add Audio
To do this:
To Record a Voiceover in iMovie on Mac
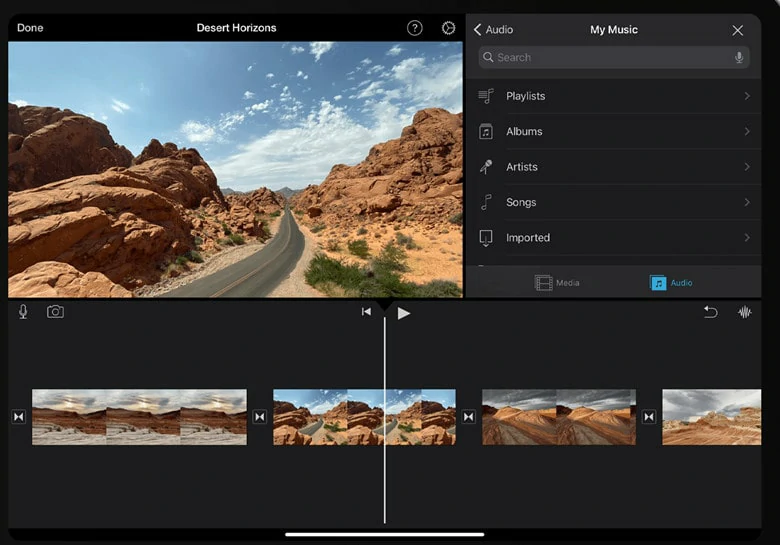
How to Change Audio in iMovie
But in a case where you don't have a Mac or iOS device, you might as well try out one of the best iMovie alternatives: FlexClip. FlexClip is one of the world's best and the most used online video editing tools. It has grown to become the best iMovie alternative, an achievement that can be attributed to its interesting features, e.g., no download; it is completely online-based, and you won't have to worry about it occupying more space in your CPU. Again, it comes with the best eye-catching templates, and it's very easy to use hence a simple, friendly user interface. So, don't hesitate to make FlexClip your video editing companion when you find the iMovie a bit complex.


The Bottom Line
That's all for how to edit with iMovie. Use iMovie to level up your videos right now. By the way, if you can't access to iMovie on account of diverse reasons, let the best iMovie alternative - FlexClip to help you!


FlexClip AI Video Maker
Reach professional-quality videos faster with easy editing tools, templates, and smart AI.
Start Now for Free
Hot & Trending
-

Best Ways to Find Music in YouTube Videos
-

Instagram Story Video Quality Bad After Upload? Fix It!
-

How to Repost Video on TikTok & How to Remove TikTok Repost
-

Improve Video Quality Online: 3 AI Video Quality Enhancers You Can't Miss
-

4K Convert to HD 1080p without Watermark: Best 4k Video Converters
-

Top 13 Birthday Video Makers with Music and Effects Free
-

How to Search Filters on TikTok & Use a Filter You See - TikTok Filter Guide
-

Large Collection of Creative and Funny Birthday Video Ideas for Ones You Care