Dress-change videos are one of the most popular transformation trends across TikTok, Instagram Reels, and Shorts. Whether you’re showcasing outfits, creating fashion content, or making fun transformations, the classic jump/snap transition is a fan favorite.
Have you ever wondered that "how did they do the clothes change transition in a dress change video?"
Good news: you're about to learn the full process and discover an even easier option using AI in this guide. Let's dive in.
AI Outfit Transition Video Made with FlexClip

Contents:
Also Read: How to Make a Talking Dog Video on TikTok & Online>
Part 1 How to Make AI Outfit Change Transition Video - Magical Outfit Transition
No multiple outfits, perfect lighting, or retakes? AI can create the whole transition effect for you in minutes—zero reshooting or complex editing. So let's start with the easiest method: creating an outfit-transition video with AI!
With FlexClip’s AI tools, you can swap outfits in any photo and do smooth transitions between two photos, or even generate fully styled outfit transition video from a single photo, saving time while keeping your video polished and professional.
FlexClip's AI offers two main AI methods to create professional dress-change videos without multiple photoshoots: creating transitions between two photos and generating a dress change video from a single photo using text prompts. Let's check the steps below.
Generate a Dress-Change Video from a Single Photo
We'll start with the quickest and simplest approach. With FlexClip, you can turn a single photo into a full outfit-change video — check out the example below!
AI Dress-Change Transition Video from a Single Photo Made with FlexClip
Pretty impressive, right? Now, let’s walk through the steps to generate a full outfit-change video from one photo using FlexClip’s AI video generator.
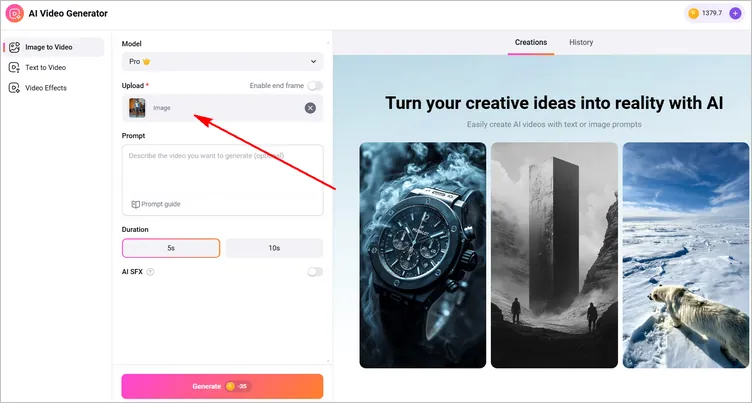
Generate a Dress-Change Video from a Single Photo - Upload
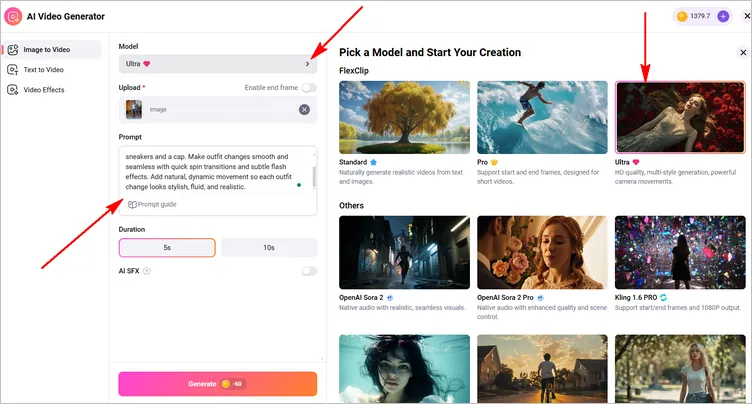
Generate a Dress-Change Video from a Single Photo - Write Prompt
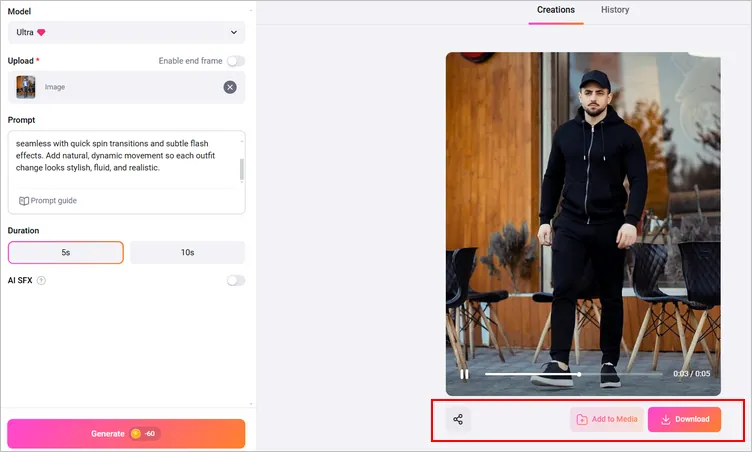
Generate a Dress-Change Video from a Single Photo - Preview and Download
Note: If the result looks off, don’t worry—AI outputs often improve with a few quick tweaks. Try refining your prompt, adjusting the duration, or switching to another AI model for a smoother transition.
Create Outfit Transitions Between Two Photos
Now, let's check the second method - how to add seamless transition between two static outfit photo to make a real dress-change morphs video using FlexClip's AI.
Step 1 Go to FlexClip AI Video Generator and Choose an AI Model
Start by navigating to FlexClip's AI Video Generator, and switch to the Image to Video mode—this is the feature that allows you to create motion and transformation between two images.
Next, you'll see a list of AI models to choose from. This step is crucial because not all models support start and end frame control. For outfit transitions, you need a model that can anchor both your "before" and "after" photos to generate a smooth morph, such as Pro model, Kling 1.6 Pro, Minmix Hailuo 02, etc.
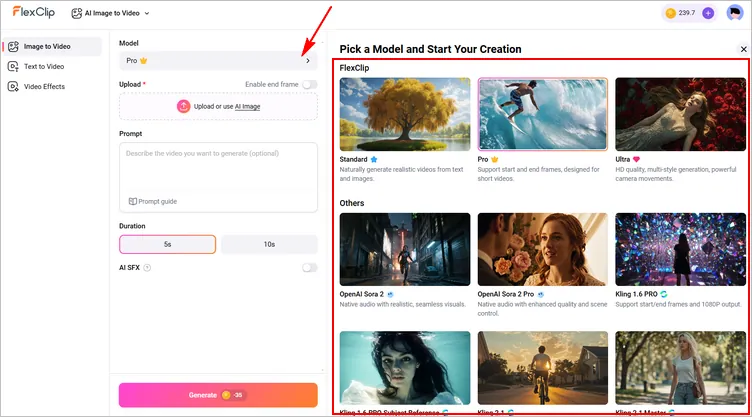
Create Outfit Transitions Between Two Photos - Select Model
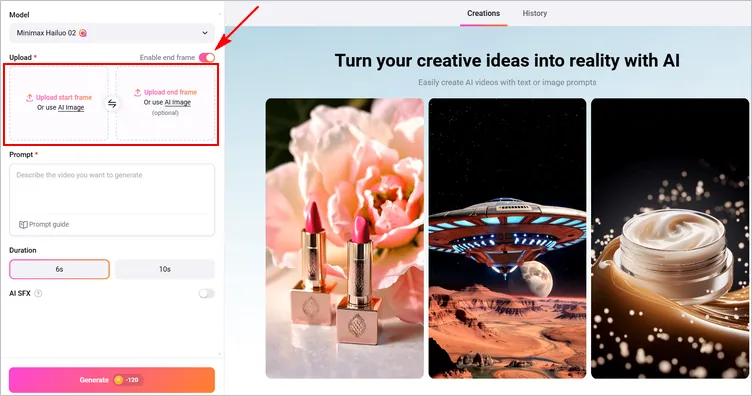
Step 2 Upload Your Start & End Frames
Once selected, toggle the Enable end frame option on, you'll see two upload sections: Upload start frame for uploading your first "before" outfit photo, and Upload end frame for the second "after" outfit photo. Once both images are uploaded, FlexClip's AI will use them as anchor points for the outfit transition.
Create Outfit Transitions Between Two Photos - Upload
Pro Tip: For the smoothest AI-generated outfit transition, use photos with consistent framing and perspective—same person, similar pose, and comparable lighting. This gives the AI a clear visual anchor and dramatically improves the morphing effect. An easy way to achieve perfect consistency is to use FlexClip’s AI Outfit Changer to perform a clothes swap on the same original photo, then use that edited version as your "new outfit" end frame.
Create Outfit Transitions Between Two Photos - AI Outfit Changer
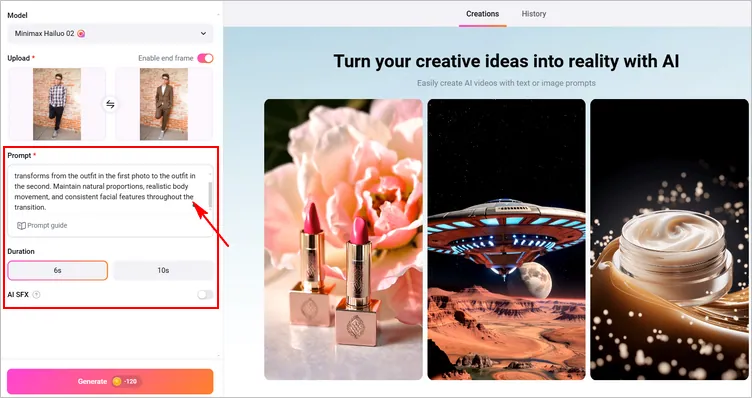
Step 3 Add Your Prompt and Adjust Settings
Once your start and end frames are uploaded, it’s time to guide the AI on how you want the transition to look. This is where your prompt comes in.
Go to the Prompt box, describe the transformation you want the AI to create. Keep your wording clear, concise, and focused on the motion, style, and visual feel of the transition. You can get creative here—mention movement (spin, turn, zoom), lighting style, mood, or pacing. The prompt helps the AI interpret how the action should unfold between your two photos.
Create Outfit Transitions Between Two Photos - Prompt
Next, fine-tune the settings, like duration, ratio, and SFX to help help shape the overall style and pacing of your video, ensuring the final result matches your creative vision.
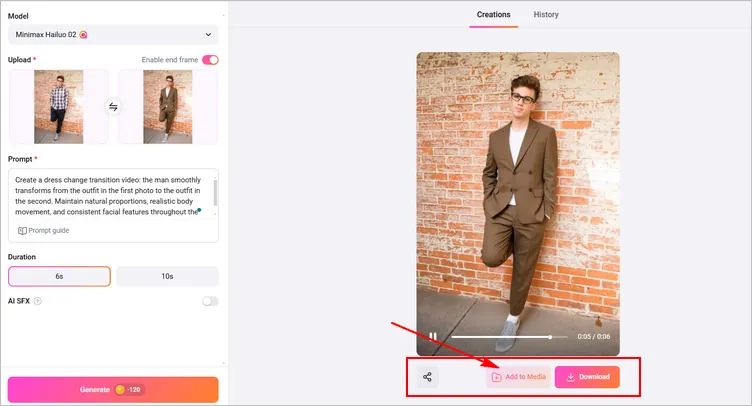
Step 4 Generate Your Outfit Transition Video
Once your prompt and preferences are set, you’re ready to generate your transformation.

Create Outfit Transitions Between Two Photos - Generate
After the AI generates your video, take a moment to carefully review the results. If something looks off, don't worry—AI results often improve with a few simple adjustments. You can refine the outcome by simplifying or adjusting your prompt, switching to a different duration, or even experimenting with another AI model to achieve a smoother, more accurate transition.
Step 5 Open the Video in FlexClip Editor (Optional)
When you're happy with your AI-generated transition, you can take your video a step further by opening it in the FlexClip Editor. This optional step gives you full creative control and allows you to transform a simple transition into a polished, share-ready video.
Create Outfit Transitions Between Two Photos - More
Now, let's check the final result below together:
AI Outfit Transition Between Two Photos Made with FlexClip
Part 2 How to Shoot and Edit a Dress Change Video - Actual Dress Change Video
This classic method for creating dress-change videos takes a bit of planning and effort, but the results are beautifully polished, look authentic, more control, great for real outfit showcases. To help you achieve a smooth and seamless outfit-change transition, here are some essential tips to keep in mind before you start recording.
Practical Tips for Recording & Editing a Dress Change Video
Step-by-Step Tutorial for Making an Actual Dress Change Video
Keep these tricks in minds, and now let's check the steps below to learn how to make an actual dress change video using jump, snap, or any transition you want.
Step 1 Choose Your Background & Set Up the Camera
To create a dress-change transition using the traditional method, begin by selecting a clean, uncluttered background and making sure the area is well-lit—natural light or soft studio lighting works best.
Then, set your camera or phone on a stable surface, and if possible, use a tripod to keep the frame perfectly steady, as even the slightest movement can disrupt the transition. It's wise to take a moment to adjust the angle, framing, and distance so your full outfit is clearly visible and centered in the shot.
Step 2 Record Your First Outfit
Once your scene and camera are set, start recording your first outfit. Start recording and perform the transition of your choice—whether it’s a jump, a spin, snapping your fingers, or covering the camera lens with your hand.
The most important part is ending in the same position every time, so mark your spot or memorize your stance to match your next clip perfectly. It’s a good idea to do a few practice takes to ensure the movement feels natural and consistent, which will make your final dress-change transition look seamless and professional.
Step 3 Record Your Following Outfits
After recording your first clip, quickly change into your next outfit and get ready to film the following shot.
Make sure you start in exactly the same spot and posture as where you finished the first clip—matching your stance, angle, and timing is essential for a smooth and natural clothing change effect in your video.
Now, you can repeat to make as many changes to clothes as you want so that there are several transitions.
Step 4 Edit the Clips Together into a Dress Change Video
Once all your clips are ready, it’s time to move on to editing—the stage where the magic happens and your dress-change video truly comes to life. Import your footage into your preferred editing tool—in this guide, we’ll use FlexClip, a powerful online video and photo editor that offers a wide range of editing tools and special features. With FlexClip, you can easily trim, align, and enhance your raw clips, transforming them into a smooth, eye-catching dress-change transition video that’s ready to share.
Upload Clips: Start by uploading your videos into FlexClip—the great thing is that it lets you import footage directly from your mobile device or even from some third-party platforms.
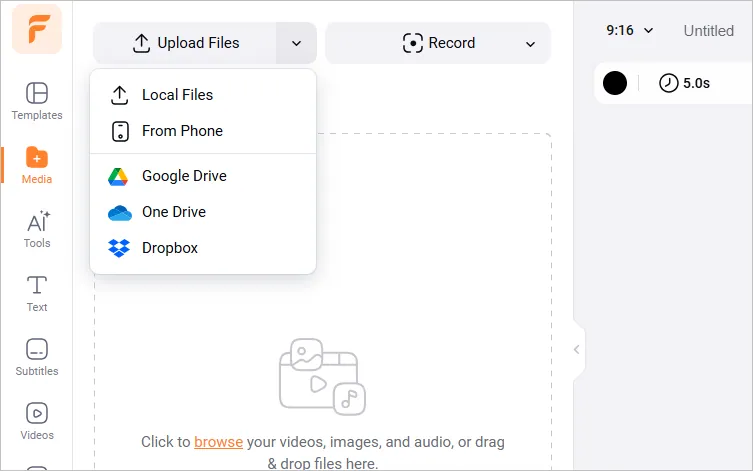
Edit the Clips Together into a Dress Change Video - Upload
Trim Precisely: Once your clips are uploaded, drag them onto the timeline in the order you want. The key to a smooth dress-change transition is precise trimming: cut each clip right at the moment of your transition move so the action flows seamlessly from one outfit to the next.
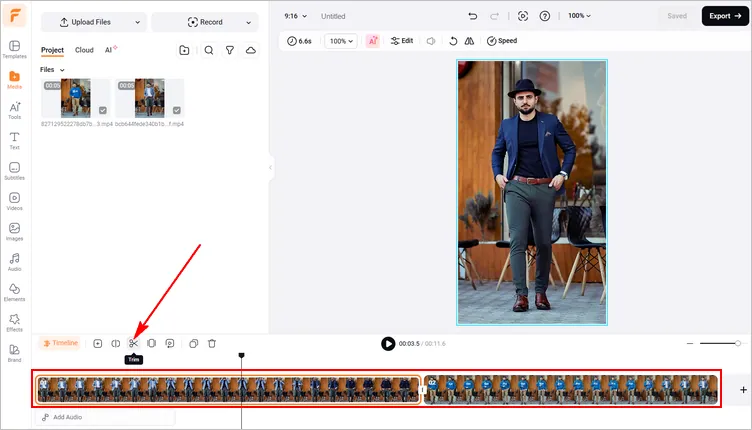
Edit the Clips Together into a Dress Change Video - Trim
Enhance with Transition and Sound Effect: Next, spice up your transition using FlexClip’s built-in effects. Try adding a quick flash, a motion blur, or a subtle zoom to make your outfit change really pop. Layer in sound effects like a whoosh, snap, or beat drop to match your movement and give the video extra energy. These little touches make your transition feel lively and professional.
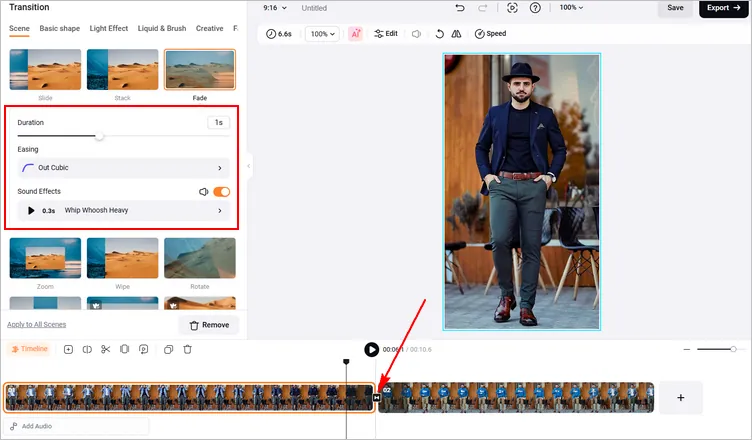
Edit the Clips Together into a Dress Change Video - Enhance
Sync with Music and More: Don’t forget to sync your video with music: aligning the outfit switch to a beat or drop instantly makes the transition more engaging and professional. To make your video even more lively, consider adding text captions, stickers, or emojis that match your style and the energy of the clip. These small touches not only enhance visual appeal but also help your video stand out on social media and capture viewers’ attention.

Edit the Clips Together into a Dress Change Video - More
Download and Share: Once everything looks smooth and polished, preview your video, make any final adjustments, and export it in high quality. If you want to share it immediately, FlexClip makes it easy—you can generate a shareable link or post directly to social media with just one click. Your dress-change transition video is now ready to wow your audience!
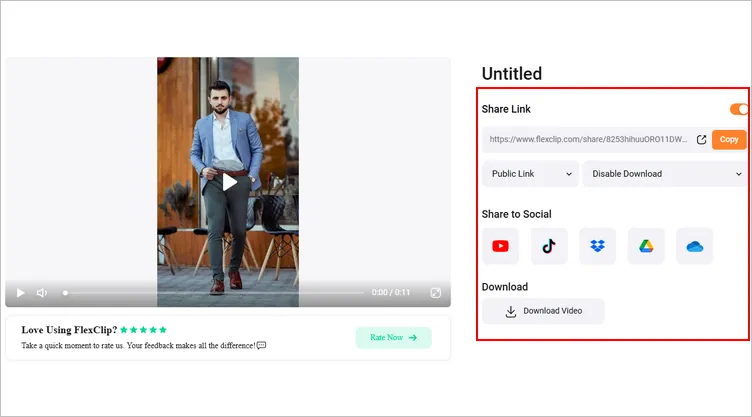
Edit the Clips Together into a Dress Change Video - Share
Final Words
Dress-change videos are easier than ever with FlexClip—whether you film a jump/snap, morph two photos, or create a single-photo AI transformation. Get creative, experiment with prompts and transitions, and turn your outfits into stunning, cinematic transformations that wow your audience.


FlexClip AI Video Maker
Reach professional-quality videos faster with easy editing tools, templates, and smart AI.
Start Now for Free
Hot & Trending
-

Best Ways to Find Music in YouTube Videos
-

Instagram Story Video Quality Bad After Upload? Fix It!
-

How to Repost Video on TikTok & How to Remove TikTok Repost
-

Improve Video Quality Online: 3 AI Video Quality Enhancers You Can't Miss
-

4K Convert to HD 1080p without Watermark: Best 4k Video Converters
-

Top 13 Birthday Video Makers with Music and Effects Free
-

How to Search Filters on TikTok & Use a Filter You See - TikTok Filter Guide
-

Large Collection of Creative and Funny Birthday Video Ideas for Ones You Care