How to convert Zoom recording to MP4?
Help! Zoom recording stuck converting to .MP4
- Questions from Zoom Community
Do you have ever recorded a Zoom recording but found it in a format that can’t be easily played? If so, you’re not alone. In usual, Zoom saves recordings in MP4 for easy playback. But if you end up recording suddenly or mistakenly, you will create a .zoom file that can’t be opened directly. Fortunately, there are many workarounds that help you convert Zoom recording to MP4 in minutes so that you can share and play with ease.
In this article, we’ve gathered the 5 best ways to convert a Zoom recording to an MP4 with a step-by-step guide. And in the last section, you’ll also learn something about FAQs of Zoom recording that lead a smooth recording experience. Let’s dive in right now!
Also Interested in: How to Convert Zoom Recording to MP3 with a Free Zoom Converter Online>>
Method 1: Convert Zoom Recording to MP4 via Zoom Client App
In Zoom, all recordings in your account will be saved in the Meetings history of Zoom client. At the same time, it provides a converter to view these recordings in MP4 format. Here's how to find and convert Zoom recording to MP4.
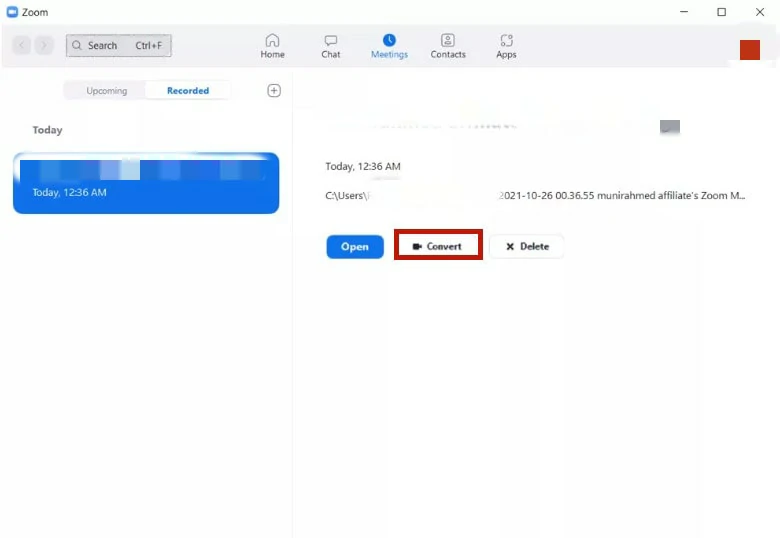
Convert Zoom Recording to MP4 via Zoom Client App
The process of turning Zoom recording to MP4 via Zoom Client App is straightforward and easy but it may fail to work under the circumstances below:
Method 2: Use Transcode on macOS to Convert Zoom to MP4
If you can’t confirm the recording file location on Zoom, Transcode, a free and open-source tool recommended by Zoom officials, is your go-option to convert Zoom recording into MP4. Since it’s platform-specific, it may not be suitable for other platforms like Windows and Linux.
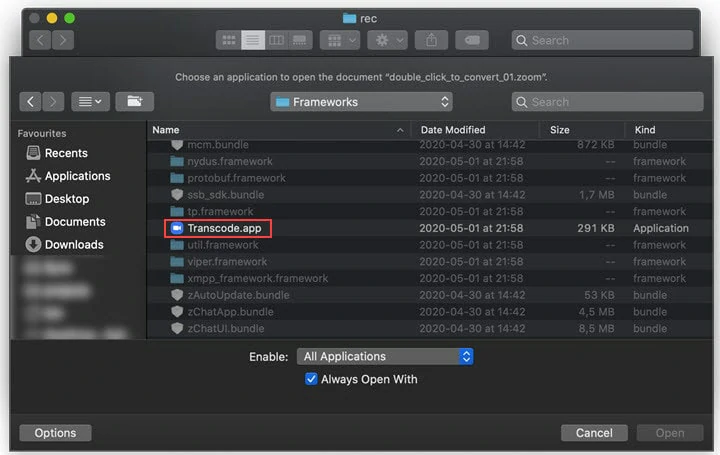
Convert Zoom Recording to MP4 via Transcode on macOS
Method 3: Convert Zoom to MP4 via zTscoder (Windows Only)
Like macOS users, Zoom also provides a built-in converter named zTscode.exe for Windows to convert Zoom to MP4. Simply follow the steps below to learn how to turn Zoom into MP4 using zTscoder.

Convert Zoom Recording to MP4 via zTscoder
Note: If zTscoder doesn’t respond, use zTscoder.exe alternatively. Go to Control Panel > search System and Security > System. Then navigate to the Advanced system settings > Environment Variables > type C:\Users\UserName\AppData\Roaming\Zoom\bin to launch the conversion.
Method 4: Turn Zoom Recording to MP4 via a Trick
This trick is recommended by a user on Zoom Community that can work in some cases. It runs based on the fact that Zoom converts recordings to MP4 automatically when the meeting ends. So, you need to create a new meeting and record it. When it ends, replace the new file with the previous non-converted file. By doing so, Zoom may be tricked into converting the earlier recording to MP4.
Let’s see how to turn Zoom recording to MP4 using the new Zoom file.
Convert Zoom Recording to MP4 via Trick
Method 5: Convert Zoom Recording to MP4 by Screen Recording
If none of the tips are useful or you prefer a more straightforward workaround with flexible editing, then try FlexClip’s online screen recorder to convert existing Zoom recordings to MP4 easily. It captures all sorts of Zoom recordings with audio and saves them in MP4, MP3, WAV, MAV and more formats for free, supporting multiple resolution options from 480p to 4k.

Besides screen recording, FlexClip has more to offer for Zoom recordings:
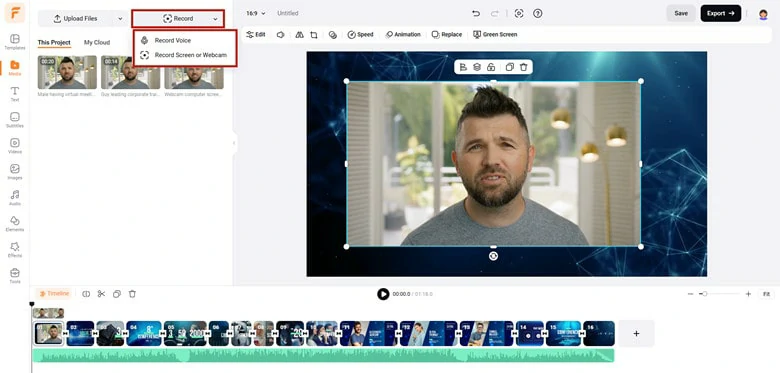
Use FlexClip to Screen Record Zoom Recording
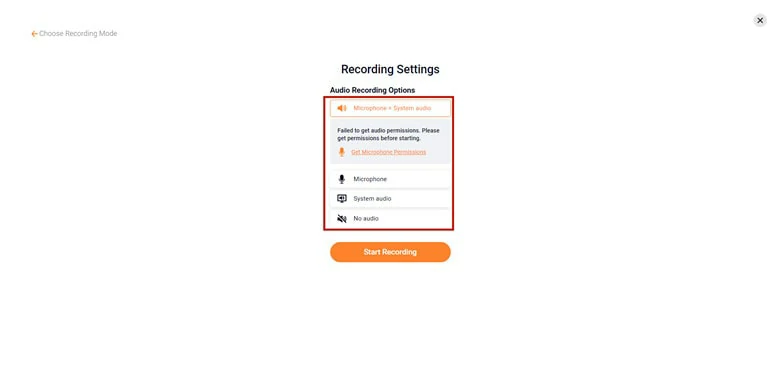
Make Settings of Audio Options
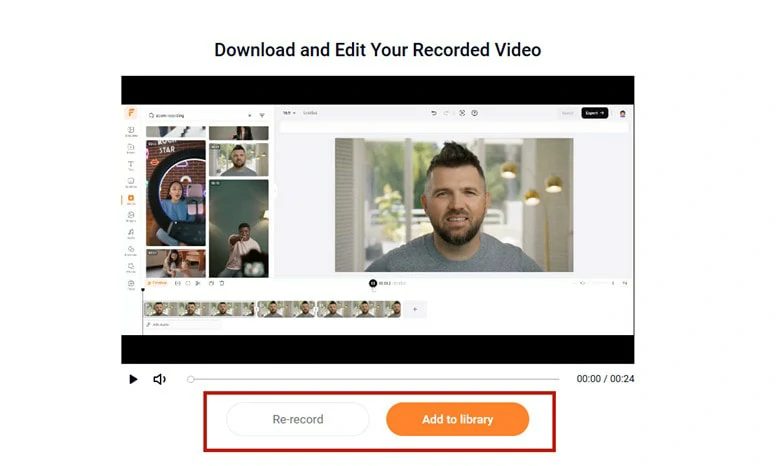
Check the Completed Zoom Recording
FAQs
1.What is a Zoom file?
A Zoom file is a Zoom recording that has not been converted to .MP4 file. It typically contains video, audio, or text data recorded through Zoom with a name of double_click_to_convert_##.zoom.
To play a Zoom file, a conversion to MP4 or M4A is required.
2.Why My Zoom not converting?
Many reasons will lead to a failed conversion, and here we’ve listed some causes.
3.How to extract a transcript from my Zoom recording?
Although Zoom provides an automatic transcript feature, it’s only accessible to a paid subscriber who happens to be a host or a co-host of the Zoom meeting/webinar with many limitations. Alternatively, you can use FlexClip’s online transcript generator to automatically extract a transcript from Zoom recording with ease.
It can accurately transcribe meetings in 140 languages with time stamp and download the Zoom transcript in SRT, VTT, SSA, ASS, SUB, and SBV files. Meanwhile, you can customize the generated transcript by changing font, size, style and more.
Here's how to convert Zoom recording to transcript using FlexClip.
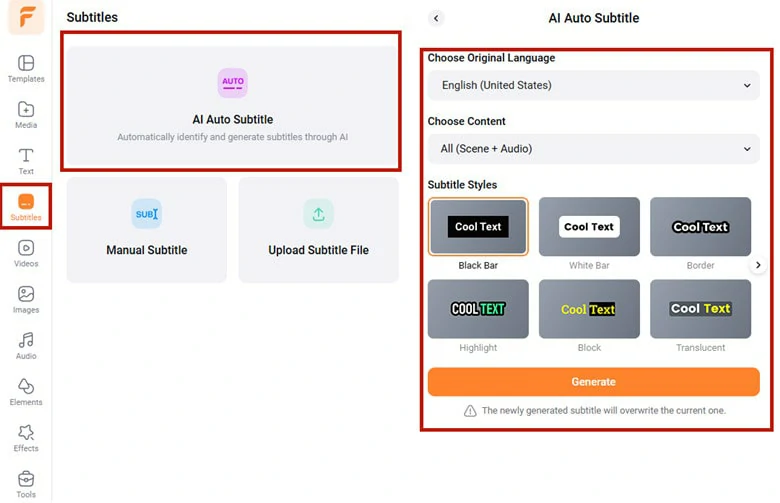
Make Settings and Launch Transcript Generation Process
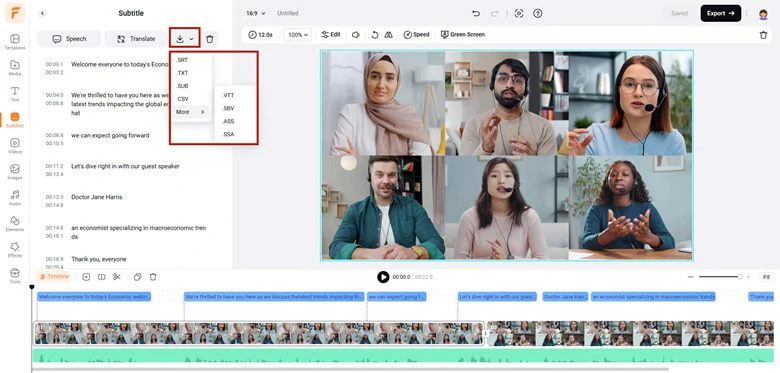
Download the Generated Zoom Transcript


FlexClip AI Video Maker
Reach professional-quality videos faster with easy editing tools, templates, and smart AI.
Start Now for Free
Hot & Trending
-

Best Ways to Find Music in YouTube Videos
-

Instagram Story Video Quality Bad After Upload? Fix It!
-

How to Repost Video on TikTok & How to Remove TikTok Repost
-

Improve Video Quality Online: 3 AI Video Quality Enhancers You Can't Miss
-

4K Convert to HD 1080p without Watermark: Best 4k Video Converters
-

Top 13 Birthday Video Makers with Music and Effects Free
-

How to Search Filters on TikTok & Use a Filter You See - TikTok Filter Guide
-

Large Collection of Creative and Funny Birthday Video Ideas for Ones You Care