Adding watermarks on your YouTube videos means you have a functional brand – it portrays professionalism. By adding watermarks to your videos, viewers will get to see your logo each time they watch the video. one of the major reasons for video content creators to add watermark is that the tiny brand image generates more recognition as the views increase. Some other reason people add watermarks on their videos is to safeguard the privacy of their contents.
In this article, we have explained some easy step-by-step procedures on how to add a watermark to a YouTube video. There might be other ways to go about this, depending on the type of tool you use. But the method we mentioned below is considered the easiest way to go about it. The detailed steps are as follows.
Step-by-step Process on how to Add Watermark to YouTube Video
This is where you choose your display time for the watermark: there are three categories listed. Then proceed to ‘Save’ when you must have added other settings: End of video, Custom start time, and Entire video.
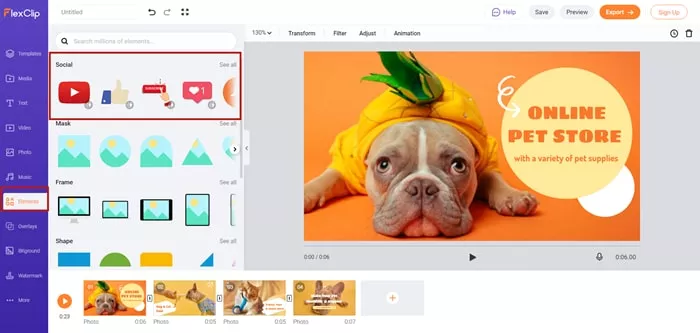
How to Add a Youtube Subscribe Button Watermark to Your Videos
Note:End of video: the watermark on the video is expected to show at the last 15 seconds to the end of your video.
Adding Watermark to YouTube Video in the Editing Process
If you are going to add a watermark to your videos using this process, you will need to use the best tool for adding watermarks to YouTube videos: FlexClip.
FlexClip is the world’s foremost video editor, and also a perfect way to add watermarks to your YouTube videos. Many benefits are attributed to adding watermarks with FlexClip: you will have total control over the size, opacity, and position of the watermark you wish to add. You will get to integrate these watermarks with ease – without going through some complex processes or experience, and finally, no download is needed. To add a watermark in your YouTube videos using FlexClip, you have to follow the steps listed below:


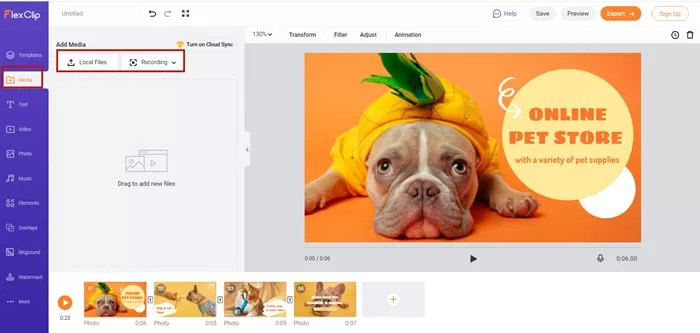
Upload Media Resources to FlexClip

Add Watermark to YouTube Video
Make Further Adjustment to YouTube Video
The Bottom Line
Adding Watermarks in your YouTube videos says a lot about your brand, it also changes the way viewers perceived it (your brand). Since it has such an impact, it will only be fair if you do it right, and we will always recommend you do this using the right tool: FlexClip. Also note, that FlexClip is also designed with features that enable users to add transition, emojis, and animation on either their videos or images. Remember to share this article if you find it interesting, there may be people there who need it.


FlexClip AI Video Maker
Reach professional-quality videos faster with easy editing tools, templates, and smart AI.
Start Now for Free
Hot & Trending
-
Ultimate Tik Tok Guide – How to Tik Tok & How to Make a Tik Tok Video that Gets Likes
-

7 Best Ways to Find Music in YouTube Videos
-

Instagram Story Video Quality Bad After Upload? Fix It!
-

How to Repost Video on TikTok & How to Remove TikTok Repost
-

Improve Video Quality Online: 3 AI Video Quality Enhancers You Can't Miss
-

4K Convert to HD 1080p without Watermark: Best 4k Video Converters
-

Top 13 Birthday Video Makers with Music and Effects Free
-

How to Search Filters on TikTok & Use a Filter You See - TikTok Filter Guide