VLC is an open-source and cross-platform media player. Since its release in 2001, it has been trusted by millions of users thanks to the compatibility with almost all media formats & video/audio codecs on practically all platforms.
There are many features of VLC besides the ability to play audio & video and recording screen in your desired format happens to be one of them. If you're seeking ways to record screen, here's how to make screen capture with VLC.
How to Use VLC Record Screen
To perform desktop screen recording with VLC, we have to use the "Capture Device" feature and make some configurations. Follow the step-by-step to know the straightforward process.
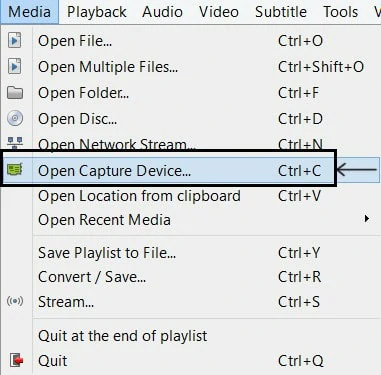
Choose Open Capture Device Option
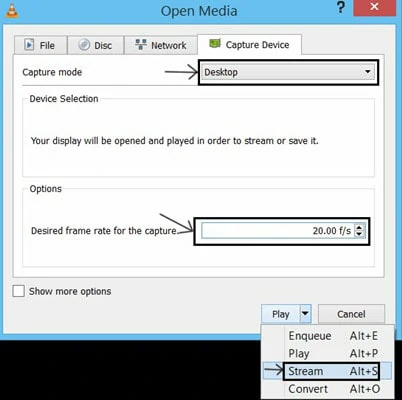
Make Some Configurations
After setting up everything, click on the arrow icon of the Play button to check Stream.
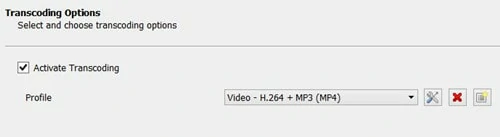
Edit Video Format in Profile
Now under the Profile section, you choose the video format and container. The default H264 video format with MP3 audio is a great choice if you don't have additional requirements.

Stream the Screen Recording
Problems of VLC Screen Recording
It's simple to record screen with VLC but you may find that VLC doesn't capture audio while screen recording. Additionally, as a media player, VLC has various limits on screen recording as follows:
While VLC is capable of recording screen videos, it may not be the best screen recorder available. For one thing, it has limited features to support recording the screen. For another, a video editing function is not provided. Therefore, many users are looking for alternatives to record screen with audio or webcam.
The Best Alternative of VLC to Record Screen
For general recording tasks, FlexClip is one of the notable and reliable screen recorders you can choose. It offers a broad spectrum of screen recording options and video editing tools that can be used even by novice video editors.
This online screen recorder allows you to capture screen, webcam, system audio and microphone sound at the same time. Besides, it also comes with stylish templates and a powerful video editor to polish your raw videos effortlessly.
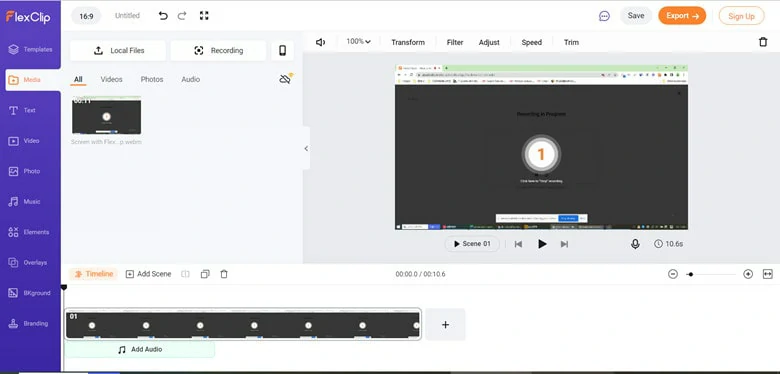
Steps to Record Screen with FlexClip
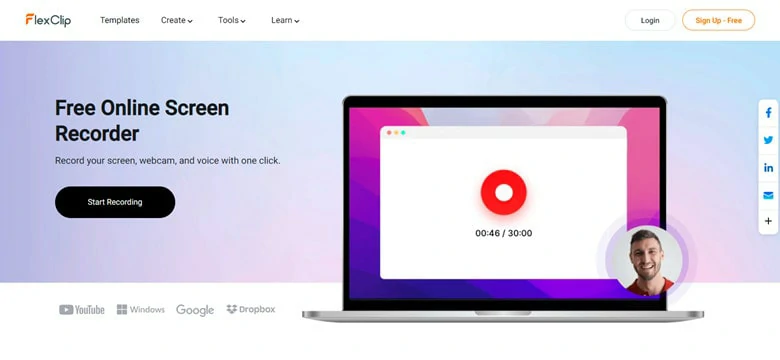
Go to FlexClip's Screen Recorder


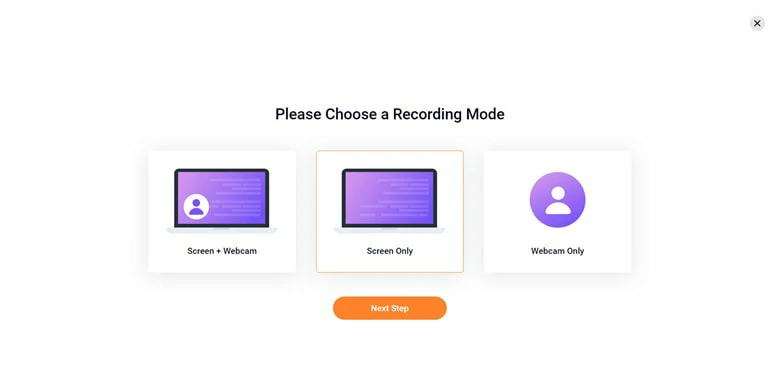
Choose a Recording Mode
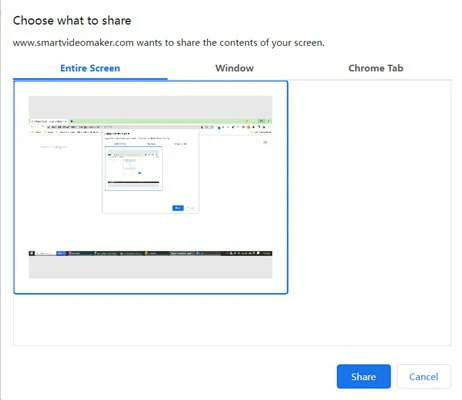
Select the Window for Recording
Make Edits to the Recorded Video
The Bottom Line
Now you must have a clear mind of how to record screen with VLC Media Player. If you just need basic screen recording, VLC will be enough. But if you want to record screen with audio or make your video more attractive, give FlexClip a try!


FlexClip AI Video Maker
Reach professional-quality videos faster with easy editing tools, templates, and smart AI.
Start Now for Free
Hot & Trending
-

Best Ways to Find Music in YouTube Videos
-

Instagram Story Video Quality Bad After Upload? Fix It!
-

How to Repost Video on TikTok & How to Remove TikTok Repost
-

Improve Video Quality Online: 3 AI Video Quality Enhancers You Can't Miss
-

4K Convert to HD 1080p without Watermark: Best 4k Video Converters
-

Top 13 Birthday Video Makers with Music and Effects Free
-

How to Search Filters on TikTok & Use a Filter You See - TikTok Filter Guide
-

Large Collection of Creative and Funny Birthday Video Ideas for Ones You Care