Summary: What’s the best way to record screen with sound on Windows and Mac? Check these best answers out and be an expert on screen recording.
Screen capture tools are more widely used in tutorial video creation, business communication, and education. Whether you are on PC or Mac, there are default screen recording tools you can rely on. Yet, when it comes to record screen with sound, your options are limited.
Here in this post, we summarized all possible ways to record screen with audio on Windows and Mac. Please refer to the part you need.
Also Read: How to Make A Birthday Wish Video >
Part 1. How to Screen Record with Sound on Mac
The free screen recorder with sound on Mac is QuickTime Player. It is a default app on every Mac. QuickTime Player is thought to be a video and audio player, but it can also be used to create video and audio.
Step 1 Launch QuickTime Player from your application folder. Go to the menu bar.
Step 2 Choose File > New Screen Recording.
Step 3 Click the arrow next to the big red dot button to enable the microphone. You can only select the Internal Microphone.

Image Board: How to Screen Record with Sound on Mac
Step 4 Hit the big red dot button then click anywhere on the screen or drag to select an area to record.
Step 5 To stop recording, press Command, Control and Esc buttons together or click the stop button on the menu bar.
Part 2. How to Record Screen on Windows 10 with Audio
You might have used Windows 10 for a very long time, but there are still lots of hidden features that you might haven’t discovered and screen recording is one of them. The screen recording is on the Game Bar.
Step 1 Press the Windows + G button on your keyboard. You will be brought into the Game Center Interface.
Step 2 Click the Start Recording button (a button with a circle and a black dot).
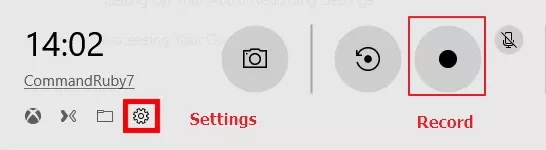
Image Board: How to Screen Record with Sound on PC - Step 2
Step 3 Click on the Settings to choose only record Game or All.
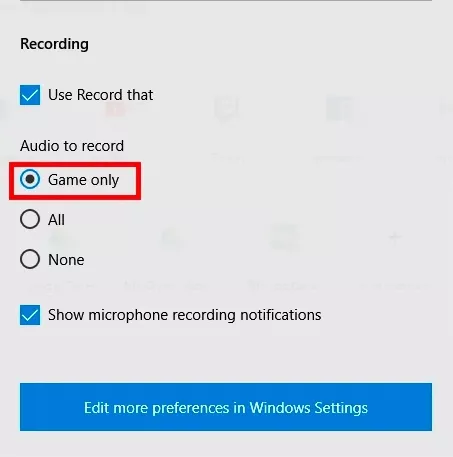
Image Board: How to Screen Record with Sound on PC - Step 3
Step 4 Stop at anywhere by clicking the Stop button, or pressing Windows + Alt + R.
Part 3. Free & Efficient Way to Screen Record without Platform Barriers
Whether it’s QuickTime on Mac or screen record tool on Windows 10’s Game center, shortcomings exist! QuickTime doesn’t allow you to record voice from outside and screen record tool on Window’s Game Center doesn’t allow you to select a specific region. Luckily, we have FlexClip, a watermark-free screen capture tool that helps record screen and audio without any platform barriers. Now, click on the Record Screen button to get started.
Step 1 Click on the big red dot, select Record Screen. Alternatively, you can select to Record Webcam.
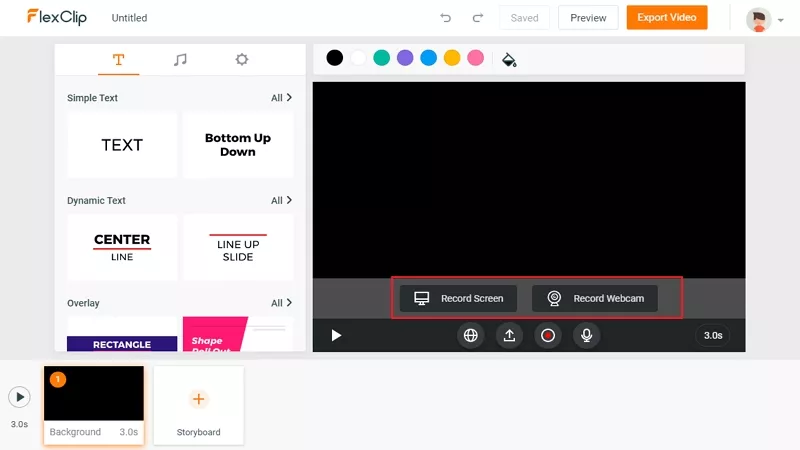
Image Board: Easiest Way to Screen Record with Sound - Step 1
Step 2 Pick a window you want to share and then tick the Share Audio box and start recording.
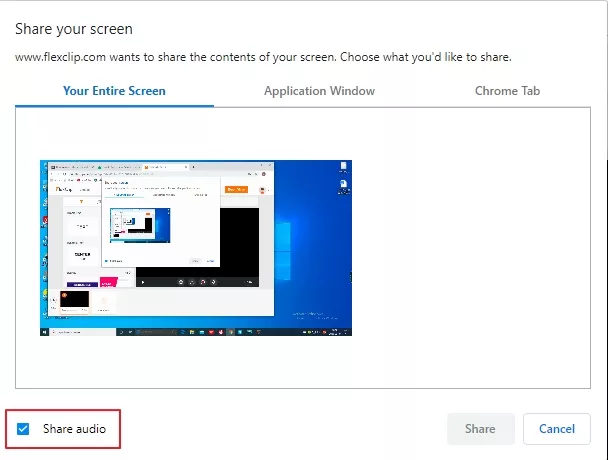
Image Board: Easiest Way to Screen Record with Sound - Step 2
Step 3 To end sharing, just click the big red dot button.
Step 4 (optional) Edit your video record.
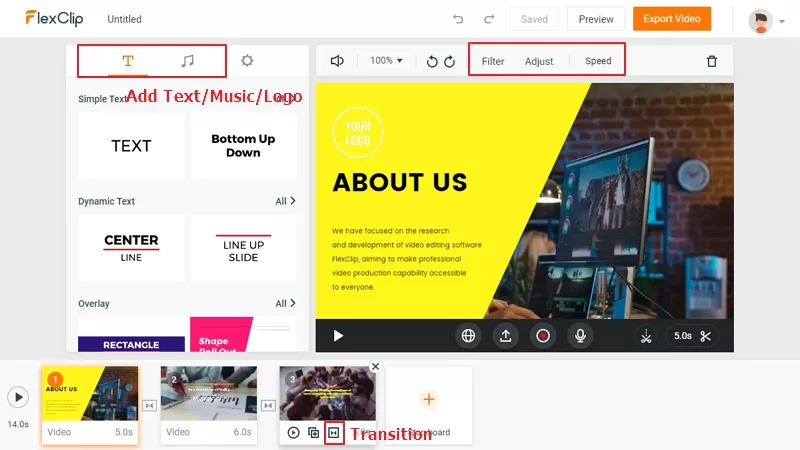
Image Board: Easiest Way to Screen Record with Sound - Step 4
Step 4 Preview and download.
The Bottom Line
That’s all for the detailed steps to screen record with sound on PC & Mac. If you find this post helpful, do share it with others.


FlexClip AI Video Maker
Reach professional-quality videos faster with easy editing tools, templates, and smart AI.
Start Now for Free
Hot & Trending
-

7 Best Ways to Find Music in YouTube Videos
-

Instagram Story Video Quality Bad After Upload? Fix It!
-

How to Repost Video on TikTok & How to Remove TikTok Repost
-

Improve Video Quality Online: 3 AI Video Quality Enhancers You Can't Miss
-

4K Convert to HD 1080p without Watermark: Best 4k Video Converters
-

Top 13 Birthday Video Makers with Music and Effects Free
-

How to Search Filters on TikTok & Use a Filter You See - TikTok Filter Guide
-

Large Collection of Creative and Funny Birthday Video Ideas for Ones You Care