Zoom in effect is a widely-used technique in video editing, esp for YouTube video tutorials or product reviews. By zooming in on a video, you are able to draw viewers’ attention to detailed parts of a video or imitate a zoom in camera movement you missed out on in real-time filming.
So, in this tutorial, we will walk you through how to zoom in on a video using Jump Cut and Keyframe, 2 of the most popular and proven ways to do zoom in video effects.
Here’s What You Will Learn:
How to Zoom in on a Video by Jump Cut
To create the zoom in video effect by Jump Cut, all you need to do is 3 steps:
Here, we would like to show you how to zoom in on a video by using FlexClip, a free and feature-packed online video editor. No software download is needed and it’s extremely easy to use. With FlexClip, you can easily trim or split clips, and add zoom in and zoom out effects, video transitions, animated texts, and other cool video effects to your videos.
Use FlexClip online video editor to zoom in on a video

Step 1: Upload Your Video to FlexClip Directly from Your Phone or PC and Ddd it to the Timeline
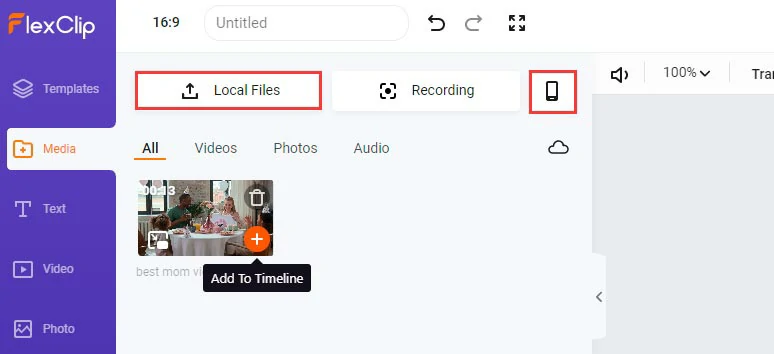
Upload video footage to FlexClip
Step 2: Split the Video Footage into 3 Clips
You need to cut off the original video footage twice. Firstly, use the split tool to cut off the video for the start of the zoom in effect. Then, select the second storyboard and split the video where you want the video to zoom back out.

Use split tool to cut off the start and end of the zoom in effect
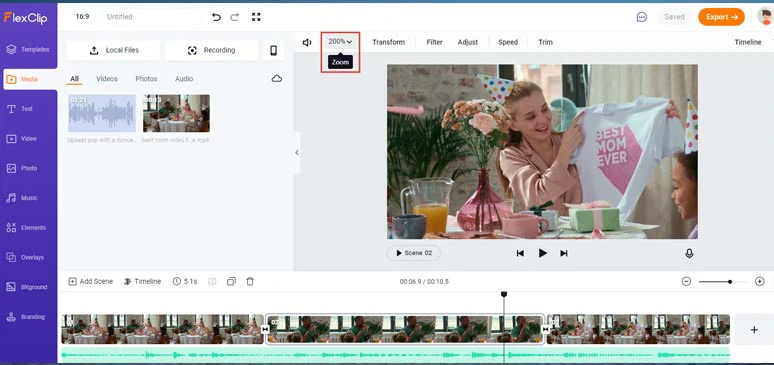
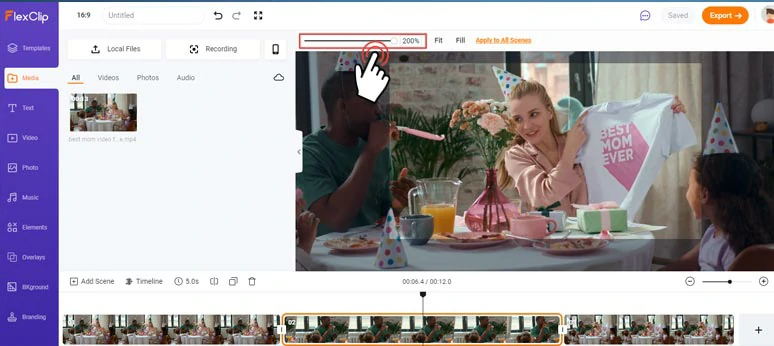
Step 3: Apply the Zoom in Effect to the Video
Select the second clip and click the Zoom tool above and drag the slider all way to the right to scale up the video size and position the video to where you want the zoom in effect to be. Now, the Jump Cut to zoom in on a video is done.
Apply the zoom in effect to the video
Here is the resulting video from the example:
Zoom in on a video by Jump Cut using FlexClip
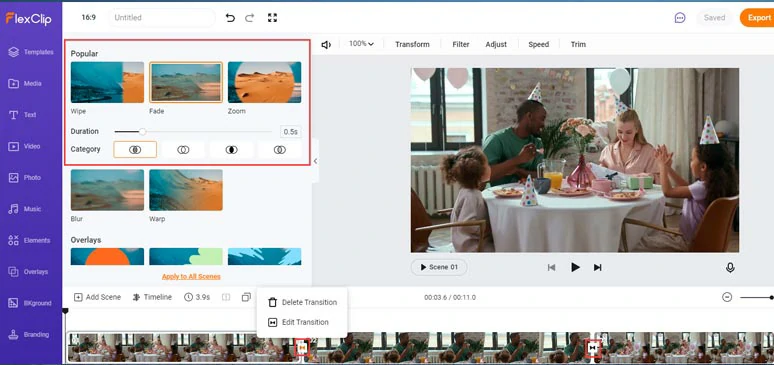
Step 4: Add a Video Transition to Smooth the Zoom In and Zoom Out Effect (Optional)
Well, you may also add a fade in/out video transition and set the duration of transition to 0.5 seconds to make the zoom in and zoom out effect smoother and more professional.
Add video transition to zoom in effect and set time
Here is the zoom in video effect with a smoother video transition:
Zoom in on a video with a smooth video transition by FlexClip
Step 5: Click the Export Button to Download or Share Your Video
You can directly download the MP4 video to your local computer or share it directly to the YouTube channel or save it to Google Drive, Dropbox. FlexClip will also generate a clickable link and embed code for easier sharing.
How to Zoom in on Premiere Pro Using Keyframe
The second technique you can use to zoom in on a video is called Keyframe or Key Framing. Keyframe refers to a specific animation or movement from point A to point B on the timeline. So, for this time, let’s see how to use popular Adobe Premiere Pro to apply the smooth the zoom in effect on a video.
Step 1: Add the Video on the Timeline on Premiere Pro and Select It
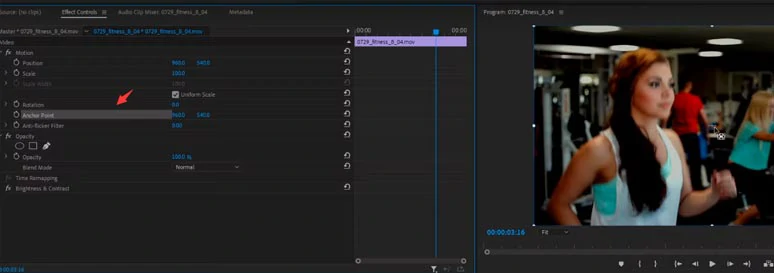
Step 2: Use Anchor Point to Locate the Area in the Video to Zoom In
Go to “Effect Controls “ > click “Anchor Point” > move the anchor point to the place where you want to zoom in on the video.
Use anchor point to locate the zoom-in area on a video
Step 3: Create Keyframe for the Start of the Zoom in Effect
Head back to “Effect Controls” > move the playhead to where you want to add the start of zooming in > click the “StopWatch” next to scale to create the start of the keyframe.
Create the first keyframe for the start of the zoom in effect
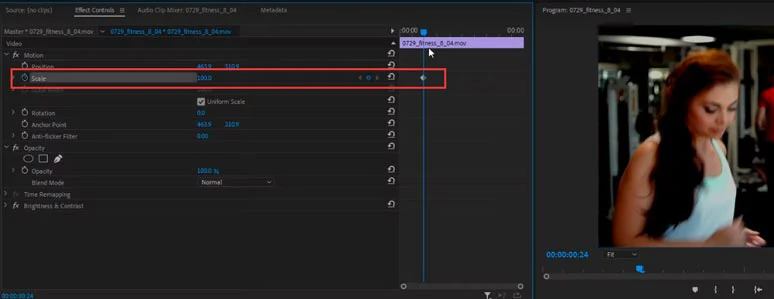
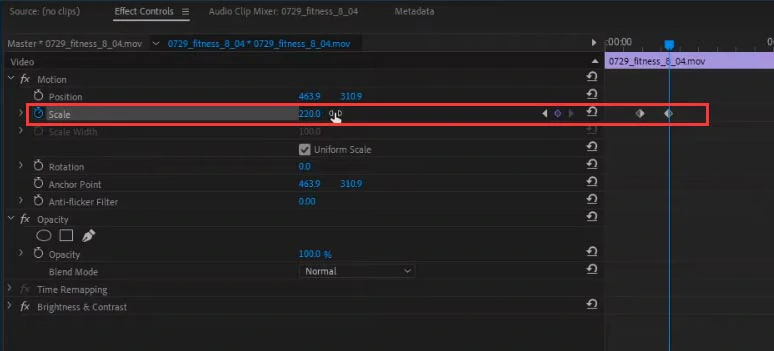
Step 4: Apply the Zoom in Effect
Move the Playhead to where you wanna the zoom in effect ends and increase the Scale to how much you’d like to zoom in to. This will automatically create the second keyframe for the animation and the zoom in effect will be also created on the video.
Scale up the video size and add another keyframe for the zoom in effect
Step 5: Zoom Out for the Rest of the Video
Move to playhead to where you want the video to zoom back out > click the little circle button, which will create the third keyframe for the current scale > move the playhead to where you want the video to be unzoomed > click the “Reset Parameter” button to create the keyframe to the original unzoomed value. Done.
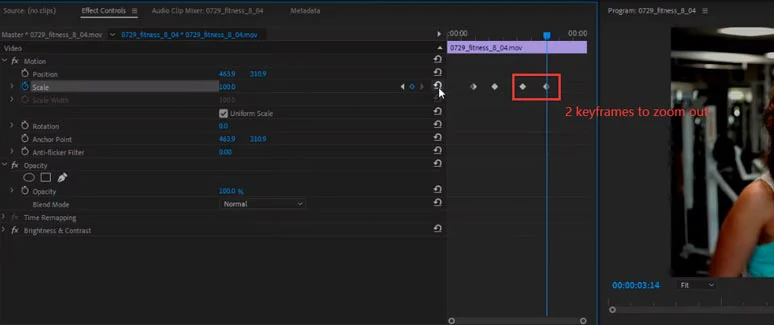
Add another 2 keyframes to zoom out on a video
How to Zoom in on a Video on Phone by CapCut
As a bonus, we’d also like to walk you through how to zoom in on a video on your phone using the keyframe feature of the powerful mobile app CapCut. CapCut is available both to both iPhone and Android users for free.
Step 1: Create a New Project and Import the Video on CapCut
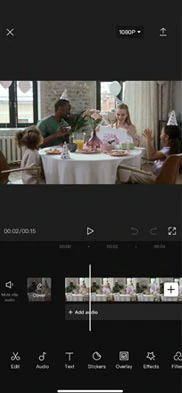
Import the video to CapCut
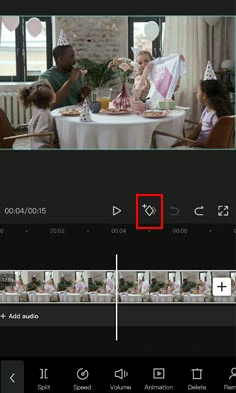
Step 2: Create the First Keyframe for the Start of the Zoom In Effect
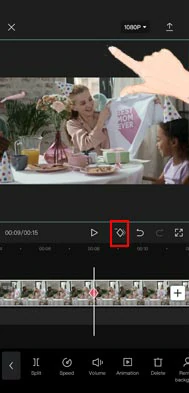
Move the playhead to decide the start of zoom in effect on the video and tap the Keyframe tool to add the first keyframe.
Add the first keyframe on the timline
Step 3: Apply the Zoom In Effect
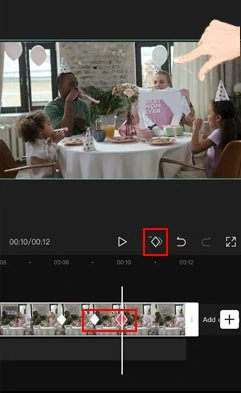
Keep moving the playhead and stop where you wish the zoom in effect to ends. Tap the keyframe tool again to add the second keyframe. Then, unpinch on the video with your fingers to scale up the video size and position the video for the area of the video you’d like to zoom in. Done. As you playback the video, the video will automatically zoom in for the area you selected.
Add the second keyframe and unpinch finger to zoom in on a video
Step 4: Apply the Zoom Out Effect for the Rest of the Video
Move the playhead and place the third keyframe and move the playhead further and place the fourth keyframe and pinch to scale the video size back to normal. Then the video shall zoom back automatically to the original size. The distance of two keyframes will decide the speed of the zoom in and zoom out effect on the video.
Add another two keyframes and pinch to zoom out on a video
The resulting zoom in effect on a video from the example above:
Zoom in and zoom out on a video by CapCut
Step 5: Preview and Export the Video
Now, It's Your Move
So, now you know how to zoom in on a video using Jump Cut and Keyframe techniques. Hopefully, you find our tutorial helpful and enjoy the video tools we recommended. So, start creating zoom in effect on your video for greater tutorial videos or product reviews, now!


FlexClip AI Video Maker
Reach professional-quality videos faster with easy editing tools, templates, and smart AI.
Start Now for Free
Hot & Trending
-

Best Ways to Find Music in YouTube Videos
-

Instagram Story Video Quality Bad After Upload? Fix It!
-

How to Repost Video on TikTok & How to Remove TikTok Repost
-

Improve Video Quality Online: 3 AI Video Quality Enhancers You Can't Miss
-

4K Convert to HD 1080p without Watermark: Best 4k Video Converters
-

Top 13 Birthday Video Makers with Music and Effects Free
-

How to Search Filters on TikTok & Use a Filter You See - TikTok Filter Guide
-

Large Collection of Creative and Funny Birthday Video Ideas for Ones You Care