Suppose you came back from your friend's wedding ceremony and you shot some terrific videos and images for them. And you really wanna make parts of the video or series of images into a GIF to post on Instagram or Facebook. So, how to do it?
Well, in this post, we will walk you through an A-to-Z tutorial on how to easily make a GIF in PhotoShop using both videos and images and offer you a free Photoshop alternative to creating captivating GIFs in minutes.
Here’s What You Will Learn:
How to Make Animated GIFs in Photoshop
Adobe Photoshop is more than an expert photo-retouching tool. It’s also a workhorse for making animated GIFs, using either video or image assets. So, let’s find out how to make a looping GIF in Photoshop in these two mainstream ways respectively.
Make a GIF in Photoshop from a Video
A slam dunk GIF made by Photoshop using a video
Open Photoshop CC and hit “Create New” > set the width, height, resolution, color mode (RGB color, and 8 bit for web use) and under the “Advanced Optons” you may set the Color Profile to Srgb IEC61966-2.1 > Click on “Create”

Create the canvas and color mode for a GIF in Photoshop
Remember, the higher the resolution and width/height, the bigger the physical size of the GIF file. If the GIF is mostly used for posting online and on social media, do select the “RGB” color.
Head to “File” > “Place Embedded” > select the clips in the folders and hit the “Place” button to upload it to the Photoshop as a layer > hold “Shift” key (for proportional scaling) and drag and drop the video to fill the negative space of the canvas > go to “Window” > hit “Timeline”
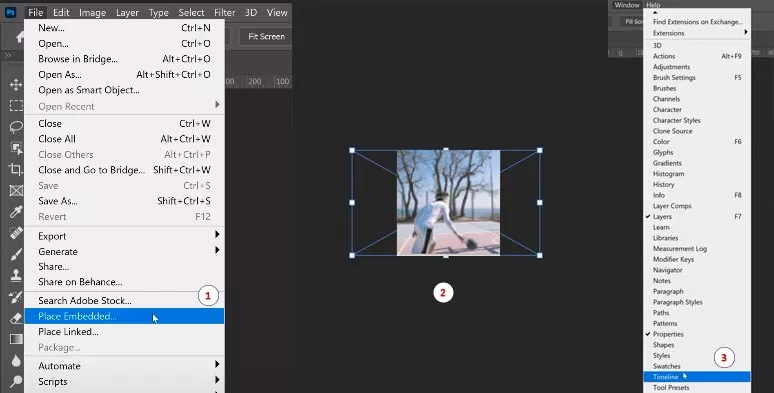
Import and resize clips and open timeline window in Photoshop
On the timeline drop-down, select “Create Video Timeline” and left-click on it > your clips will be added to the timeline > scrub through the playhead to choose the start and ending frame of the GIF and move the slider to trim the clips.
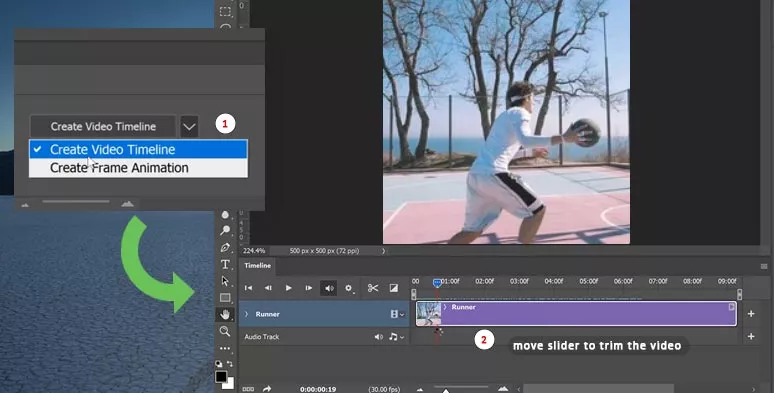
Create a video timeline and trim the video
Click on the 4 line icon > select “Loop Playback > preview the final effects of the GIF. Now, you can have the looping animated GIF.
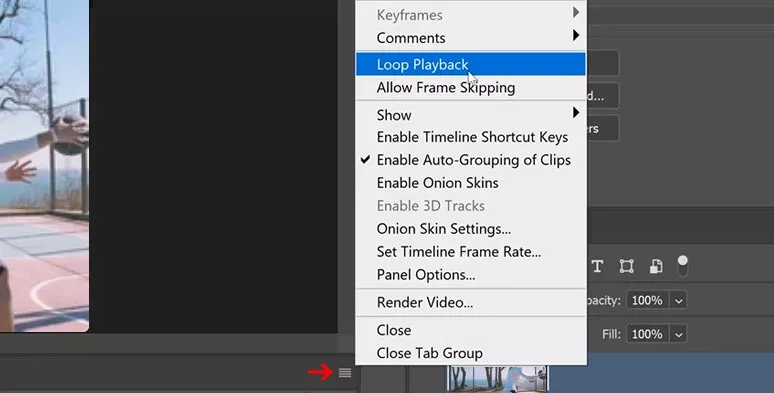
Set loop play effects for a GIF in Photoshop
Go to “File” > “Save for Web” (legacy) > Select “GIF” for the format and set “Loop Option” as “forever” > hit the “Save” button. Done. Find out how to make GIF transparent
Make a GIF in Photoshop from Images
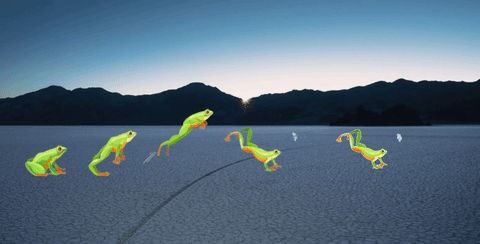
A jumping frog created by a series of images in Photoshop
If you use the continuous shooting mode of your camera or iPhone to shoot a moving subject or happen to have several comic images in succession, then you can use make an original GIF in Photoshop with ease. Check top 7 images to GIF converter.
Go to “File” > “Scripts” > “Local Files into Stack” > browse your image folder and upload images in batch to Photoshop
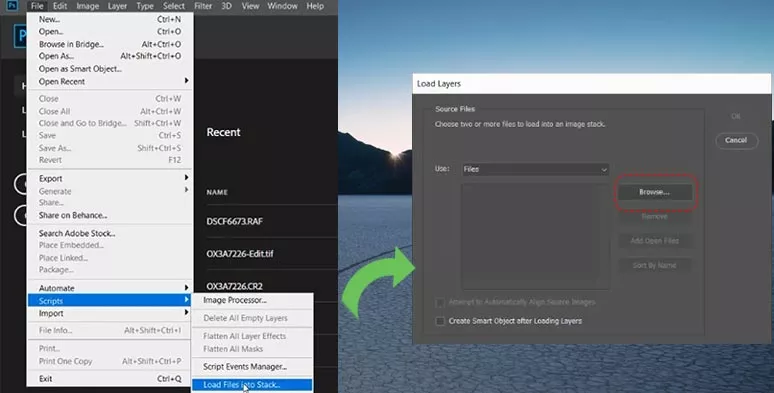
Import multiple images into Photoshop as many layers
Head to “Window” > hit “Timeline” > select the drop-down option “Create Frame Animation” and left-click on it; then the first image layer will be added to the timeline > click on 4 lines icon > select “ Make Frames from Layers”, then all the image layers will be added to your timeline.
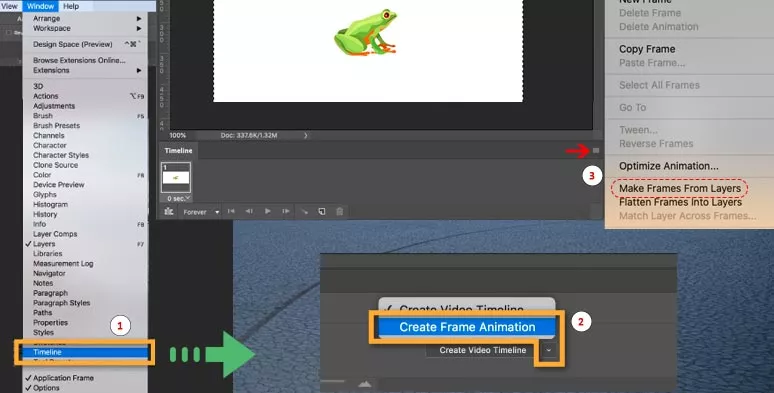
Create frame animations and add all images to the timeline
If you find images are not in chronological order, just click the 4 lines icon and select “Reverse Frames”. Then all images will be in the right order.
Shift+click to select all the images > hit drop-down option > Other > set the delay time to 0.15 secs, which works best for a smooth looping GIF > below, set the loop as “Forever. Then preview the looping GIF.
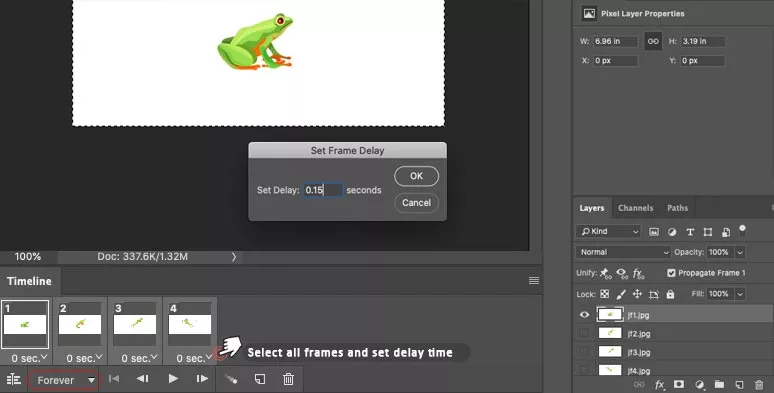
Set delay time and looping effects for all frames
Go to “File” > “Export” > “Save for Web (Legacy) > select GIF as the format and set “Loop Option” as “forever” > hit the “Save” to export a GIF from the PhotoShop
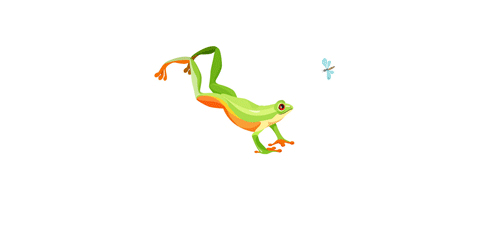
The exported GIF made from images in Photoshop
Perfect Photoshop Alternative to Creating Compelling GIFs
Though Photoshop seems to be a fantastic software to make GIFs from videos or images, its drawbacks are also obvious:
In this respect, a flawless Photoshop alternative to creating captivating GIFs is FlexClip, a feature-packed online video editor, with perfect integration with Giphy’s vast GIF assets, and tons of user-friendly video tools for you to create unparalleled GIFs.
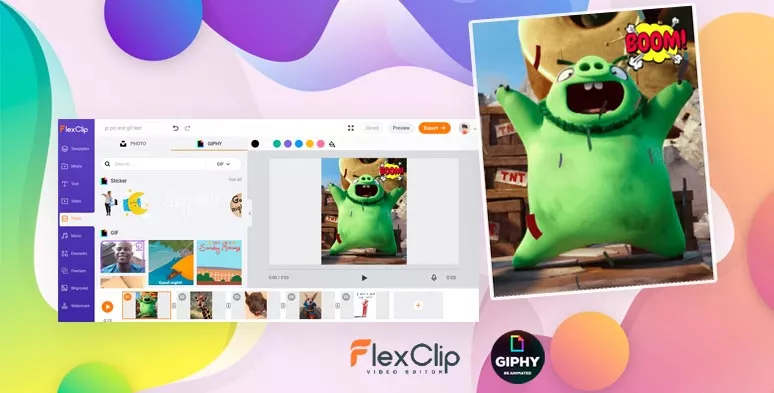
FlexClip GIF maker

Apart from uploading your assets to create a GIF, you may also explore the hottest Giphy GIF assets in the “Photo” sidebar and royalty-free videos, images within FlexClip to create your GIF project. Then use the trimmer to decide the beginning and end of the GIF.
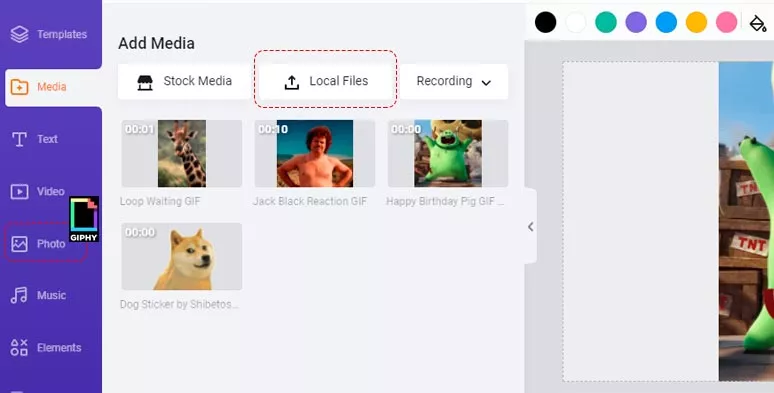
Upload your GIF, images, video assets to FlexClip GIF maker
Head to “Move” on the left toolbar. With one click, you can set the perfect aspect ratio of your GIFs for Instagram, Facebook, or TikTok, etc. Then slightly adjust the imported assets to fill the negative space.
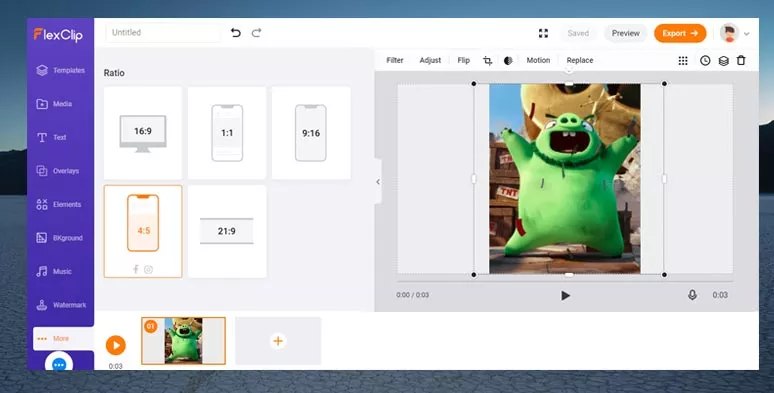
Adjust the aspect ratio of a GIF
To make your GIFs second-to-none, you can easily add designer-made text animations, and customize their color scheme, fonts, motions. While the featured elements give you wings to poke fun at an idea or person in the GIF or can be served as great call-to-actions for branding and marketing.
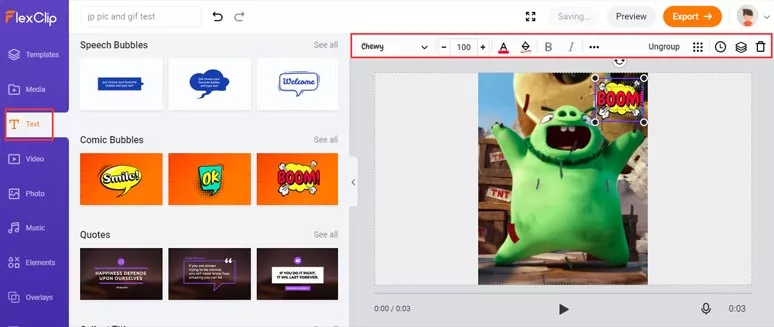
Add text animations and elements to a GIF
Preview your great GIF works > hit the “Export” button > select “GIF” ’and customize its resolution and fps to download the GIF to your local computer. You may also save it to your Dropbox as well.
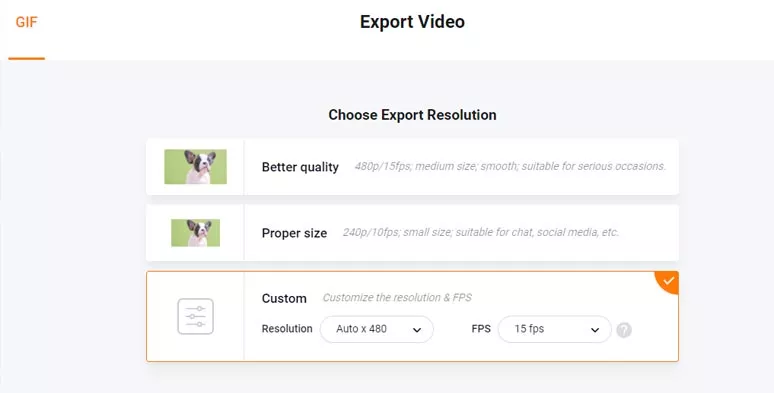
Export GIFs from FlexClip GIF maker
Final Thoughts
So, hopefully, now you know how to make a cool GIF in Photoshop using your videos and images. If you want to enjoy a hassle-free GIF-making experience with tons of stylish GIPHY GIF assets and royalty-free stock assets, FlexClip can also be your man. Start using FlexClip or Photoshop to create your first GIF now.


FlexClip AI Video Maker
Reach professional-quality videos faster with easy editing tools, templates, and smart AI.
Start Now for Free
Hot & Trending
-

7 Best Ways to Find Music in YouTube Videos
-

Instagram Story Video Quality Bad After Upload? Fix It!
-

How to Repost Video on TikTok & How to Remove TikTok Repost
-

Improve Video Quality Online: 3 AI Video Quality Enhancers You Can't Miss
-

4K Convert to HD 1080p without Watermark: Best 4k Video Converters
-

Top 13 Birthday Video Makers with Music and Effects Free
-

How to Search Filters on TikTok & Use a Filter You See - TikTok Filter Guide
-

Large Collection of Creative and Funny Birthday Video Ideas for Ones You Care