Ever heard about Blender? It is an open-source 3D application used in computer graphics. It is very popular among video game character artists and animation makers and can be used for motion tracking, rigging, rendering, and other art forms in the visual graphics section. This tool has been in existence since 1998 and is managed by Blender Foundation. This tool was designed for the sole purpose of giving the animation computer graphics world a lift. And from the look of things, it is doing just that.
Using the 3D text blender is easy; you just have to apply the right keys. Even with that, there are some situations where people find it difficult to use this software. For that reason, we have taken the time to detail a step-by-step guide on how to create a 3D text using the Blender text 3D software tool. Read on.
How to Create 3D Text with Blender
3D Text in Blender: Everything You Need to Know!
An Easier Way to Create 3D Text
Even with the Blender 3D text tutorial listed above, some people who are new to the software may find it difficult to follow (and of the truth, it is not all that easy). But we will be showing you an alternative: an easier way to pull it off.
This is where we introduced FlexClip: one of the world's most used video and image editing tools. It is also an excellent tool for creating 3D text for videos. It has rich fonts, an easy-to-use interface: one click to turn normal texts into 3D texts, and elegant text animations. So, save yourself the stress of getting it right on Blender 3D text; try out FlexClip instead.
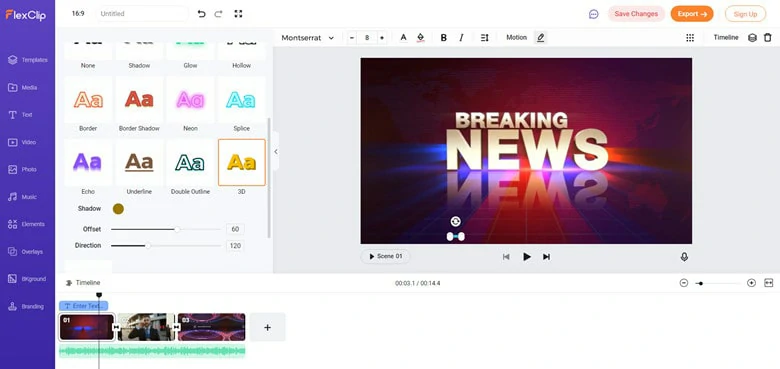
The 3D Text Effect of FlexClip


The Bottom Line
3D texts have proved to be one of the best ways to captivate the viewers' attention; all you need to do is get the right tool. FlexClip is designed to give you that convenience and opportunity to express your artistic abilities. Give it a try! If you find this post helpful, please do share it so that other people may benefit.


FlexClip AI Video Maker
Reach professional-quality videos faster with easy editing tools, templates, and smart AI.
Start Now for Free
Hot & Trending
-

Best Ways to Find Music in YouTube Videos
-

Instagram Story Video Quality Bad After Upload? Fix It!
-

How to Repost Video on TikTok & How to Remove TikTok Repost
-

Improve Video Quality Online: 3 AI Video Quality Enhancers You Can't Miss
-

4K Convert to HD 1080p without Watermark: Best 4k Video Converters
-

Top 13 Birthday Video Makers with Music and Effects Free
-

How to Search Filters on TikTok & Use a Filter You See - TikTok Filter Guide
-

Large Collection of Creative and Funny Birthday Video Ideas for Ones You Care