Windows 10 brings several performance enhancements over the previous versions of Windows. It is sleeker, faster and more productive. However, many users may face performance issues including lag and occasional freezes.
Don't worry. Here are some quick solutions to make Windows 10 faster and improve the performance of video lagging. Keep scrolling to know more.
Can't Miss: 5 Best Free Video Editor for Windows 10>
Part 1. The Main Causes of Video Lagging/ Stuttering on Windows 10
Before directly diving into the various fixes, it's necessary to figure out the causes behind the stuttering problem. Many reasons lead to video lagging on Windows 10, from computer breakdown to video file problems. Let's take a close look at the causes.
Now let's see how to fix video stuttering on Windows 10. (To edit the video or change the video format, try FlexClip for help)
Part 2. Fixes for Video Stuttering Problem
Fix 1. Update Windows
Whether you're facing a video lag or stuttering problem, you first need to check the Windows updates. Each time a new version is released, bugs and problems from the prior version are solved. Update your Windows system if you have bugs.
1. Press Windows + I to launch system Settings and choose Update & Security from the options.
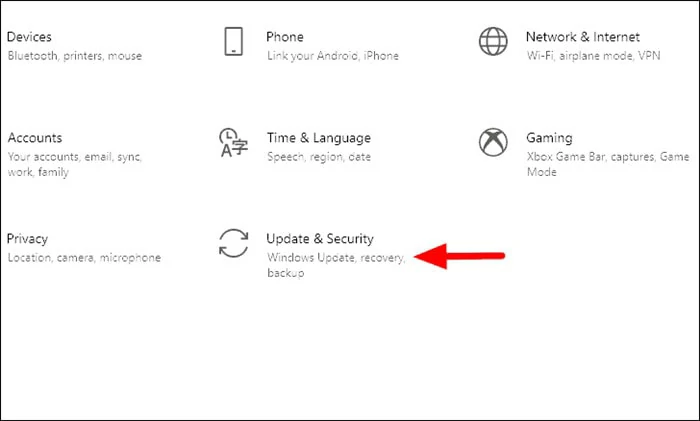
Open Your Windows Settings
2. The ‘Windows Update’ tab will automatically appear. Here click on the ‘Check for updates’ box on the right side of the screen.
3. If any updates are available, Windows will start to download and install them on your system automatically.
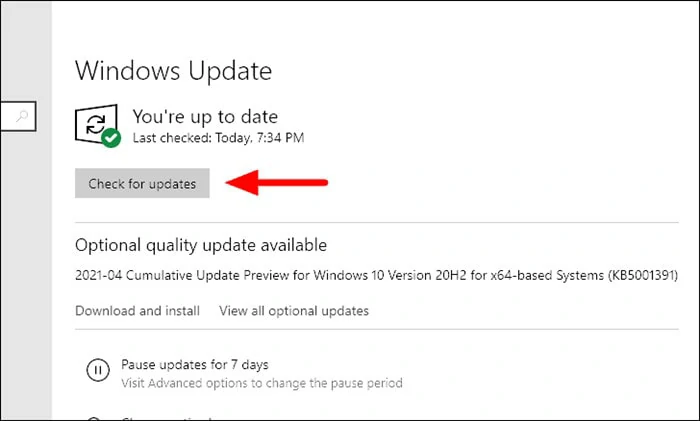
Update Your Windows Version Now
Fix 2. Analyze Hardware Changes on Windows
Hardware changes may cause video lagging or stuttering problems. Therefore, it's a good idea to scan for hardware changes on your PC.
1. Launch Device Manager application and press Windows +R to open the Run command. Next you need to type in 'devmmgt.msc' in the text field and click “OK”.
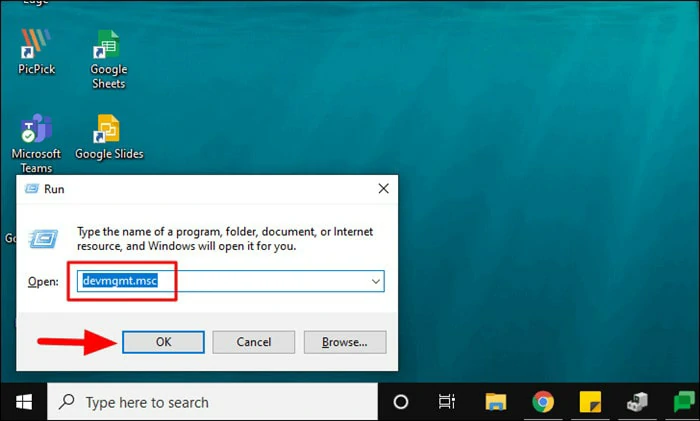
Enter Hardware Settings
2. After you've done this, pick “Scan for hardware changes” from the list. When the scanning is over, try to play the video again to check if the stuttering problem is solved.
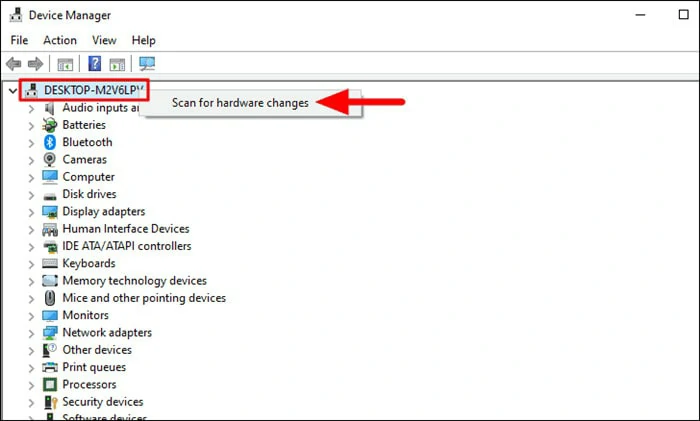
Scan for Hardware Changes
Fix 3. Update Graphics Driver
You may run into a problem if you have an outdated graphics driver. So you have to ensure that your graphics driver is up to date. If you're facing issues with video playback, always check for graphics driver updates.
Firstly, search the Device Manager in the start menu and launch it by clicking on the search result.
Search for the Device Manager
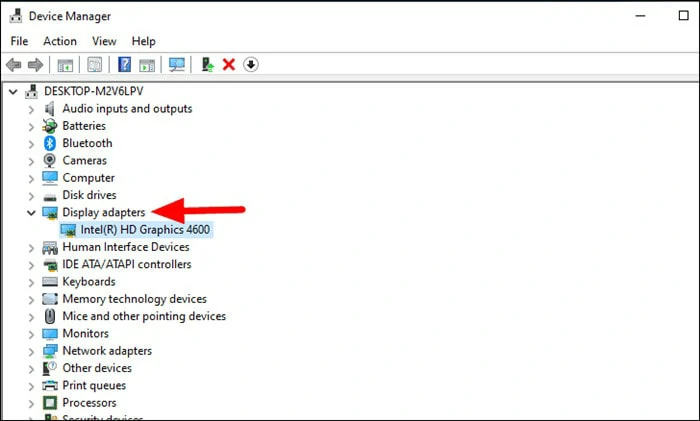
On the ‘Device Manager’ window, double-click on ‘Display Adapter’ to explore the drivers under it.
Right-click on the graphic driver and select Update driver from the drop-down menu.
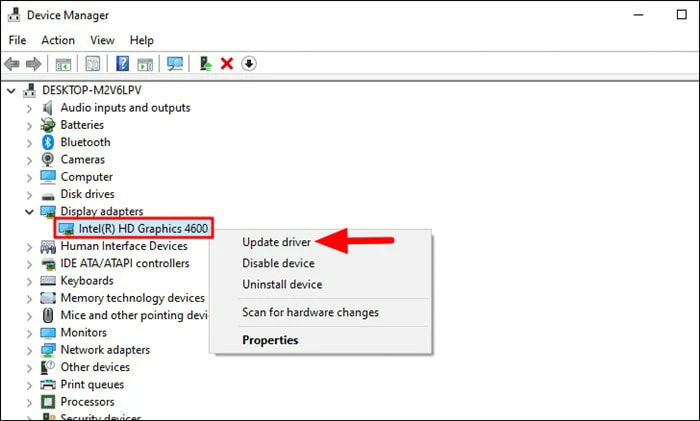
Find the Update Driver Option
The Update driver window will pop up where you can see many options to let the Windows search for the driver or you can browse and manually install it. You can select the first option to update your graphics driver.
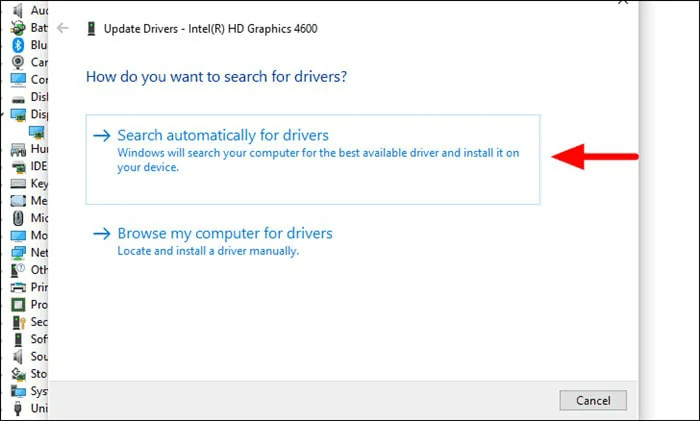
Search Automatically for Driver
Once the update process is finished, reboot your computer to check if the error is fixed.
Fix 4: Reset the Power Plan
Resetting the default power plan is another method to fix the video lagging issue on Windows 10. Here's how to restore it.
Open the Control Panel and choose Power Options.
Now, click on 'Change plan settings' under the 'Selected plan' section.
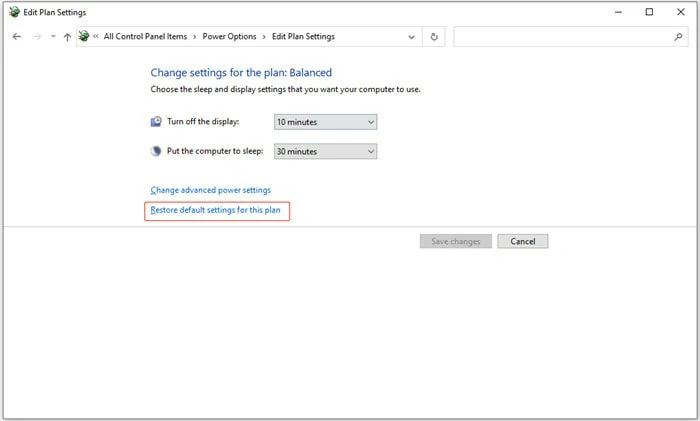
Change the Plan Settings
Confirm this operation and restart your PC.
Fix 5: Modify the Wallpaper Settings
Many users report that after setting a slideshow as the wallpaper, the video they are playing may skip a frame every time the background picture changes. If you're encountering this bug, change the wallpaper settings to fix it.
1. Launch the Start menu and enter the desktop background in the search panel.
2. Head to background settings and change background from Slideshow to Picture or Solid color.
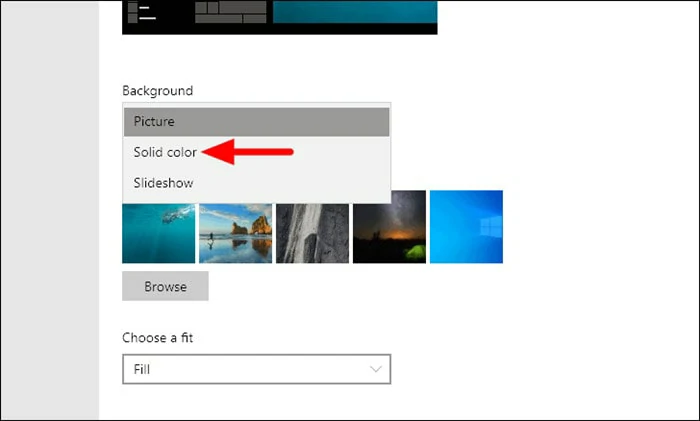
Change the Background Option
Fix 6: Scan for Malware
If malicious items infect your computer, the video lagging problem may occur. Therefore, you need to run a full system scan tool to detect and remove any harmful virus from your computer. After that, try to relaunch your computer and play your video again to see if the problem is fixed.
Part 3. Fix the Video Lagging Issue with VLC Media Player
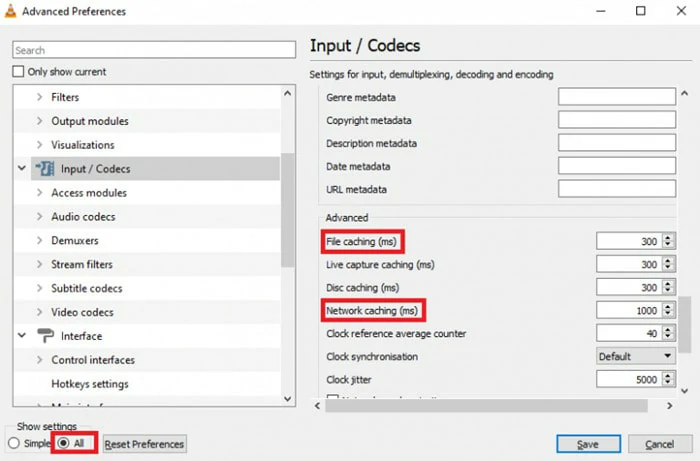
Fix 1: Change the File Caching Value
One common way to fix the video lagging issue with the VLC media player is to change the File Cache value. Because a higher value might lead to HD videos lagging or stuttering. Hence, follow the steps below to alter the cache value.
Find the Preference Option from the Drop down Menu
Move to Input / Codecs and select the checkbox for ‘All’ under ‘Show Settings' at the bottom-left corner.
Move to Input/Output Panel
Here you can change the File caching (ms) value to a smaller value. Afterward, play the video again to see if the lagging is removed.
Fix 2: Disable Hardware Decoding to Fix Video Lagging
Accelerated hardware decoding might cause the video lagging issue. To resolve this, you need to disable the hardware encoding. Check the steps below to turn off the hardware encoding.
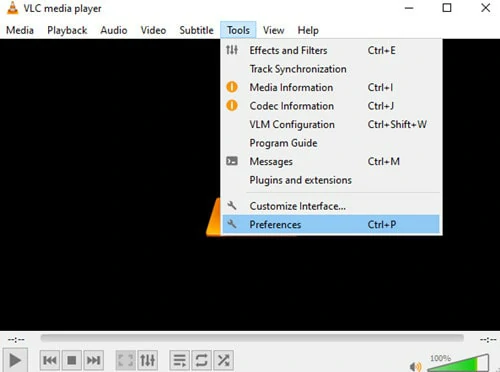
1. Launch VLC and navigate to Tools > Preferences.
2. In the settings window, click on Input and Codecs on the left sidebar.
3. Now, choose the Disable the Hardware-accelerated decoding option.
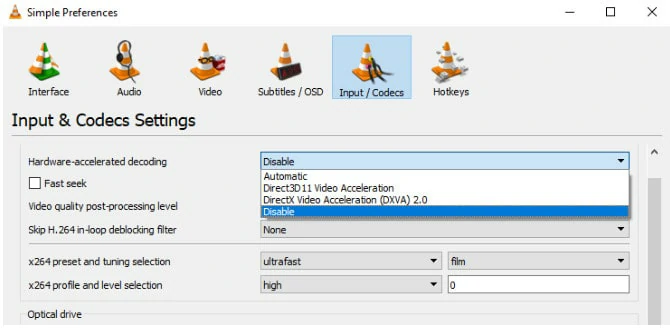
Disable Hardware-accelerated Decoding Option
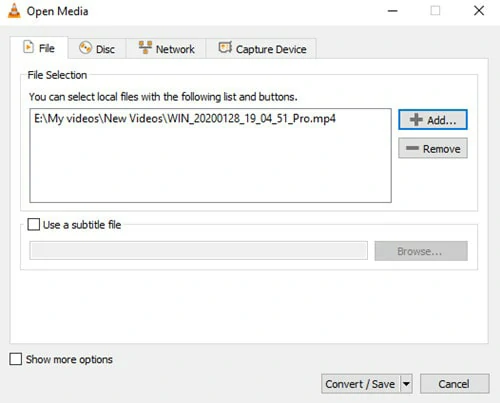
Fix 3: Convert the Video File into a Compatible Format
If you're still facing lagging and stuttering issue with VLC media player, the video format may not be compatible. Hence, you'd better convert the video into a compatible one by following the steps below:
To convert the format, click on the ‘Media’ menu in the main interface, and select ‘Convert/Save’ from the drop-down menu.
Go to File > Click Add button to select the video file you want to convert > Hit the Convert/Save button.
Now set your destination folder and hit the Convert icon.
Convert the Video Format
Once the conversion process is completed, play it again to check if the video runs without any lags.
The Bottom Line
This post lists nine ways to fix video lagging or stuttering problems on Windows 10. Try the methods mentioned above and check if the problem is solved.


FlexClip AI Video Maker
Reach professional-quality videos faster with easy editing tools, templates, and smart AI.
Start Now for Free
Hot & Trending
-

Best Ways to Find Music in YouTube Videos
-

Instagram Story Video Quality Bad After Upload? Fix It!
-

How to Repost Video on TikTok & How to Remove TikTok Repost
-

Improve Video Quality Online: 3 AI Video Quality Enhancers You Can't Miss
-

4K Convert to HD 1080p without Watermark: Best 4k Video Converters
-

Top 13 Birthday Video Makers with Music and Effects Free
-

How to Search Filters on TikTok & Use a Filter You See - TikTok Filter Guide
-

Large Collection of Creative and Funny Birthday Video Ideas for Ones You Care