The rewind effect was initially employed in movies to emphasize characters or plot-relevant elements. However, with the rise of social media, the rewind video effect has become prevalent across a multitude of project types, ranging from music videos and promotions to reaction videos and vlogs, offering entertainment value. If you're eager to hop on this trend but unsure where to begin, fear not. In this blog, we'll guide you through three methods to create a rewind video using iMovie, Premiere Pro, and online tools. Let's dive right in.
Also Interested in: How to Reverse a Video in CapCut>>
Make Rewind Video Effect Online - FlexClip
Searching for an all-in-one solution to craft a rewind video online? Look no further than FlexClip, a versatile video editor designed for simplicity and efficiency. Not only does it facilitate easy creation of rewind effects, but it also provides access to a vast library of rewind sound effects, green screen footage for rewind videos, and VHS overlays, ensuring a seamless editing experience. Moreover, advanced features including speed adjustment, text addition, video shape modification, and more are readily available to help elevate your rewind videos to the next level.
Reverse Video Feature in FlexClip
How to Make a Rewind Video Online Using FlexClip
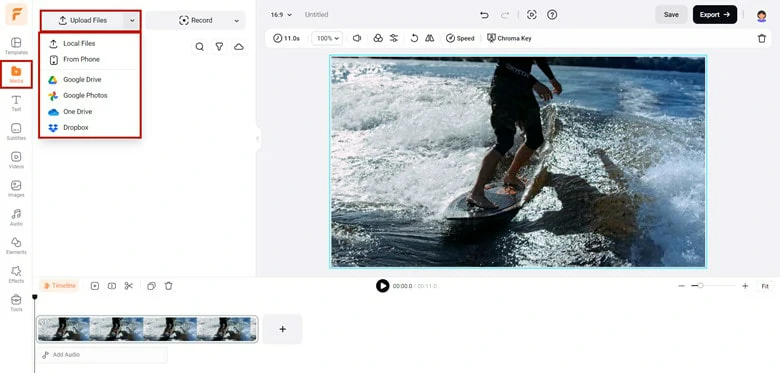
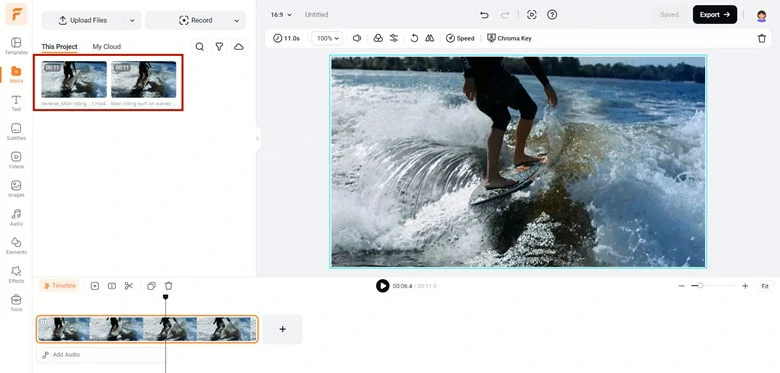
Upload the Video You Want to Reverse to FlexClip


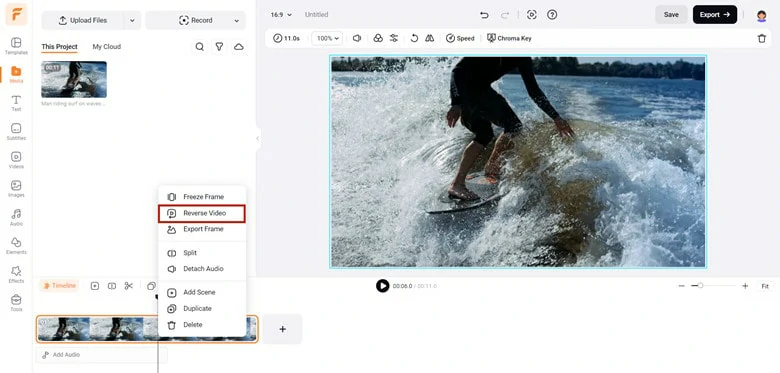
Reverse Video in the Timeline
Arrange the Video Sequence to Create the Rewind Effect
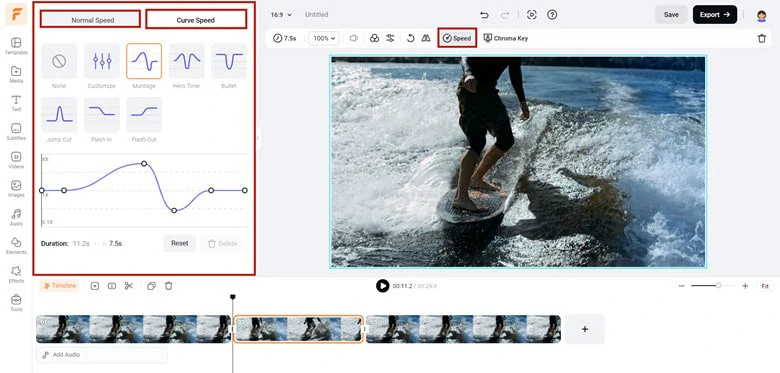
Change the Speed of the Reversed Clip
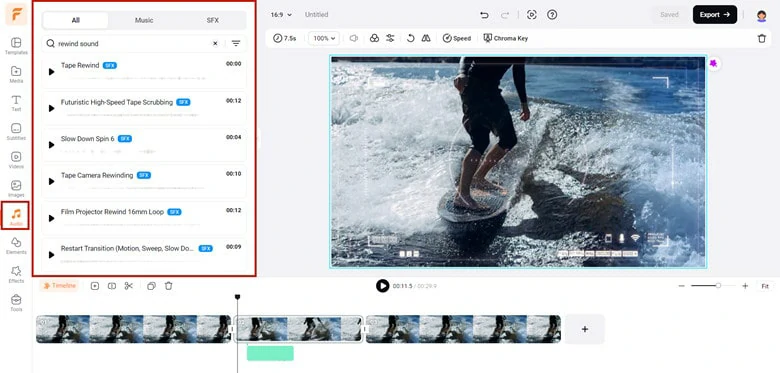
Enhance the Rewind Video Effect
Create iMovie Rewind Video Effect on Mac
iMovie is a freebie for Mac users seeking to fulfill video and audio editing needs. As a robust video editor, it boasts a broad array of features tailored to meet various requirements, including a video reverser, chroma key tool, picture-in-picture effect, and the ability to rewind videos. Its user-friendly interface and intuitive operation make it accessible to users of all levels, ensuring even beginners can effortlessly begin editing with just a few clicks. To utilize the iMovie rewind feature, simply follow the steps outlined below.
Create a Rewind Video Effect on Mac Using iMovie
Make Rewind Video Effect Premiere Pro
For professionals who look for an industry-standard software to conduct editing task, Premiere Pro from Adobe must appear in the recommendation list. Offering a comprehensive array of advanced features, it provides users with the ability to achieve stunning video effects while maintaining precise control over various parameters. Creating a rewind video effect is simple with Premiere Pro—all you need is your video and a few minutes to follow the steps below:
Finally, preview the VHS rewind effect video to ensure everything looks as intended. Once satisfied, proceed to export the video to your computer.
Create a Rewind Video Effect Using Premiere Pro
FAQs:
The difference between rewind and reverse videos lies in their effects and execution. A rewind video visually simulates the physical rewinding of a tape, achieved through editing to create a backward playback illusion.
Conversely, a reverse video directly reverses the playback direction, displaying actions in reverse chronological order without a physical rewinding effect. Rewind videos give the impression of the entire content rewinding, while reverse videos solely reverse individual actions or scenes. Both offer distinct visual effects and storytelling possibilities.
Unfortunately, iPhone doesn’t have the built-in feature to reverse or rewind video for creating a rewind video effect. So, you need to use some third-party tools to achieve that goal. If you don’t want to download any software or cost any penny, you can rely on online video reversers like FlexClip.
There are numerous websites offering resources for obtaining rewind effect green screen footage. For instance, Shutterstock, a renowned provider of photos, videos, and illustrations, is an excellent source for accessing royalty-free rewind effect green screen resources.
The Bottom Line
This blog covers the three methods for creating a rewind video effect using iMovie, Premiere Pro, and an online tool. Hopefully, after going through the post, you've discovered your preferred method for achieving this captivating rewind video effect. Now, it's your turn to dive in and get started right away!


FlexClip AI Video Maker
Reach professional-quality videos faster with easy editing tools, templates, and smart AI.
Start Now for Free
Hot & Trending
-

Best Ways to Find Music in YouTube Videos
-

Instagram Story Video Quality Bad After Upload? Fix It!
-

How to Repost Video on TikTok & How to Remove TikTok Repost
-

Improve Video Quality Online: 3 AI Video Quality Enhancers You Can't Miss
-

4K Convert to HD 1080p without Watermark: Best 4k Video Converters
-

Top 13 Birthday Video Makers with Music and Effects Free
-

How to Search Filters on TikTok & Use a Filter You See - TikTok Filter Guide
-

Large Collection of Creative and Funny Birthday Video Ideas for Ones You Care