As casual as a reverse clip may sound, it is really effective in video editing, and it has been widely used around video content creation. It can be really cool when applied in an entertainment video and can be descriptive when creating presentation videos, giving a more artistic or comical effect to the particular scene or action in the video.
To play videos backwards, you will need a reverse video editor tool like the iMovie. In this article, we will show you how to rewind a video on iMovie.
Contents:


Create Video Faster with FlexClip's Pre-Made Templates →
Start from Scratch Easily with FlexClip's Online Video Maker →
Also Read: How to Reverse a Video on TikTok >
Part 1 How to Reverse a Video in iMovie on Mac
iMovie makes it easier to reverse videos. i.e. play videos backwards. But, if you're new to the Mac system and don't know how to use iMovie to rewind a clip, here is a detailed tutorial guiding you on how to reverse a video on iMovie on Mac.
Reverse a Video in iMovie on Mac
Pro Tip: In order to get the best reverse video effect, you’d better to mute the audio or detach the audio file before reversing the video footage. Check out our post on how to mute audio from a video in details.
Part 2 How to Reverse a Video in iMovie on iPhone/iPad
Struggling to reverse a video in iMovie on your iPhone or iPad? Well, you’re not alone, as iMovie on iOS device does not have a reverse feature just like in the Mac OS version for you to play a video backwards!
Therefore, if you do need to reverse your iPhone video, you’ll need to turn to a third-party iMovie alternative for playing the video backwards. The good thing is many apps you can use for this purpose, such as CapCut, InShot, and more. Don't hesitate to explore these iOS apps and download them on your device for reversing a video on your iPhone without any hassle.
However, sometimes, you might want to reverse your videos without installing an app on your iPhone because of storage problems. Is there a way to reverse a video on an iPhone without an app? The answer is yes; keep reading to learn the way!
Bonus: Best iMovie Alternative to Reverse a Video Online for Free
As we said above, if you're working on your iPhone/iPad, or you're using a Windows PC, you can't reverse a video in iMovie. And now, you're having trouble finding a video editor that can help you reverse video without it, go and search for FlexClip right now!
FlexClip works not only for Windows but also on Mac for you to reverse a video and do more edits to take your video to the next level. What's more, FlexClip allows you to directly import files from your iPhone simply by scanning the QR code, i.e. you can reverse your iPhone video online instantly without data transfer.
Now, let's try FlexClip video editor for reversing your video directly online for free and perfect it using its powerful features:


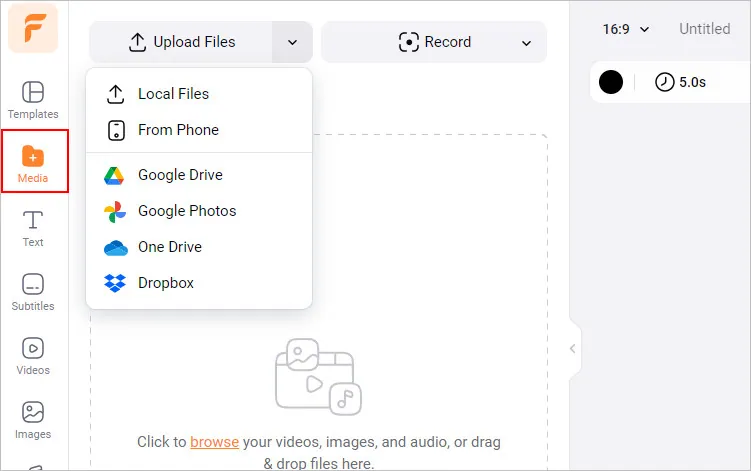
Reverse a Video Online with iMovie Alternative - Upload
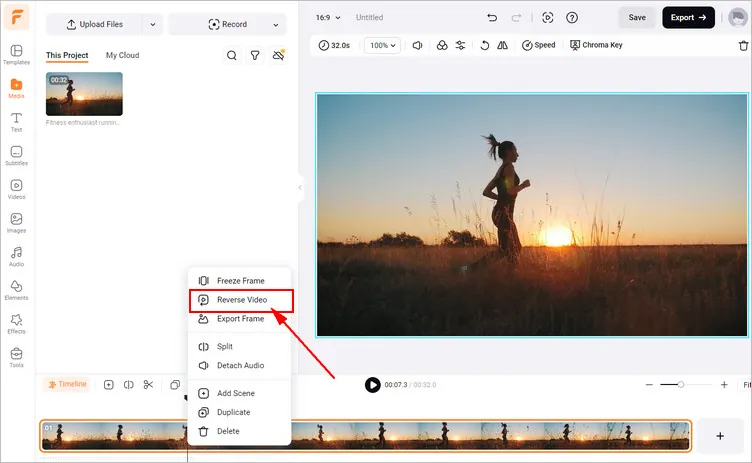
Reverse a Video Online with iMovie Alternative - Reverse
That's it! Now, you can download your reversed video directly and seamlessly share it via a link, or post to social media and beyond. Or you can keep editing using FlexClip’s powerful features and stunning effects to level up your video, such as adding text, editing audio, adding overlay effects and stickers, etc.
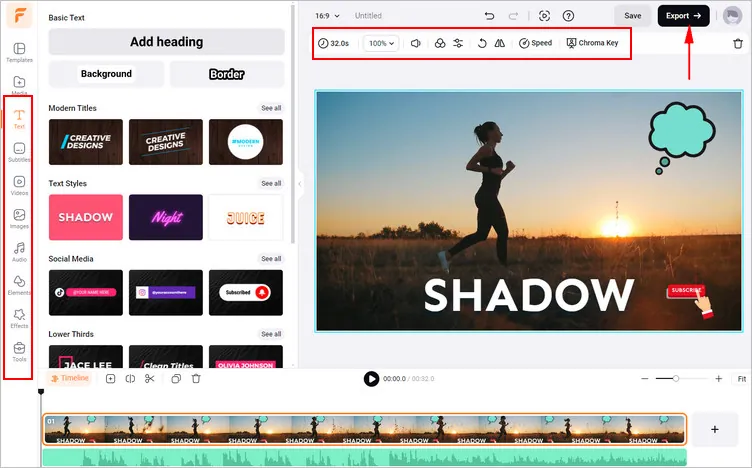
Image Board: Reverse a Video Online with iMovie Alternative - More Edits
No more ideas to customize your video? You can turn to FlexClip’s pre-made templates for some inspiration.


FlexClip AI Video Maker
Reach professional-quality videos faster with easy editing tools, templates, and smart AI.
Start Now for Free
Hot & Trending
-

Best Ways to Find Music in YouTube Videos
-

Instagram Story Video Quality Bad After Upload? Fix It!
-

How to Repost Video on TikTok & How to Remove TikTok Repost
-

Improve Video Quality Online: 3 AI Video Quality Enhancers You Can't Miss
-

4K Convert to HD 1080p without Watermark: Best 4k Video Converters
-

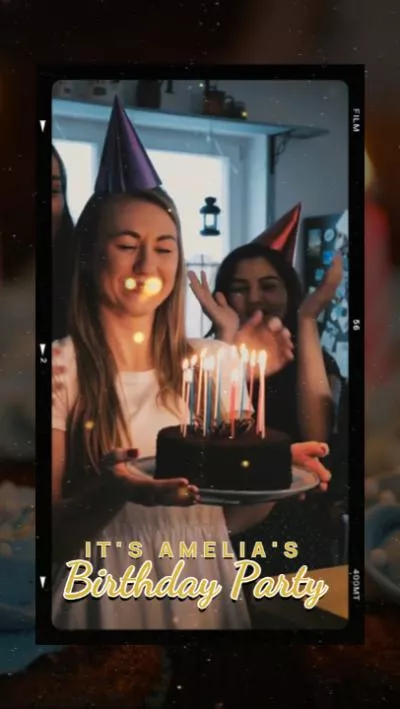
Top 13 Birthday Video Makers with Music and Effects Free
-

How to Search Filters on TikTok & Use a Filter You See - TikTok Filter Guide
-

Large Collection of Creative and Funny Birthday Video Ideas for Ones You Care