Scrumptious recipe videos are the most inviting piece of content online in part because it is our instinct to look for something fresh and palatable to eat.
So, whether you plan to share your secret pancake recipe with foodies on YouTube or unveil the latest dishes of your restaurant, etc, making a mouthwatering recipe video and later posting it online are a proven strategy to boost higher CTR and your online presence.
In this inspirational post, we break down the trending recipe videos into 10 practical tips and will walk you through how to set up camera gears, lighting, and how to film and edit recipe videos with a free online video editor. So, you can make tasty recipe videos yourself at home in a breeze.
Here’s What You Will Learn:
10 Best Hacks to Make Tasty Recipe Videos Yourself at Home
To make a captivating recipe video, apart from your original recipe and magic cooking skills, you need to consider how to attract foodies in the first 3 seconds, how to make your tutorial easy-to-follow, and how to make your food come alive through the lens and what’s more, how to edit cooking clips to make all that happen.
Having studied dozens of viral recipe videos made by YouTube food influencers like Tasty, etc., and interviewed many professional food videographers, we put together these 10 proven strategies that will help you create a winning recipe video from scratch. So, let’s dive in. Discover more free recipe and food video templates.
1. Prepare the Recipe
An engaging recipe video starts with a well-prepared recipe. Don't get us wrong. What we mean here is more than buying all the ingredients needed. What you should do is:
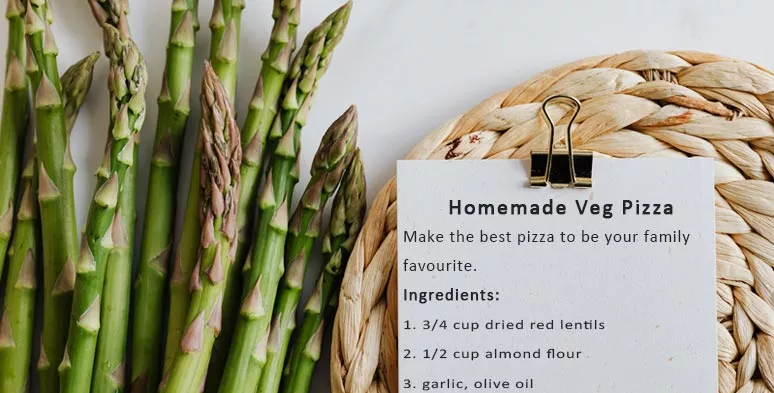
Prepare the recipe ingredient list and print it out
2. Setup the Cooking Scene
Ideally, the double-sided Kitchen island or counter would be the best place for making recipe videos. It offers you enough room for cooking while allowing you to put the tripod, camera, and key light on the opposite side of you.
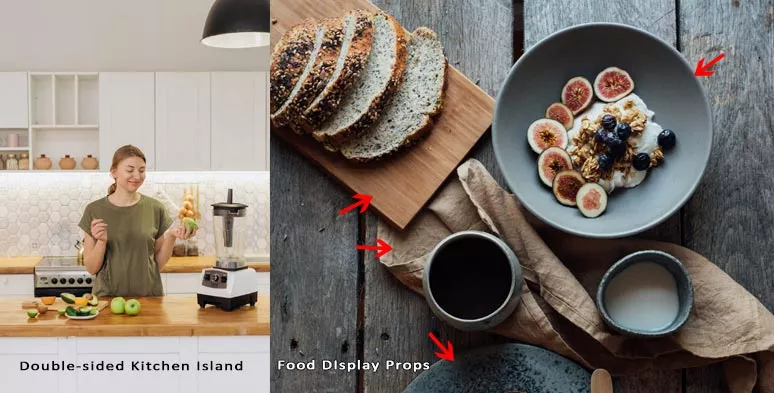
Double-sided kitchen island and food display pros are essential
Meanwhile, to add the cinematic flair to your recipe video, using the right props would be the icing on the cake. Popular ornament items like linen tablecloths, vintage platters, and bowls with styles and decorative candles, and even fruits and vegetables will take your recipe videos to a notch.
One more thing, do keep all the utensils and props in an orderly fashion. Check top 10 tips to create cinematic videos.
3. Get the Perfect Lighting
Lighting is the soul of videography. For indoor filming of a recipe video, having consistent, soft, and evenly lit lighting decides the game.

Lighting setup for making a recipe or food video
A popular overhead lighting setup would be:
4. Camera, Angles, and Lens
Nowadays, most smartphones and even entry-level mirrorless cameras or a DSLR can record 1080P full HD videos and some can even produce 4k videos with the time-lapse feature.
However, what truly sets your recipe videos apart from others is how you use your camera to present your recipe and cooking process. Here are our expert advice:
Besides, think about the aspect ratio of the video you want for different social media. For example, secure your camera vertically (9:16) for Instagram or horizontally (16:9) for YouTube.
5. Use Close-up Shots
Close-up shots are the most iconic technique to show the texture and clarity of the food. Some of the most classic chose-ups scenes involve the display of the finished dishes, sizzling food being cooked on the pan and show how you slice the beef thinly or mix different ingredients, or, etc. Overall, close-up shots are must-have scenes for a recipe video.
Check how many close-up shots YouTube food influencer Tasty used in her recipe video
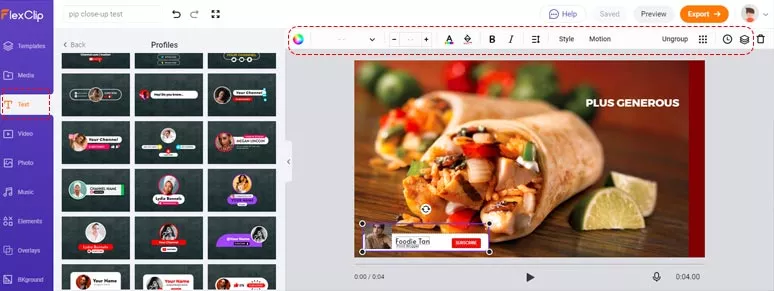
Another cool way to display the close-up shots is using picture-in-picture effects. So, you can create dramatic close-ups by displaying the same cooking scenes from different perspectives.
A picture-in-picture closeup shot made by FlexClip
To do so, all you need is FlexClip, a free and feature-packed online video editor that makes video editing easy and fun. There is no software to download and you can easily access its millions of royalty-free stock assets and dozens of useful video tools.
Create picture-in-picture close-up shots by FlexClip

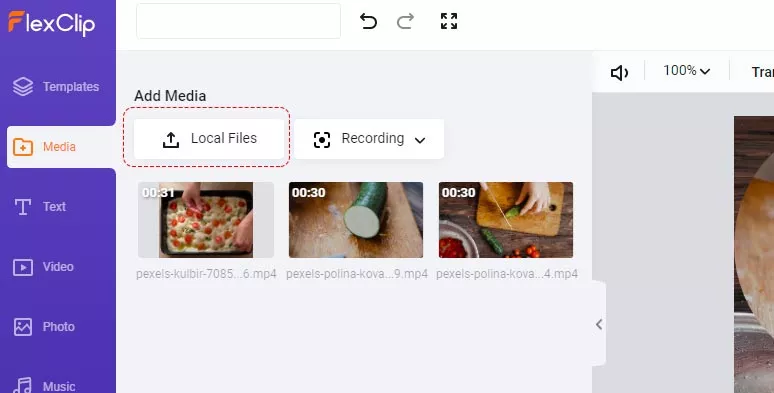
Upload video and image assets to FlexClip video maker
Add one video footage to the storyboard > add another video into the video by clicking the “Picture in Picture” icon. You may also crop the second video into a circle or rectangle shape.
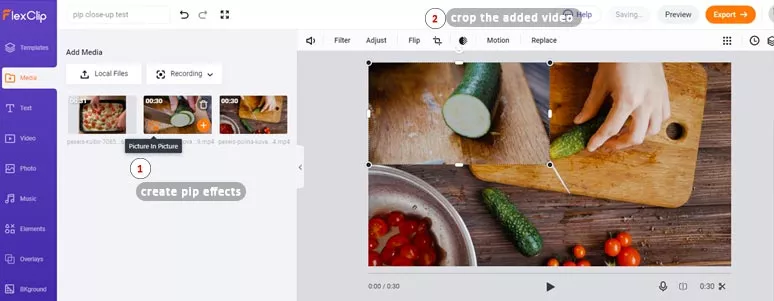
Add the second video over a video
Drag and drop the video to scale it down and place it wherever you want in the frame and use the trimmer to adjust the duration of the video or customize the in and out effects for the motion of the video, etc. You may add featured text animations as well.
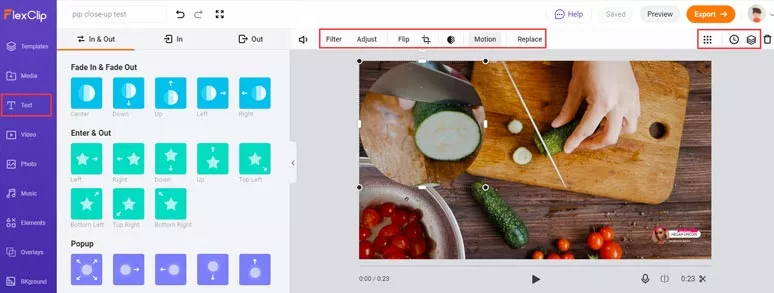
Customize the picture-in-picture video by changing its motion, duration,etc.
6. Control the Pace: Shoot Time-lapse
Except for the highlights of the cooking scene, no one will be patient enough to watch the entire cooking process. That’s why shooting time-lapse is often employed to speed up the pace for the recipe video.
Use FlexClip to speed up the food preparing process
If your camera or smartphone has the time-lapse feature, you can easily achieve the larger-than-life effects. If it’s not available, FlexClip’s speed changer will also help you create the magic.
Upload video footage to FlexClip > add the clip to the storyboard > click on the “Speed” to speed up your original video.
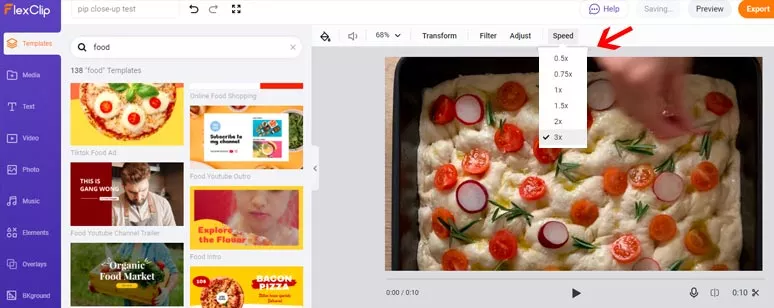
Create the timelapse effects by speeding up the original video
7. Use Camera Tricks
Well, in addition to shooting time-lapse videos, another widely popular trick to speed up the ingredient preparing process is by making ingredients appear out of nowhere.
Split and merge two clips to create a camera illusion
All you need to do is film one food on the counter and later add another food or more and then cut the in-between clips. Do remember to use a tripod and consistent lighting, which is vital for splitting and merging two clips in post-production.
So, upload the clips to FlexClip’s timeline mode and split the clips into 3 and delete the in-between clips, and then merge two clips, and the magic appears.
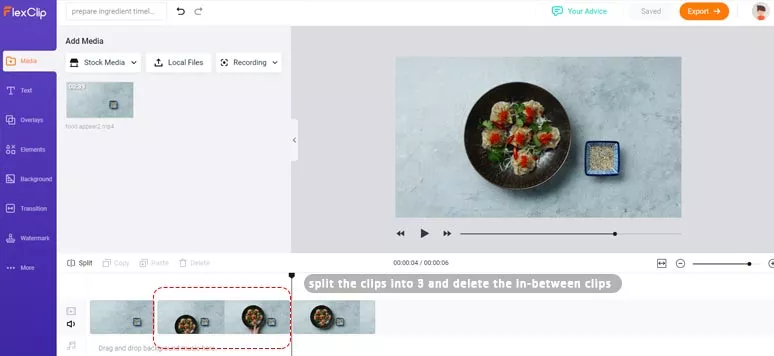
Use FlexClip to make ingredients appear by deleting in-between clips
8. Bring Movement to Recipe Videos
Now, you have the close-up shots and time-lapse, etc, it’s time to make your recipe video come alive. You need to add movements to the food.
Here, are some of the popular strategies used by many food influencers on Instagram and YouTubers, etc.
Sprinkle grated cheese over pasta
Eat a piece of cake with a fork
Break off bread
It’s a terrific food scene to end or introduce your recipe video, isn’t it?
9. Add Animated Texts, Music, and Voiceover
To make it easier for global viewers to follow your food tutorial videos, you need to add texts to certain parts of the video while adding music and sound effects will further create the moods for your recipe video.
With hundreds of designer-made text animations and thousands of royalty-free music of different genres, FlexClip will help you add animated texts and music to your recipe video in simple clicks.
Just upload video assets to FlexClip > select the customizable text block on the left sidebar > customize the fonts, color scheme, and motion, style, duration, etc. Done.
Add animated text blocks and customize details
The music library is also on the left sidebar. You can enter keywords to select an ideal music or sound effect or upload your audio to further spice up the recipe video.

Add music and sound effects or even voiceovers to recipe videos
10. Create Thumb-stopping Intro & Outro
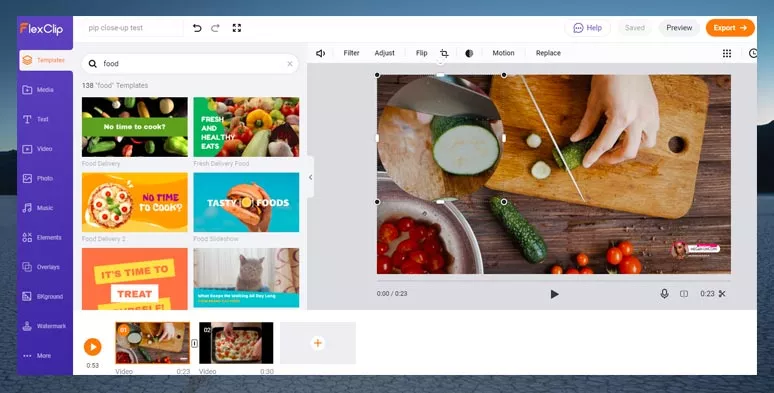
As mentioned above, the first 3 seconds of the recipe video are so vital to grab foodies’ attention. If you are not good at designing an intro or an outro for your recipe video, then using the professionally designed templates will save you tons of time.
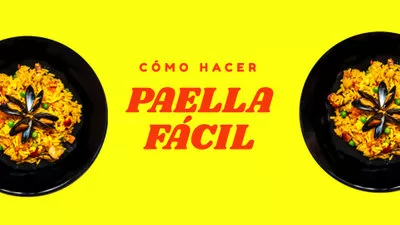
Just access FlexClip video editor > upload your video and photo assets > click on “Templates” on the left sidebar and enter keywords like “recipe or food” > select your favorite free recipe template > customize all the elements and export the video.
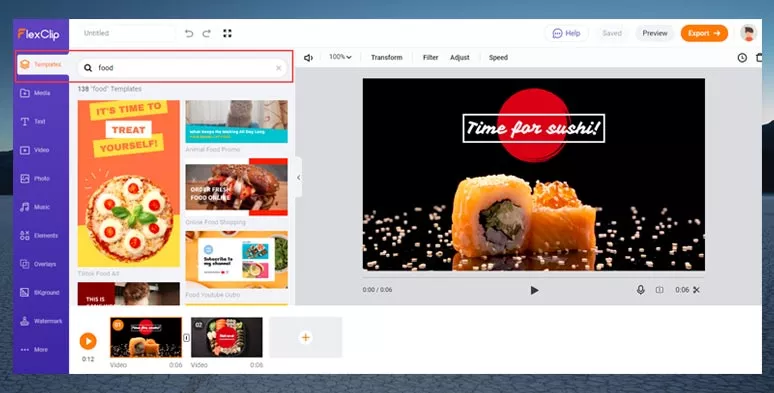
Select a dazzling food intro or outro templates in FlexClip
Just don’t forget to leave your website address for the potential customers in the outro or add your logo to boost the branding as well.
Now, It’s Your Showtime
Well, if you’ve made it here, we have reasons to believe that you do find our post helpful and we are glad to see that. So, it’s more than pressing the record button to make a scrumptious recipe video. With your cooking skills, originality, and imagination, careful planning, together with the help of FlexClip online video editor, you can create an amazing recipe video like no other!


FlexClip AI Video Maker
Reach professional-quality videos faster with easy editing tools, templates, and smart AI.
Start Now for Free
Hot & Trending
-

Best Ways to Find Music in YouTube Videos
-

Instagram Story Video Quality Bad After Upload? Fix It!
-

How to Repost Video on TikTok & How to Remove TikTok Repost
-

Improve Video Quality Online: 3 AI Video Quality Enhancers You Can't Miss
-

4K Convert to HD 1080p without Watermark: Best 4k Video Converters
-

Top 13 Birthday Video Makers with Music and Effects Free
-

How to Search Filters on TikTok & Use a Filter You See - TikTok Filter Guide
-

Large Collection of Creative and Funny Birthday Video Ideas for Ones You Care