Time lapse is a technique used to capture a series of photos or frames at set intervals over a period of time. These individual frames are then played back at a much faster rate than they were captured, creating the illusion of time moving quickly. Time lapse is commonly used to document phenomena such as sunrise, cloud movements, flower blooming, traffic patterns, and various other dynamic processes.
For Apple system users interested in exploring time lapse, iMovie emerges as an ideal option due to its user-friendly interface and effective functionality. Below is a comprehensive guide on how to create a time lapse video using iMovie.


Also interested in: 5 Best Video Speed Changers to Speed up or Slow Down Videos>>
How to Make Time Lapse in iMovie on Mac
Once you’ve shot videos, iMovie allows you to convert normal videos into time-lapse effect with simple operations. Here we take iMovie 10 as an example to show you how to make an iMovie time lapse on Mac.
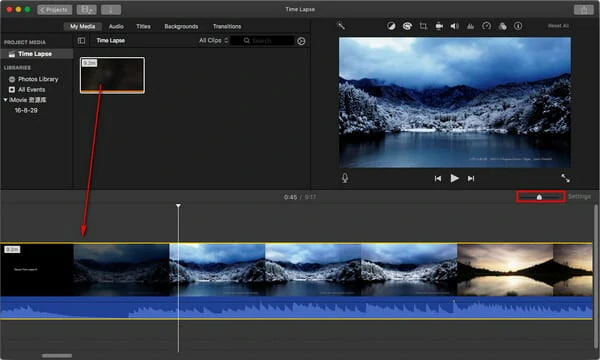
Open and Add Video to iMovie Timeline
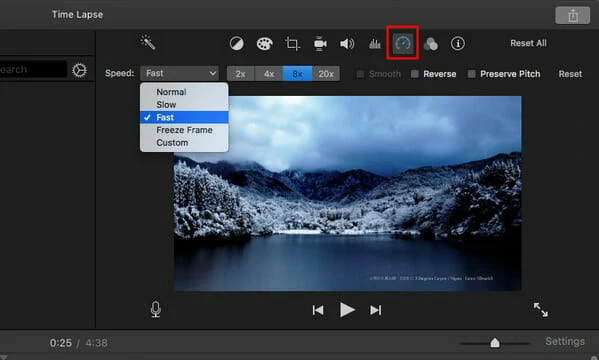
Choose the Fast Speed Feature to Enable Time Lapse Effect
If you want more control over the time-lapse effect, select "Custom" from the Speed menu. This allows you to adjust the frame rate according to your preference.
That's it! With these simple steps, you can easily create a time-lapse effect in iMovie on your Mac. Experiment with different frame rates and settings to achieve the desired effect for your video.
How to Create TimeLapse from Photos in iMovie on Mac
If you're looking to create a timelapse from pictures in iMovie on your Mac, follow these steps:
With these steps, you'll be able to effortlessly create a timelapse from your photos in iMovie, perfect for sharing on social media platforms.
How to Make a Time Lapse Video from Photos on iMovie
How to Create an iMovie Time Lapse on iPhone/iPad
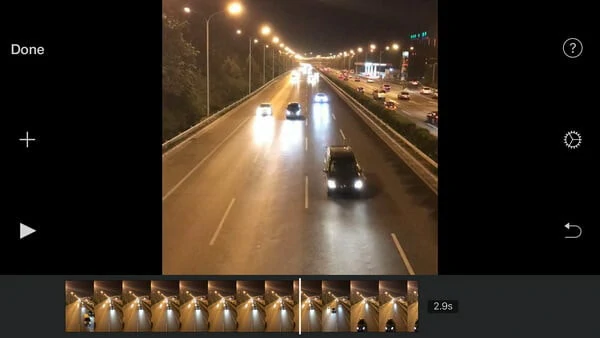
Import the Desired Video to iMovie on iPad/iPhone
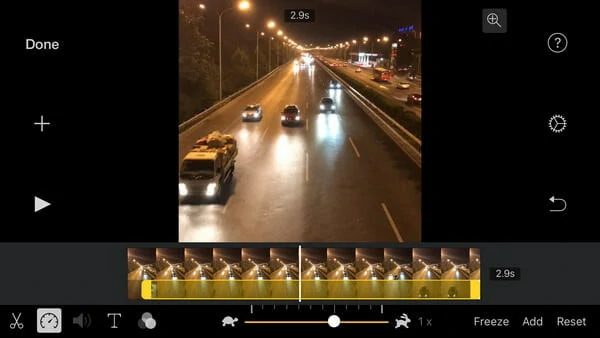
Create Time Lapse Effect by Changing Speed
By following these steps, you can easily create captivating time lapse videos using iMovie on your iPhone or iPad.
Best Alternative to Make iMovie Time-lapse Video Online
iMovie does provide basic features for making time lapse videos. But for more complex or professional-grade time-lapse videos, you may need to explore alternative software options with more advanced features and customization capabilities. Here are some reasons why FlexClip is recommended:


How to Create iMovie Time-lapse Video Online Using FlexClip
The regular steps of making time-lapse videos in FlexClip work similarly to iMovie. So, here we take the speed curve feature as an example to show how to create an iMovie time-lapse video.
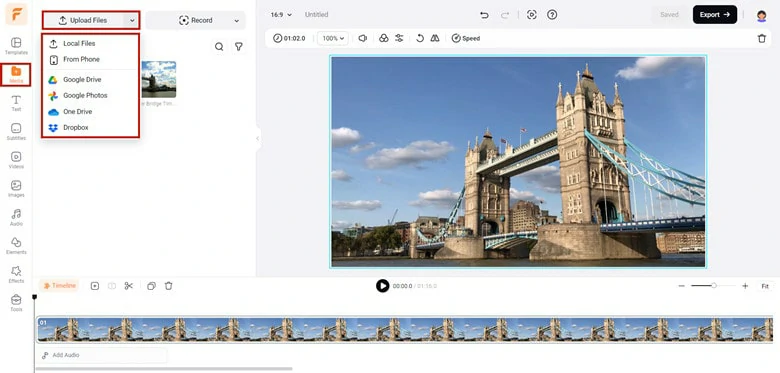
Upload Your Footage to FlexClip
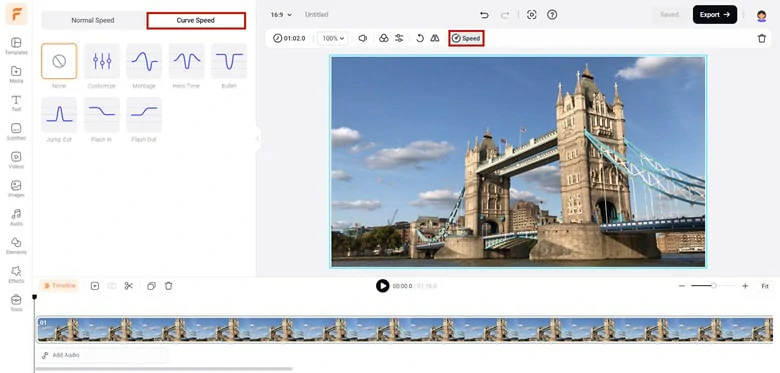
Find the Curve Speed Feature in FlexClip
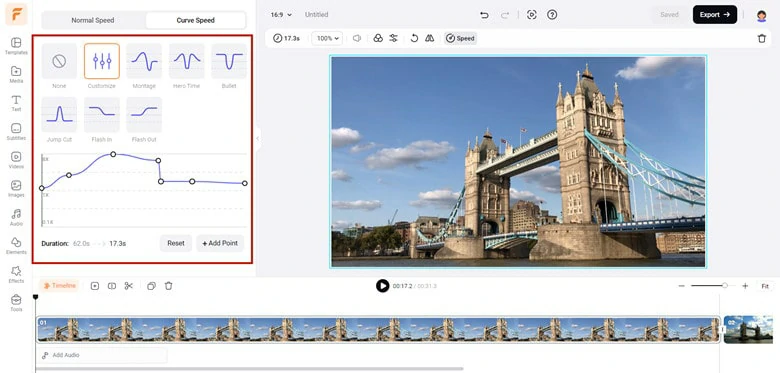
Enable the Curve Speed Feature in FlexClip to Create Time-lapse Effect
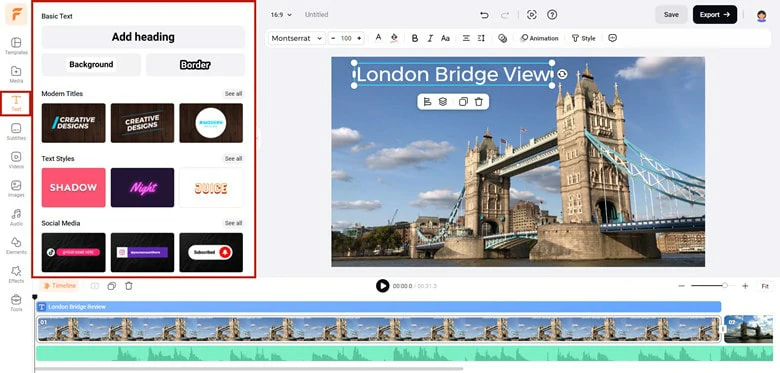
Perfect Your Time Lapse Video with Music and Text
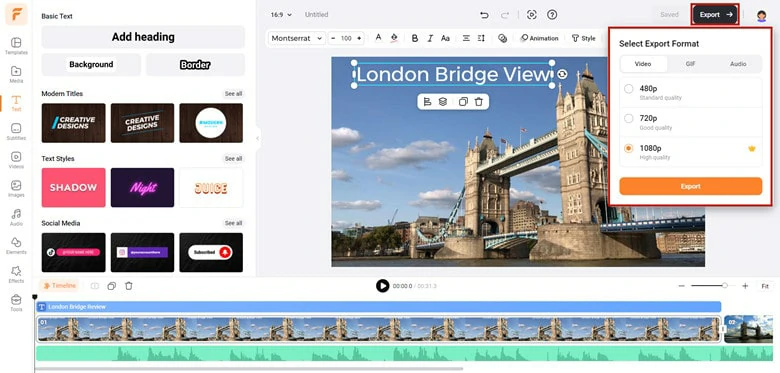
Export the Edited Time-lapse Video
In Conclusion
That’s all for iMovie time lapse videos on Mac, iPhone and iPad. While if you’re looking for a way that provides more flexibility, try to use FlexClip as your alternative solution. Now it’s your turn to get started!


FlexClip AI Video Maker
Reach professional-quality videos faster with easy editing tools, templates, and smart AI.
Start Now for Free
Hot & Trending
-

7 Best Ways to Find Music in YouTube Videos
-

Instagram Story Video Quality Bad After Upload? Fix It!
-

How to Repost Video on TikTok & How to Remove TikTok Repost
-

Improve Video Quality Online: 3 AI Video Quality Enhancers You Can't Miss
-

4K Convert to HD 1080p without Watermark: Best 4k Video Converters
-

Top 13 Birthday Video Makers with Music and Effects Free
-

How to Search Filters on TikTok & Use a Filter You See - TikTok Filter Guide
-

Large Collection of Creative and Funny Birthday Video Ideas for Ones You Care