If you grew up in the 80’s, videotapes must have brought you lots of joy, whether it is a film tape rented from a shop, or a homemade videotape of cherished moments. Sadly, it gets harder and harder to get a VCR, and the life expectancy of a videotape is only about 20 years.
Don’t get us wrong, we are not saying you should get rid of all VHS. Converting videotapes to digital helps make a copy of your memories or classic movies, and offers a better way to share these old videos.
In only 6 steps, you can record VHS without paying extra to buy expensive software. Let’s dive right in!
Table of Contents
Free Customizable Templates You May Love


Check More Free Video Templates >
Can't Miss: How to Download Embedded Video >
Step 1. Preparation
It is impossible to play VHS on a computer directly because computers don’t have plugins to receive video and audio signals. Under this circumstance, we will need some devices to connect the VCR and the computer.
Here is a list of items we need:
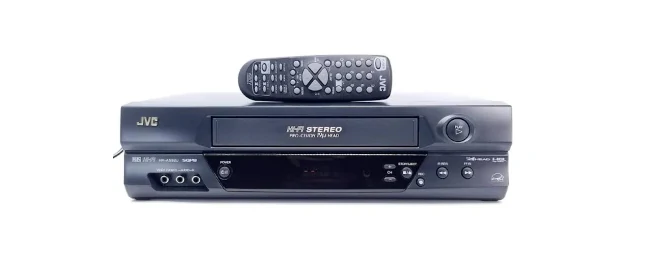
VCR Overview
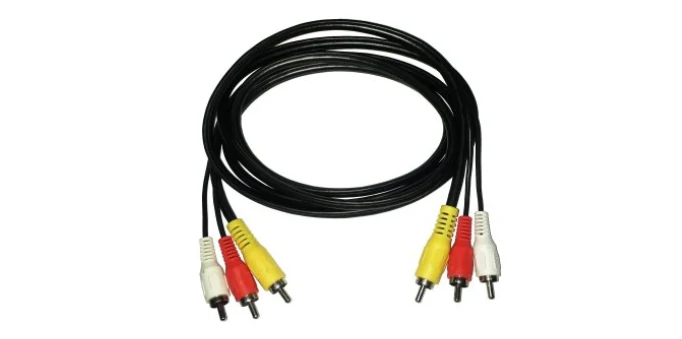
Audio/Video Cable Overview
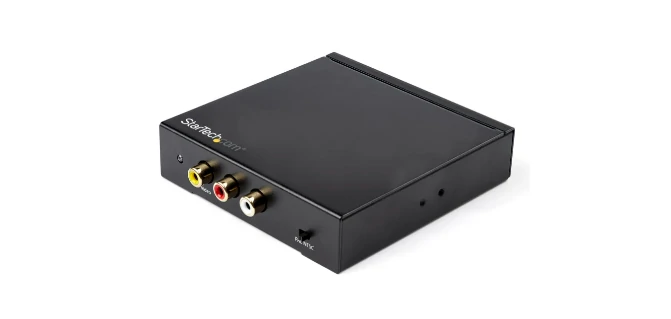
Converter Box Overview
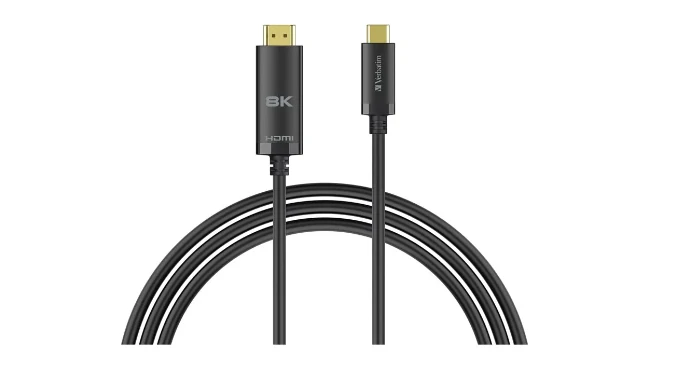
HDMI Cord Overview
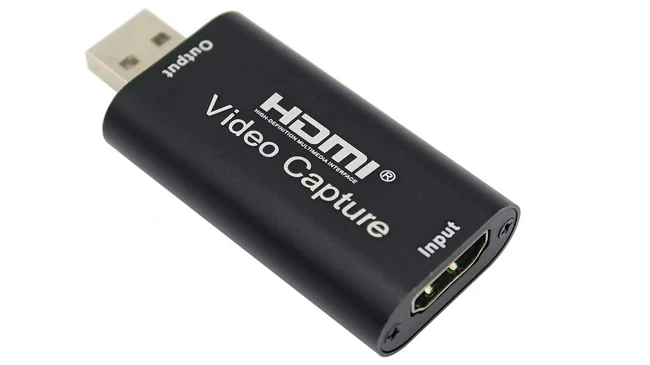
Video Capture Card Overview
Step 2. Installation
It is always the installation that takes time. Firstly, you need to plug in the Audio/Video cable to the VCR and the converter box. (red to red, white to white, yellow to yellow). Mind that the converter box needs power to work, so connect it to an outlet.
Next up, plug one end of the HDMI cord into the converter and the other end to the video capture card. Now, the video capture card is like an open USB. Plug it into the computer.
Here is an image showing you the installation orders.
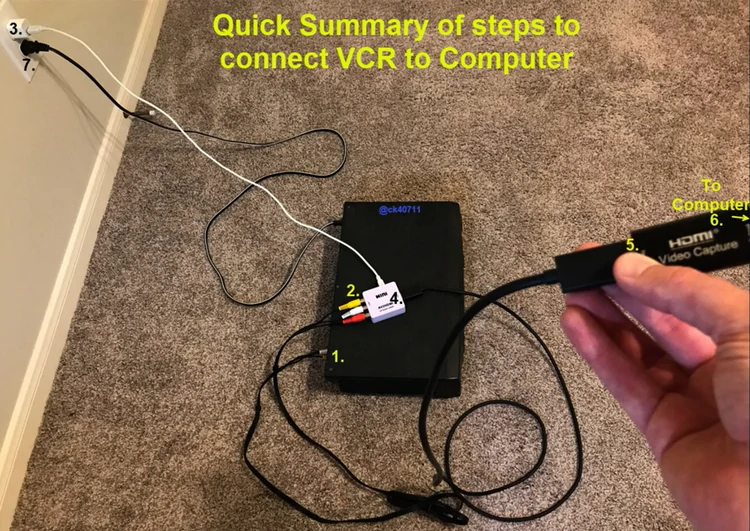
Connect VCR to Computer
Step 3. Download OBS
Now, since the videotype resource is ready to be used, we need software to capture them. OBS is by far the nicest open-source software that can identify VLC signals and record.
It is free to get OBS. Visit the OBS official website, choose the right version according to the system you are working on. Follow the prompt to launch it.
Step 4. Setup OBS
Go to Files > Output. Under the Recording menu, you can see an option of Recording Path. Click the Browse button to choose where you want to store the VCR recording.
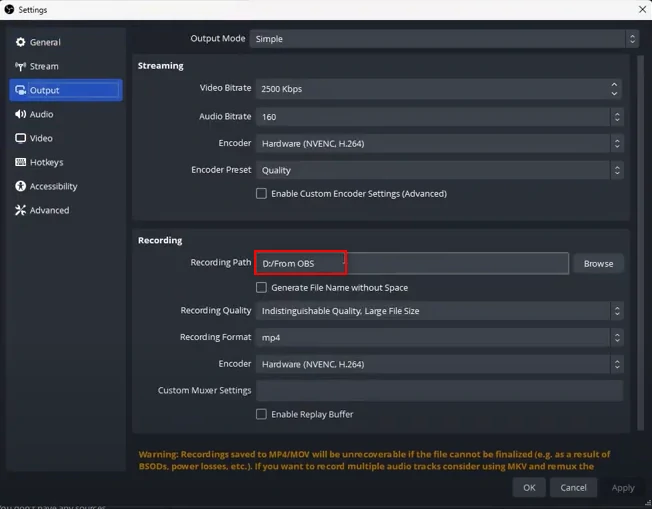
Setup OBS
Step 5. Record VHS
It is time to record VHS. Click on the “+” button below the OBS interface, choose Video Capture Device. A window will pop up to ask you to rename the recording project. Make edits and hit OK to confirm.
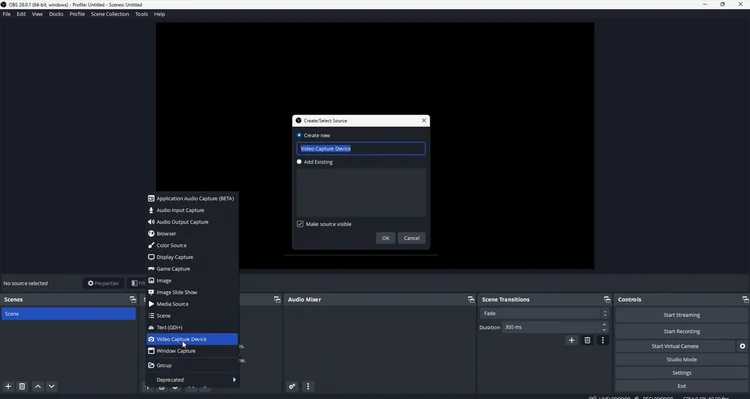
Add Resource
Now you are at the Property menu. Set the Device to USB Video. Hit Confirm.
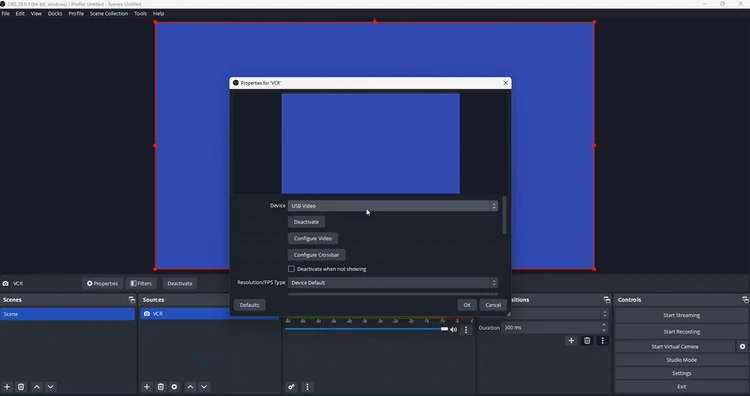
OBS Property Menu
Move to your VCR, and hit Play. OBS is now capturing your VHS tapes.
Step 6. Edit & Share
FlexClip’s online video editor makes it easy for you to edit old analogue videos. You can apply filters to get rid of their old, glitchy look, add AI captions, or export in a higher frame rate so that the movements are more frequent and natural.
With FlexClip, you can enjoy the ultimate freedom of sharing your video. You can export it to a local folder, save to cloud services, share via a short link, or post to social media platforms directly.
The Bottom Line
With the right devices and OBS Studio, you are able to record VHS tapes with great ease. Don’t be frightened by the complicated setup process, they should be easy when you take action. By the way, do remember editing videos with FlexClip’s online video editor, which is extremely easy to use.


