Not too many of us know all the features on our PC. When it comes to record a video on PC, there are embedded tools on PC to help out, like the Game Bar. You can also record video clips on PC using Microsoft PowerPoint, OBS Studio, and FlashBack Express.
To record video on PC can be different from what you have on Apple or Ubuntu OS. But aside from some of the above-mentioned video recording functions, there are other methods you can record videos on your PC. We have taken the time to draft some of these methods and urge you to read through the process.
Five Ways to Record a Video on PC
Method 1. Record a Video on PC with Game Bar
Built-in Windows 10 Screen Recorder Guide
Method 2. Record a Video on PC with PowerPoint
How to Record Screen using Microsoft PowerPoint
Method 3. Record a Video on PC with OBS
Before we proceed with this step, let's take someone time to explain what OBS is and what it stands for. An OBS Studio is developed to work as a powerful broadcasting and screen tool. Aside from its original function as live streaming video content, it can also be used to seamlessly record pick-up audio and computer screens. Below is how you can record clips on your PC with ease.
How To Record Your Computer Screen With OBS
Method 4. Record a Video on PC with Apowersoft
Apowersoft is a third-party online recording app used on PCs; this application, like its counterparts, does not need Java Applet to function, but users can still use launchers if it is their first time. The unique feature of this tool is that it doesn't have a recording limit like it is obtainable on most Recording tools. To record your screen using Apowersoft, you need to follow these steps:
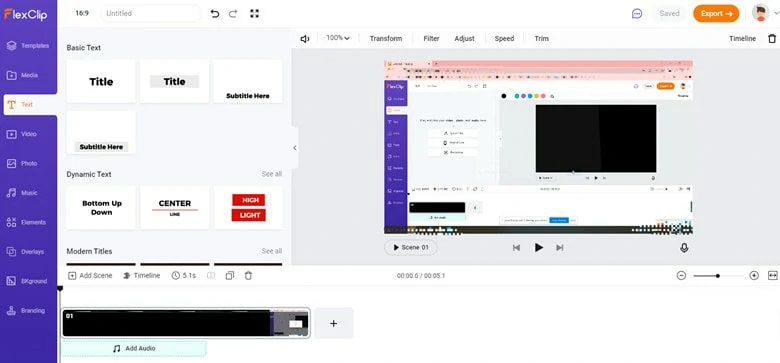
Method 5. Record a Video on PC with FlexClip
FlexClip is ordinarily developed as a video and image editing tool online tool. And recently, it has been listed as one of the best tools to record on PC. This online software has many unique merits: it is an online-based platform, so there is no need to download any launcher to record videos on PC. It has extra easy-to-use editing tools which help users level up their video. Some of these editing tools include trimmers, filters, widgets, and animations. And finally, users can freely record the system audio or external audio. And to record on your PC using FlexClip, follow the steps below.
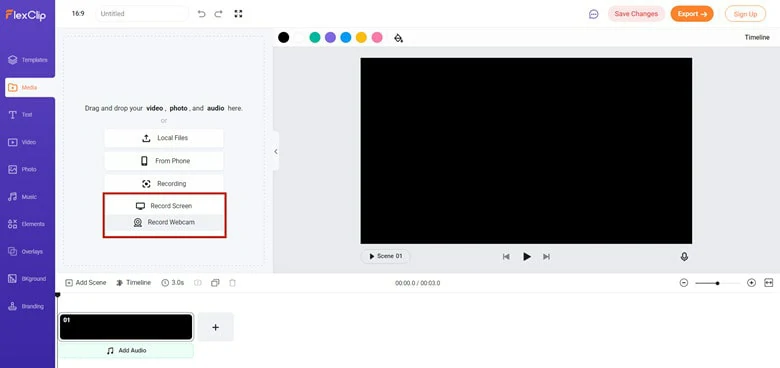
Find the Record Function on FlexClip


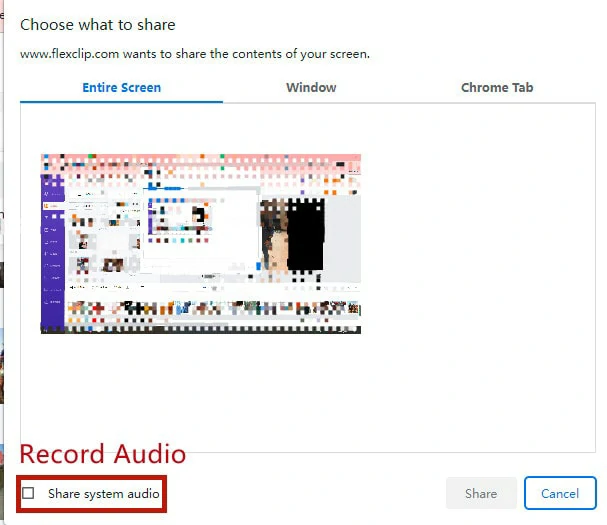
Record Screen with Audio
Add Text to the Recorded Video
The Bottom Line
There are many ways to go about recording on your PC; there is probably a lot of third-party software that can help you do that, but the ones we mentioned above are the most recommended based on the user's recommendations. So, please like and share this post if you find it interesting, at least for the benefit of those who might need it somehow. By the way, do remember to use FlexClip to edit your recording.


FlexClip AI Video Maker
Reach professional-quality videos faster with easy editing tools, templates, and smart AI.
Start Now for Free
Hot & Trending
-

Ultimate Tik Tok Guide – How to Tik Tok & How to Make a Tik Tok Video that Gets Likes
-

7 Best Ways to Find Music in YouTube Videos
-

Instagram Story Video Quality Bad After Upload? Fix It!
-

How to Repost Video on TikTok & How to Remove TikTok Repost
-

Improve Video Quality Online: 3 AI Video Quality Enhancers You Can't Miss
-

4K Convert to HD 1080p without Watermark: Best 4k Video Converters
-

Top 13 Birthday Video Makers with Music and Effects Free
-

How to Search Filters on TikTok & Use a Filter You See - TikTok Filter Guide