Live Photo is an amazing camera feature of the iPhone that records what happens 1.5 seconds before and after you take a photo. So as you look back on a live photo, it will display a 3-second video before becoming a static image.
Though live photos work perfectly to bring your photo memories to life on iPhone, they can’t be directly shared on Instagram, Facebook, or other social media as an animated GIF.
So, in this tutorial, we will walk you through the 5 best ways to turn a live photo into a GIF or a looping video. Then, you can easily share your joyous moments with friends on various social media.
Here’s What You Will Learn:
How to Turn a Live Photo into a GIF on iPhone (IOS 15)
One thing to mention is that although iPhone’s latest IOS 15 system can’t directly create a real GIF format file, it will generate a looping MOV video file that plays back and forth and looks exactly like a GIF. Check 6 free MOV to GIF converters.
Step 1: Select a Live Photo in the Photo Album on iPhone
Open the Photo app > tap “Albums” and scroll down to “Live Photos” on Media Types > tap the Live Photo you want to turn into a GIF.
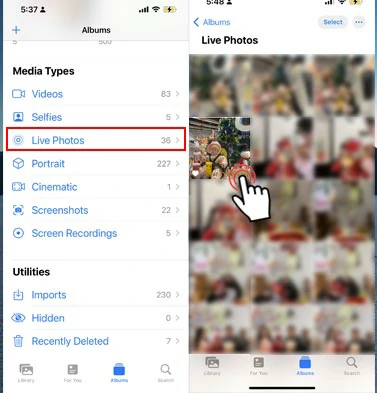
Select a live photo on iPhone
Step 2: Convert a Live Photo to a GIF
Tap the Live Photo icon on the top left corner > select “Bounce” effect. Then the live photo will be turned into a looping GIF, though it is actually a MOV video file.
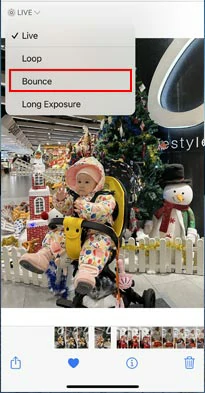
Tap bounce to turn a Live Photo to a GIF
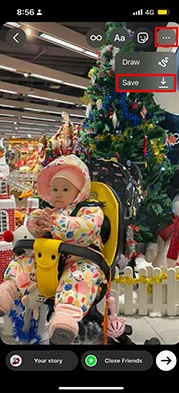
Step 3: Save and Share the GIF
Tap the “Share” button at the bottom of the left corner > select “Save to Files” on my iPhone. Then, a looping MOV file will be saved on your iPhone. You can open the Files app on your iPhone to view it and share it to Google Drive, Messenger, or other social apps.
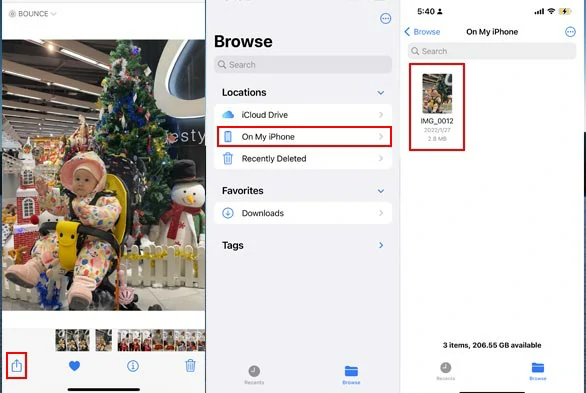
Save the converted looping Live Photo as a looping MOV file to My Files
How to Convert Live Photos to GIFs or Video by GIPHY
As the most prestigious online database for trending GIFs and animated GIF stickers, GIPHY's mobile app offers you a free and easy way to convert your Live Photos to a GIF or a video.
Step 1: Launch GIPHY on your iPhone and tap the Create icon on the top right corner.
Tap the Create icon on GIPHY on your iPhone.
Step 2: Upload a Live Photo to GIPHY.
Tap photo gallery > select Live Photos > tap the Live Photo you wish to convert to a GIF.
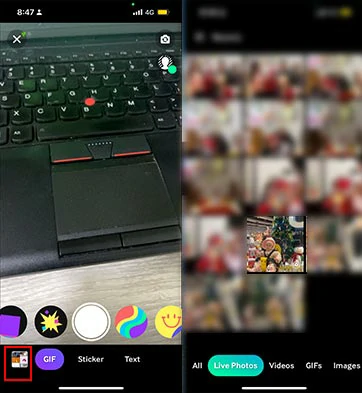
Select the Live Photo you wish to convert to GIF.
Step 3: Edit your Live Photo.
Here, GIPHY offers you 5 main options to edit your Live Photo before you turn it into a GIF.
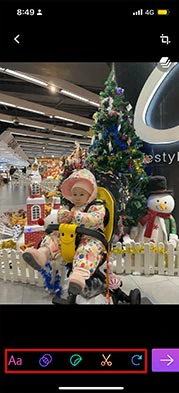
Edit the Live Photo with 4 options on GIPHY.
After you've done editing, tap the next button.
Step 4: Tap "Share GIF".
Then you can have two options to save your Live Photo:
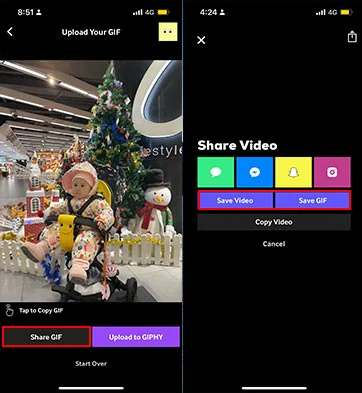
Save Live Photo as a GIF or video on your iPhone from GIPHY.
How to Make a Live Photo to a Looping Video Resembling a GIF by Instagram
Since Instagram doesn't support GIF files, If you want to post a Live Photo as an animated GIF for Instagram Story or Instagram Feed. You can first make a Live Photo a looping video using Instagram's Boomerang feature and later post it on IG Story or Feed. Also, read the 5 best ways to post GIFs on Instagram.
Step 1: Launch Instagram on your iPhone and swipe to the left to open Instagram Story.
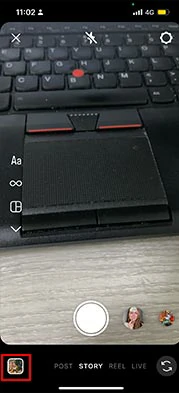
Swipe to Instagram Story and tap the photo gallery.
Step 2: Upload a Live Photo from the Live Photo gallery on your iPhone.
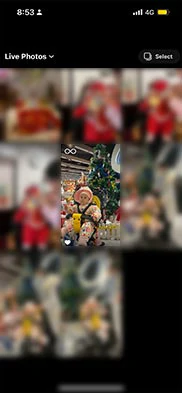
Select and upload your Live Photo to Instagram.
Step 4: Tap the Boomerang icon to turn your Live Photo into a Boomerang looping video.
Tap the Boomerang icon to turn Live Photo into a looping video.
Step 5: Make some edits for your Boomerang video. (optional)
Then Instagram will allow you to trim your looping video, slow down or speed up its speed, or add a kind of fade-in effect to your original Live Photo. If you are ok with any changes, then tap the "Done" button.
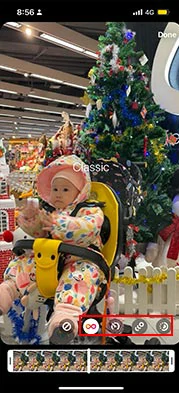
Edit the Live Photo on Instagram.
Step 6: Share your Instagram Story or save the looping video to your camera roll.
Now, you can tap Your Story to directly post the looping video on Instagram Story or tap "three dots" on the top right corner > tap the "Save" button to save the Live Photo as a looping video resembling a GIF to your Camera Roll.
Save the Live Photo as a looping video on your iPhone from Instagram.
How to Convert Live Photo to GIF by Live Converter
Well, another viable option to convert Live Photo to GIFs or videos is using the popular Live Photo to GIF converter--Live Converter.

Convert the Live Photo to a GIF or video by Live Converter on iPhone.
All you need to do is upload a Live Photo from your iPhone to Live Converter and it will automatically convert the Live Photo to a looping video. Then you can trim its duration and click the Save button and choose "Save as Video" or “Save as GIF” for your Live Photo.
The only downside is that you can't find features like adding texts or filters to your Live Photo. Besides, a watermark will be attached to the converted GIF/Video. But, you can spend a couple of dollars on a one-time purchase of the Liver Converter for high-quality Live Photo to GIF and Video conversion without ads.
How to Turn a Live Photo into a GIF Online
As a bonus, we've also offered you a great workaround to turn a live photo into a GIF or video online, using the feature-packed FlexClip online video maker.
Use FlexClip to convert Live Photos to GIFs or videos online

Step 1: Select and convert a Live Photo to a looping video.
Open your Live Photo > tap the “Live Photo” icon on the top-left corner and select “Bounce” > tap the “Share” button > choose “Save to Files” on my iPhone. Then, the original Live Photo will be converted to a looping video, resembling an animated GIF.
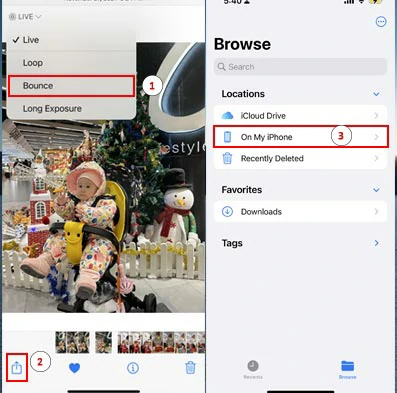
Convert a Live Photo to a GIF video and save it to Files on iPhone.
Step 2: Upload your Live Photo video from your iPhone to FlexClip.
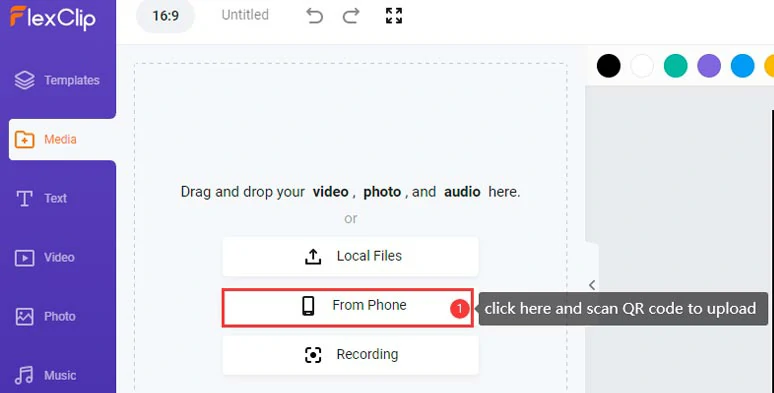
Upload your Live Photo video to FlexClip from your iPhone.
Step 3: Add the Live Photo video to the intuitive timeline.
Firstly, set the aspect ratio of the video to 9:16 or 4:5 aspect ratio to fit the size of your Live Photo video > click the "+" button to add your Live Photo video to the timeline > click the Zoom tool to fill the canvas.
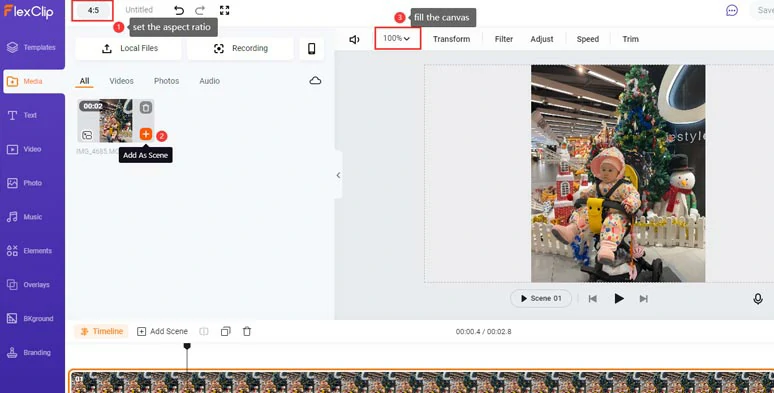
Set the aspect ratio of the canvas and add your Live Photo video to the timeline.
Step 4: Spice up your Live Photo video.
Click the Element tab, where you can add multiple GIPHY GIF stickers to your Live Photo video to spice up your Live Photo; or click the Text tab and add designer-made and fully-customizable text animations to your Live Photo video; While in the elements tab, you can add funny emojis, animated illustrations, etc. Feel free to explore.
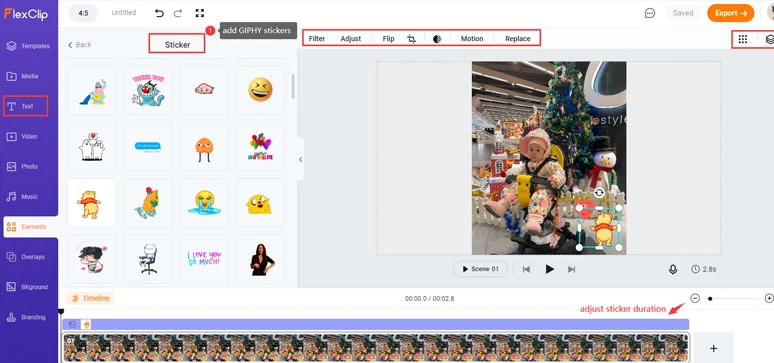
Add GIPHY’s stickers or animated texts to your Live Photo video.
Step 5: Save the Live Photo video as a GIF or video.
Done with the editing. Hit the “Export” button to save the Live Photo as an animated GIF or a looping video to your local PC; you may also share it to Google Drive, or Dropbox as well.
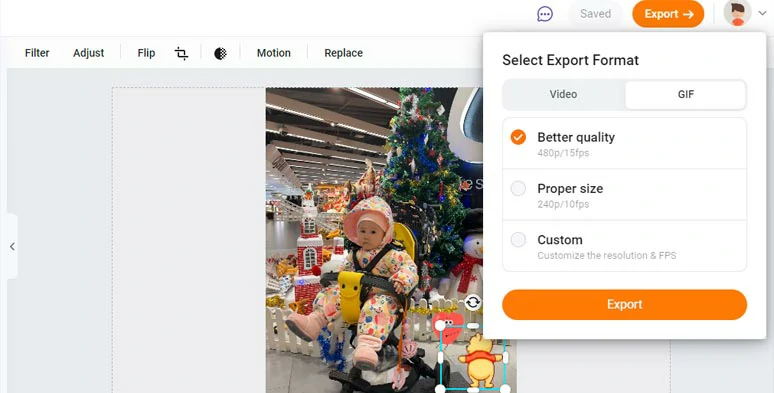
Save the Live Photo video as a GIF or video.
Here is the resulting Live Photo GIF from the example above:
Converted Live Photo to GIF by FlexClip.
Now, It's Your Move
So, now you know how to easily turn a Live Photo to a GIF or a video on both your iPhone and PC. Have great fun making your photo memories to life and sharing them with your friends on Facebook, Instagram, etc. If you find this post helpful, click and share it on your Facebook and Twitter and leave your comments to us. Cheers!


FlexClip AI Video Maker
Reach professional-quality videos faster with easy editing tools, templates, and smart AI.
Start Now for Free
Hot & Trending
-

Best Ways to Find Music in YouTube Videos
-

Instagram Story Video Quality Bad After Upload? Fix It!
-

How to Repost Video on TikTok & How to Remove TikTok Repost
-

Improve Video Quality Online: 3 AI Video Quality Enhancers You Can't Miss
-

4K Convert to HD 1080p without Watermark: Best 4k Video Converters
-

Top 13 Birthday Video Makers with Music and Effects Free
-

How to Search Filters on TikTok & Use a Filter You See - TikTok Filter Guide
-

Large Collection of Creative and Funny Birthday Video Ideas for Ones You Care