QuickTime videos (also known as MOV files) are a distinct video format developed by Apple Inc. They are often compressed by the MPEG-4 codec and saved in the QuickTime file format (QTFF).
To edit a QuickTime video or a MOV file, you don’t need a fancy video editor like Premiere Pro to do so. In this tutorial, we will walk you through the 4 best QuickTime video editors to effortlessly trim and split QuickTime videos and elevate your QuickTime videos with audio, subtitles, transitions and other stunning visual effects.


Here’s What You Will Learn:
Also, read how to make faceless YouTube videos with ChatGPT and AI video maker.
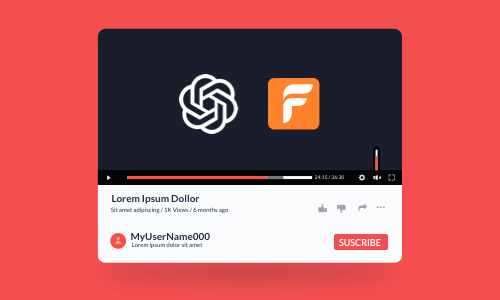
How to Edit QuickTime Videos Using FlexClip (Mac, Windows, Best Option)
Well, if you are new to video editing and need a versatile QuickTime video editor to effortlessly transform your QuickTime videos into compelling videos for YouTube, TikTok, or Instagram Reels, then user-friendly and feature-packed FlexClip AI video maker deserves to be one of your top-picks to edit QuickTime videos.
How to edit a QuickTime video by FlexClip online.

With FlexClip, you can:


Use vast royalty-free music, sound effects, and video assets for your video projects.
Auto-generate subtitles to your QuickTime videos in one click.
Speed up or slow down QuickTime videos with the speed curve feature.

Effortlessly convert text to realistic AI voices for your video projects.
Access FlexClip > upload your QuickTime video assets from your computer, phone, Google Drive, One Drive, Dropbox, or even Google Photos.

Upload QuickTime videos or MOV files from your PC or phone.
Click the “+” button to add the MOV files to the intuitive timeline. Drag the slider inward to trim the clips or use the Split tool to cut a clip into two parts. To adjust the sequence of clips on the timeline, simply drag and drop the slider as you wish.

Trim, split clips and adjust the sequence for the rough cut on the timeline.
Click the Text tab on the left sidebar > scroll down and select from 1,000+ readymade and editable text animations, such as YouTube/TikTok/IG Reels’ Like, Share, and Subscribe buttons, profile titles, lower thirds, news titles, speech bubbles, quotes, callout titles, search bars, location titles, etc. > customize the text style such as text font, color, spacing, layer, opacity, and duration, italics, and boldness, etc.
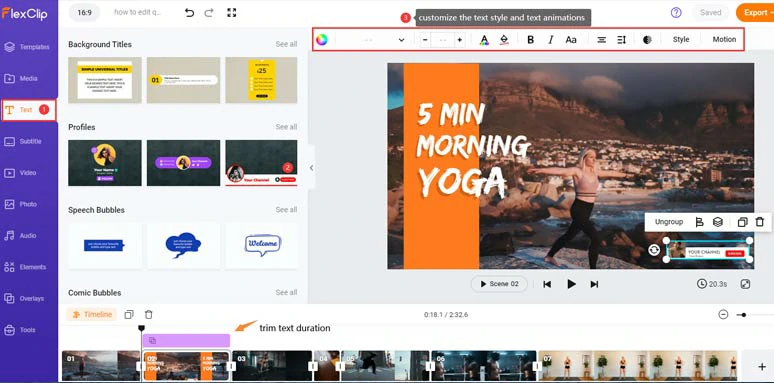
Add call-to-action text animations to QuickTime videos.
With the text selected, you can click the Motion tool to effortlessly animate the text with styles, like typewriter, cinematic glitter, blur, contract, burst, bounce, fade, neon, stomp, etc. You can tailor the speed and duration of text animations as well.
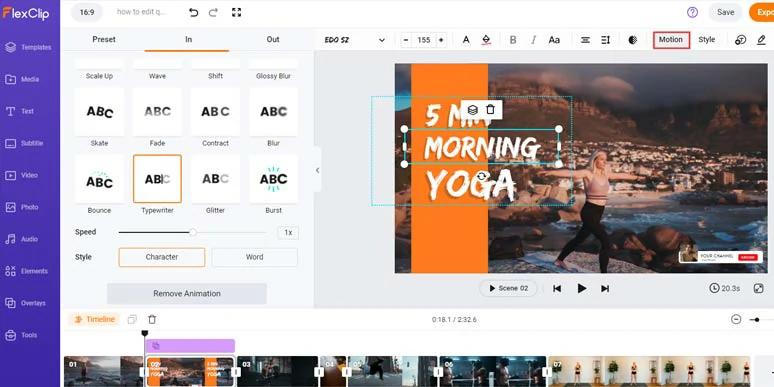
Easily animate text with styles for QuickTime videos.
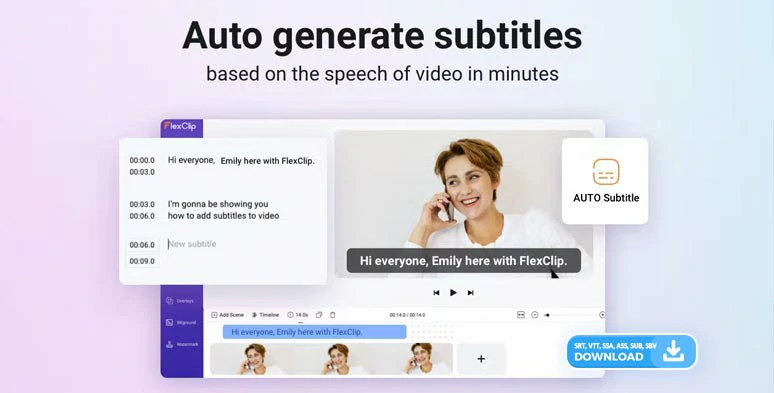
Manually adding subtitles or captions to QuickTime videos can be a time-consuming and excruciating experience. With FlexClip’s AI auto subtitle generator, you can do it with the click of a button.
Click the Subtitle tab > Auto AI Subtitle > identify the language in your video > hit Next > select the style of subtitle, which can be changed later > press the Generate button.
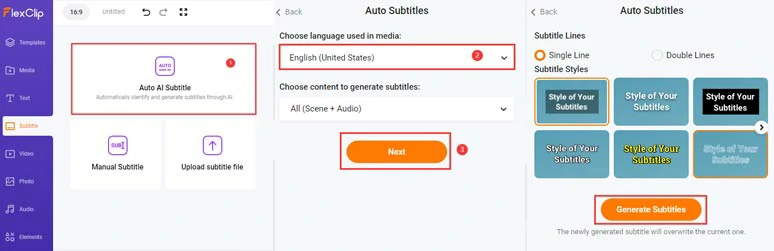
Auto-transcribe video and audio to text for burned-in subtitles in your QuickTime videos.
Now, you can skim through the auto-generated subtitles > correct any typos > tweak the text font, color, size, alignment, position, italics, boldness, color and opacity of background fill, etc.
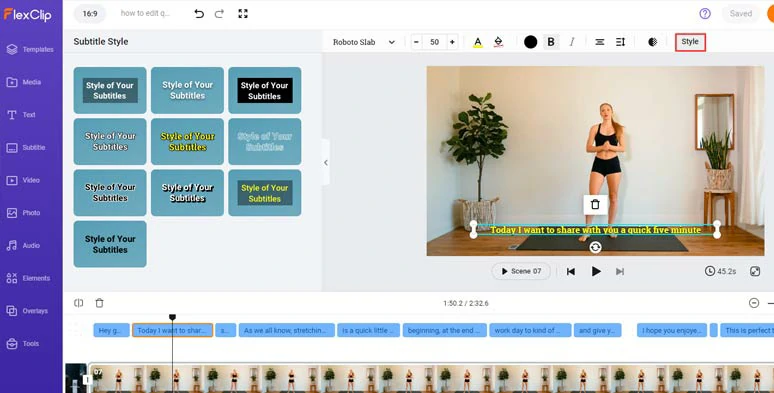
Customize the style of auto-generated subtitles.
If you find one subtitle too long, you can press “Enter” to split it or click the Merge tool to merge two short subtitles with ease. Alternatively, you can download the subtitles in SRT, VTT, SSA, ASS, SUB, SBV, TXT, and CSV formats for other repurposings. Pretty handy!

Edit and download subtitles in diverse formats for other repurposings.
Move the playhead to find the video movement you want to add B roll. Click the “Add as Layer” icon, then the clip will be added as a video overlay over another video. You may use a crop mask to add styles to the B roll and set duration and motion to achieve the great visual effects you prefer.
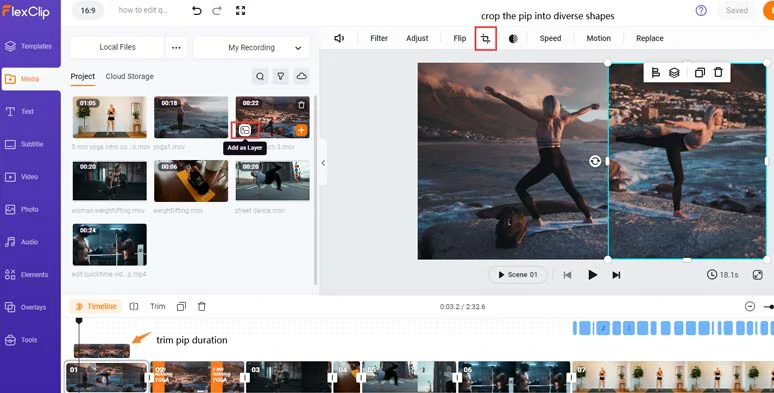
Use picture-in-picture effect to add B roll for better storytelling.
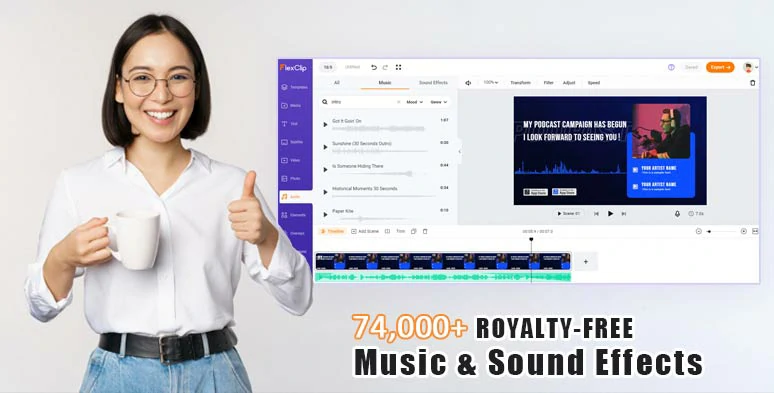
To add rhythm and vibes to QuickTime videos, click the "Audio" tab > choose from 74,000+ royalty-free music tracks and sound effects for your video project. You can layer multiple audio tracks, like uplifting music and transitional sound effects (whoosh, swoosh), to create depth and bring your QuickTime videos to life. You can trim and split the audio, adjust the audio’s volume, or apply fade in/out effects for a smooth audio transition.
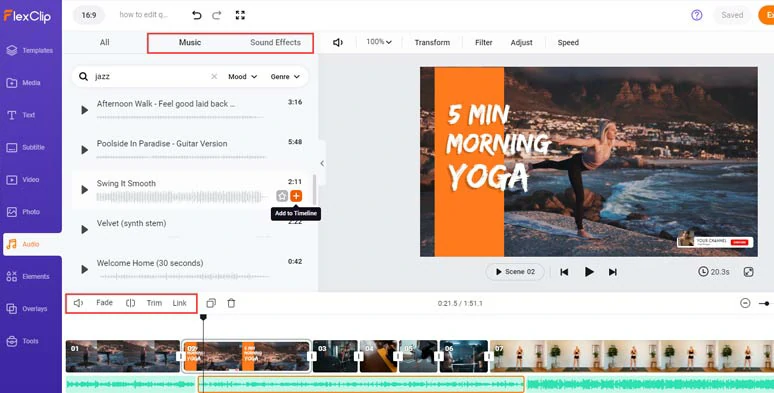
Add royalty-free music or sound effects to create vibes and emotions for your QuickTime videos.
Click the Overlays tab > select from 400+ creative effects overlays, like dreamy bokeh, light leaks, lens flare, ink splash, cinematic film grins & film project rewind, camcorder, fire, snow, rain, etc. to spice up your QuickTime videos.
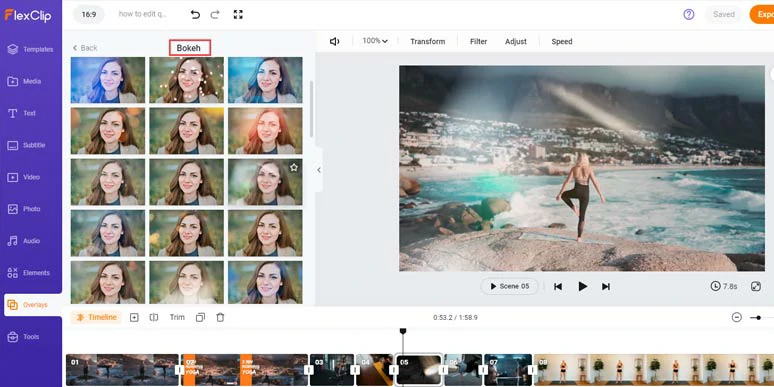
Add bokeh or lens flare creative effects overlays to add cinematic vibes to your QuickTime videos.
By clicking the Transition tool between two video scenes, you can choose from 200+ trending transitions to smooth out the video from one scene to another, such as liquid, brush, wipe, glitch, circle, splash, geometric shape, etc. Besides, you can also change video speed, and add animated GIPHY stickers, aesthetic illustrations, etc. from the Elements tabs, etc. Please feel free to explore.
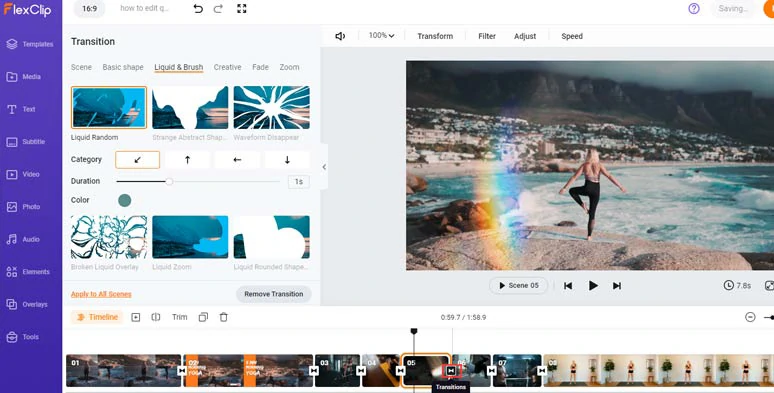
Add trending transitions to QuickTime videos.
Done with the editing. You can download the 1080P video to your local computer or directly share it to YouTube, Google Drive, One Drive, Dropbox, or TikTok; a clickable link is also available for your blog posts, newsletters, or other repurposing your videos.
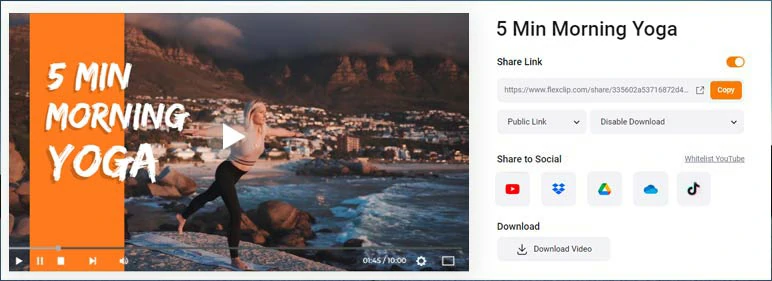
Easily share and repurpose your video content.
How to Edit QuickTime Videos by QuickTime Player (Mac)
If you are using Mac, Apple’s pre-installed desktop app QuickTime Player may also do you some favor for the basic editing of a QuickTime video. Yet, since QuickTime Player is essentially a media player, so the editing feature is so limited.
Use QuickTime Player to trim, split and merge QuickTime videos
Trim a QuickTime Video by QuickTime Player
Launch your QuickTime Player > go to “File” and hit “Open File” to play your QuickTime video > head to “Edit” and select the “Trim” option from the drop-down menu > drag the trimmer slider to trim the video > finally, go to “File” and hit “Save”.
Split a QuickTime Video by QuickTime Player
Open the clip in QuickTime Player > go to “View” and select “Show Clips” in the drop-down menu > then a small red playhead will appear > drag the playhead to the place where you want to split the video > hit “Command+ Y” and the video will be split into two > click “Done”
Merge Multiple QuickTime Videos by QuickTime Player
Open one clip first in the QuickTime Player > head to “Edit” and hit “Add Clip to End” > browse through your folder to add another video and press “Choose Media” > go back to “Edit” and select “Insert Clip After Selection” > insert the third clip > click “Done”. Then 3 clips are successfully merged.
Another shortcut is that after you add the first clip, then use keyboard hotkey “ Command+E” and drag and drop the clips to the edit pane you want to merge. Finally, hit “Done”. Of course, you can easily drag and drop the clips to adjust their order.
Rotate and Flip a QuickTime Video by QuickTime Player
Open a clip in QuickTime Player > go to “Edit” > in the drop-down menu, you can select “Rotate Left/Right”, “Flip Horizontally/Vertically” to achieve the effect you need.
How to Edit QuickTime Videos by iMovie (Mac)
As opposed to QuickTime Player, iMovie, another free built-in app on Mac, enjoys more powerful editing features. For Mac users, using iMovie is also a viable option to edit QuickTime videos.
Use iMovie to edit QuickTime videos
Split QuickTime Videos by iMovie
Open your clip in iMovie > drag the slider of settings to extend the clip, so you can see details of each frame > move the playhead to the place you want to split a video > use “Command + B” to split the video. Then you drag either clip to remove the unwanted frames.
Add Audio to QuickTime Videos by iMovie
Go to the “Audio” tab > select a sound effect and drag and drop it to the timeline > drag the centerline of the audio down or up to adjust its volume
Add Video Overlay to a QuickTime Video by iMovie
Upload two clips to iMovie’s media library > add one clip on the timeline > drag and drop the second video above the first video > click the “Cutaway” tab above > select “Picture in Picture” in the drop-down menu > the second video will be added as a video overlay on the first video
Color Correct a QuickTime Video by iMovie
Move the play head to the one clip > go to the second “Color Correction” icon above > drag the slider to adjust the shadow, mid-tone, highlight, and color tone of the clip.
Of course, you can also easily add video filters, a background texture or a video transition to a QuickTime video from the main menu above.
How to Edit QuickTime Videos by Windows 10 Video Editor
For Windows 10 users, the pre-installed free Window 10 video editor is another alternative to editing a QuickTime video.
Use Windows 10 video editor to edit QuickTime videos
Go to the taskbar > enter “video editor” and click “Open”
On the main menu, you can add a video card as an intro of your video or trim, split, or add texts, motion, even 3D effects, and filters to the clips. You may change the video speed as well.
Now, It’s Your Move
| Platform | Best Features | Limitations | |
|---|---|---|---|
| FlexClip | Mac, Windows, Online | diverse AI tools; 4M+ royalty-free stock video assets; 74,000+ royalty-free music tracks and sound effects; 5000+ free & editable video templates; speed curve; GIPHY‘s GIF assets; picture-in-picture effects; 1,000+ editable text animations; 200+ transitions; 400+ creative effects overlays | Don’t have mobile apps |
| QuickTime Player | Mac | Trim, split, merge rotate, flip, mute, record videos | No animated texts, transitions, and stock assets |
| iMovie | Mac | Around 20 video editing tools; iTunes audio assets; premade texts, transitions, backgrounds; timeline | No video and GIF assets; can’t edit vertical videos |
| Windows 10 Video Editor | Windows | Add title card; trim, split, rotate, flip video, add filters, 3Deffects, change video speed | Limited text animations; no video and image stock; can’t do pip effects |
So, given the flexibility, adaptability, and huge stock assets, FlexClip is arguably the best video editor to edit QuickTime videos so long as you have access to the internet. If you only want some basic editing like trimming or splitting the QuickTime video, then using iMovie, QuickTime Player, or Windows 10 video editor also works.


FlexClip AI Video Maker
Reach professional-quality videos faster with easy editing tools, templates, and smart AI.
Start Now for Free
Hot & Trending
-

Best Ways to Find Music in YouTube Videos
-

Instagram Story Video Quality Bad After Upload? Fix It!
-

How to Repost Video on TikTok & How to Remove TikTok Repost
-

Improve Video Quality Online: 3 AI Video Quality Enhancers You Can't Miss
-

4K Convert to HD 1080p without Watermark: Best 4k Video Converters
-

Top 13 Birthday Video Makers with Music and Effects Free
-

How to Search Filters on TikTok & Use a Filter You See - TikTok Filter Guide
-

Large Collection of Creative and Funny Birthday Video Ideas for Ones You Care