An image aspect ratio is the ratio of an image's width up to the height. It is expressed using two different numbers separated by a colon, e.g., 17:8, meaning seventeen-to-eight. Changing aspects ratio is often seen in movies, especially when the director doesn't want to bring out the whole view into contest. It is used when you want to make the scene in such a way that the eyes can easily catch the pictures on the screen at once. And in some other occasions, the video aspect ratio is applied just for formality: probably it is part of the video planning.
To change the video aspect ratio right, you need a tool that can help you do that, and that is where the Premiere Pro comes in. Premiere Pro is a video editing software by Adobe and used by industry professionals to edit videos in a more professional concept. This tool has grown to be one of the best video editing tools in existence and has been used by thousands of video content creators who have testified to its abilities.
But the Premiere Pro software can be complicated to some people; it is no surprise considering the complexity of the tool. But that shouldn't be a problem. Below, we have created steps you can follow to change the video aspect ratio using Premiere Pro. Please read through.
How to Change the Video/Frame Aspect Ratio in Premiere Pro
What's an Easier Way to Change Aspect Ratio with PR
As we mentioned earlier, applying the Premiere pro-change aspect ratio method can be quite complicated (for some people). But what if there is an easier way to get this done? Because there is. This is where we introduce FlexClip: the best way to change the aspect ratio on videos without causing any damage to video quality. It was specifically designed using some rich media resources that have the ability to create better videos. Below, we have created a step-by-step guide on how you can use FlexClip to create a perfect aspect ratio. Click the Create a Video button to get started!


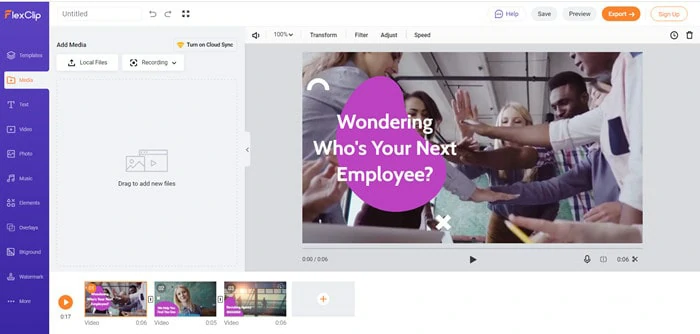
Upload Media Resources to FlexClip

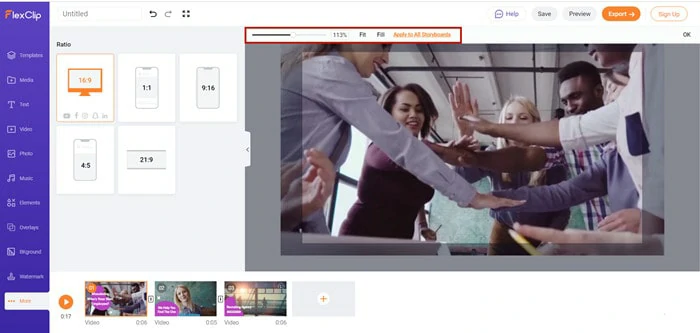
Choose a Video Aspect Ratio
Adjust the Video by Zooming
Add Text to Your Video
The Bottom Line
As you can see in our guide, the "Change aspect ratio premiere pro" technique is not as easy as most people have classified it compared to what is applicable when using FlexClip. Not just for editing aspect ratios, you can also use FlexClip to change the video speed, add filters, transitions, etc., to your videos. So, go ahead, share, and like this article if you find it interesting.


FlexClip AI Video Maker
Reach professional-quality videos faster with easy editing tools, templates, and smart AI.
Start Now for Free
Hot & Trending
-

7 Best Ways to Find Music in YouTube Videos
-

Instagram Story Video Quality Bad After Upload? Fix It!
-

How to Repost Video on TikTok & How to Remove TikTok Repost
-

Improve Video Quality Online: 3 AI Video Quality Enhancers You Can't Miss
-

4K Convert to HD 1080p without Watermark: Best 4k Video Converters
-

Top 13 Birthday Video Makers with Music and Effects Free
-

How to Search Filters on TikTok & Use a Filter You See - TikTok Filter Guide
-

Large Collection of Creative and Funny Birthday Video Ideas for Ones You Care