In a rush to capture the best moment, we can make mistakes, like forgetting to adjust the focus point. The face turned blurry while the background looked razor-sharp. I’m definitely not a PhotoShop master, but I can fix this kind of issues using AI.
In this guide, you will learn the easiest way to change the focus point. Follow step by step and polish your visual artworks in a natural way.
Adjust Focus Point from Image - Example Image
Common Out-of-Focus Photos at A Glance
Before diving into the solution, let’s take a look at what out-of-focus issues actually look like in real photos. The following examples highlight common focus mistakes, hoping you could spot them and how they affect image quality.
1. Wrong Focus Point Selection
Most cameras or phones automatically select focus points for you while shooting. This significantly improves image quality, but sometimes the camera can make mistakes. For example, the camera might focus on the background instead of the person.

Wrong Focus Point Photo
2. Shallow Depth of Field
Shallow depth of field is a shooting style where only a small portion of the image is sharp, while everything in the front or behind the area falls into blur. This technique creates great visual works, but the in-focus area is so narrow that slight misplacement can make the main subject look soft or out of focus.
3. Subject or Camera Movement
If the camera or something within the scene moves during the exposure, the captured image will show motion blur, which distracts people’s attention from the key objects.

Fix Motion Blur from Images
4. Low-Light Environment
It is common to encounter photos that nothing in them appears to be truly sharp. This is due to a low-light environment, the camera couldn’t capture the light from the main object. This can also be caused by camera shake, slow shutter speed, or missed autofocus.
How to Change the Focal Point of Images
You don’t need Photoshop or go through a steep learning curve to change the focal point. Use a simple prompt, tell FlexClip where the focus point should be, AI will do the rest of the editing tasks.
Click the Change Image Focal Point button, follow the steps below and see how FlexClip helps.

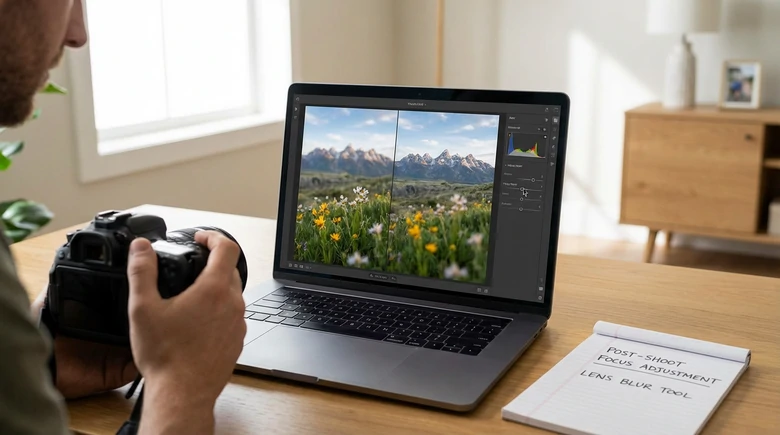
Step 1. Upload the Photo
You are now at FlexClip’s AI Photo Editor tool. Drag and drop your photo to the upload section. Here is the example photo we uploaded.

Out of Focus Example Photo
Step 2. Enter a Prompt
FlexClip offers you access to the most advanced photo editing models like Nano Banana, OpenAI, Flux, Qwen, etc. Pick one you love most.
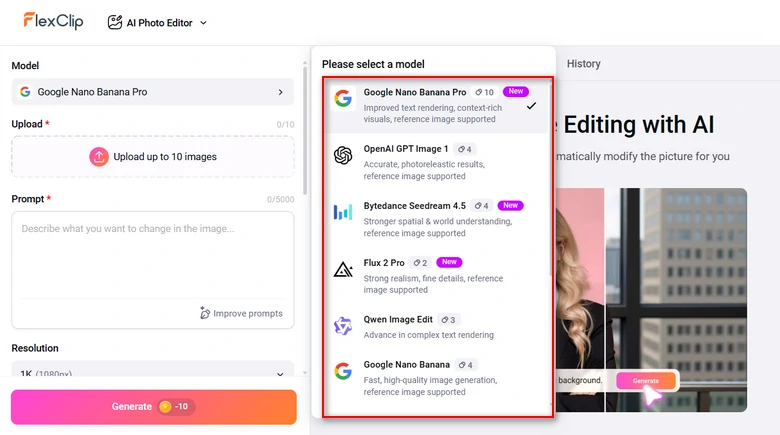
FlexClip AI Photo Editing Models
Enter a detailed prompt describing the focus point shift. For instance, Blur the flowers in front of the girl to make her face and body clearer.
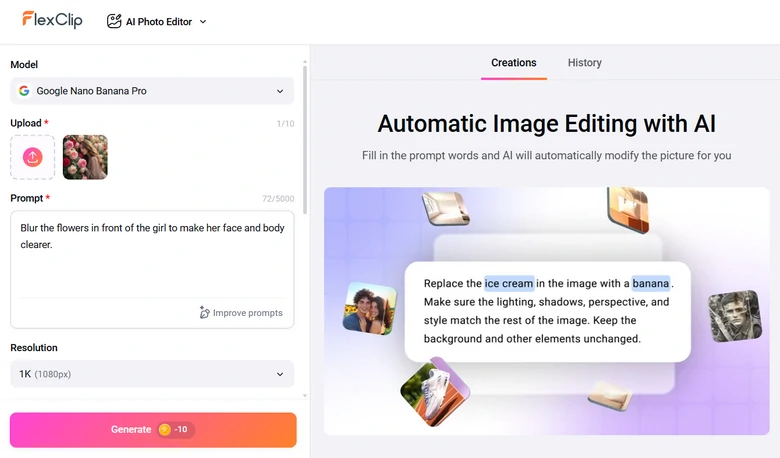
Enter Prompt
Step 3. Preview the Output
You will be able to get the refocused image within several seconds. Preview the changes, save to a local folder or post to social media directly.
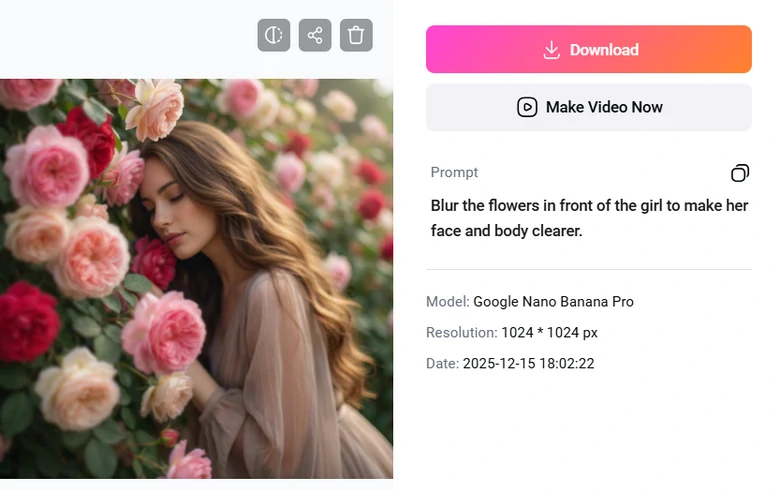
Preview the Results
What Makes FlexClip a Great Focus Point Changing Tool
FlexClip turns the traditional focus point changing task into a simple, fast process without sacrificing visual quality. Besides ease-of-use, here are key reasons why it sets apart.
FlexClip is powered with the most advanced photo editing models like Nano Banana Pro, Flux, it enhances or blurs parts of images as you prompted without distorting the original details, especially for portraits and landscape photos.
Instead of applying flat blur or sharpening, FlexClip creates smooth depth transitions between the subject and background, so the results looks closer to real camera focus rather than the obvious editing effect.
Feeling like turning your photos into an eye-catching slideshow? FlexClip offers a built-in panel where you can make color corrections, add transitions, crop images, apply masks to combine photos into a video with ease.
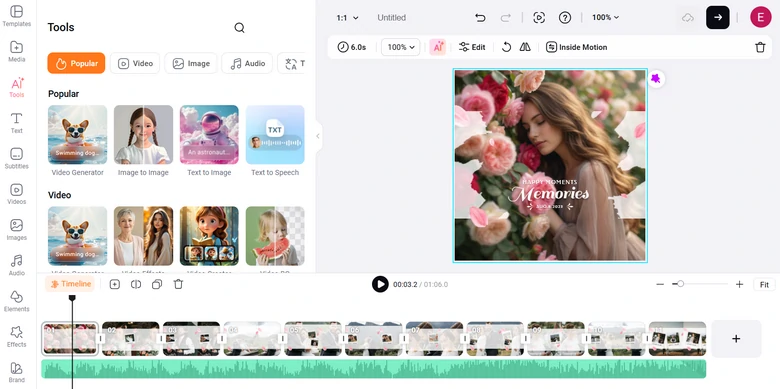
Use Fixed Photos for Video Project
Don’t even want to edit? FlexClip’s 7000+ video templates are ready to be customized. Pick the template you love, replace the media resources, and make the template yours.


Other Focus Point Changing Tools to Try Out
FlexClip is not the only option when it comes to change image focus point. Here are several other tools that can simulate a photo’s focus point. Choose one depending on how much control and realism you need.
1. PicsArt
As an AI-powered photo editing tool, PicsArt combines manual tweaking with smart blur. It can quickly identify the main subject and apply lens-style blur to the background, helping redirect attention to the right area. Additionally, you can render among different blur intensity and feathering to make the transition look more natural, similar to real depth of field.
How to Change Focus Point of Images Using PicsArt
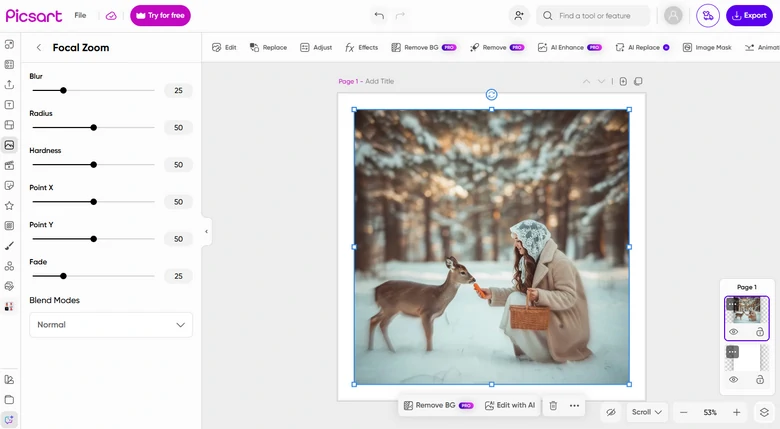
Change Focus Point Using PicsArt
Pros of Using PicsArt
Cons of Using PicsArt
2. Topaz
Topaz is a professional tool for recovering and enhancing sharp details where focus was missed. Its AI-powered sharpening analyzes image content and restores clarity to the intended subject while minimizing halos and noise. Maximally, it upscale images by 6x. In a word, Topaz is a strong choice for who care about image realism and want professional-level focus correction.
How to Change Focus Point for Images Using Topaz
Topaz Tutorial
Pros of Using Topaz
Cons of Using Topaz
Frequently Asked Questions
1. Can you change the focus point after taking a photo?
To some extent, yes. You can’t truly refocus a photo optically after it is taken. AI-powered photo editors like FlexClip, can shift visual focus by sharpening the subject and blurring the background to create a realistic focal point.
2. Is it possible to fix a blurry subject?
If the subject is only slightly out of focus, FlexClip can enhance its sharpness and recover details. However, severely blurred images may have limitations. They won’t look perfectly sharp and some details may be twisted.
3. Do I need Photoshop to change the focus point?
No, many AI photo editors simulate focus point changing process. Photoshop is not necessary.
4. Does changing the focus point reduce image quality?
Changing focus point doesn’t reduce image quality. However, excessive sharpening or compression can reduce quality.


FlexClip AI Video Maker
Reach professional-quality videos faster with easy editing tools, templates, and smart AI.
Start Now for Free
Hot & Trending
-

Best Ways to Find Music in YouTube Videos
-

Instagram Story Video Quality Bad After Upload? Fix It!
-

How to Repost Video on TikTok & How to Remove TikTok Repost
-

Improve Video Quality Online: 3 AI Video Quality Enhancers You Can't Miss
-

4K Convert to HD 1080p without Watermark: Best 4k Video Converters
-

Top 13 Birthday Video Makers with Music and Effects Free
-

How to Search Filters on TikTok & Use a Filter You See - TikTok Filter Guide
-

Large Collection of Creative and Funny Birthday Video Ideas for Ones You Care