Adding subtitles to MKV engages viewers better and makes your video content accessible to people who speak a different language or often watch your videos with the sound off during commute and in quiet places.
So, if you are looking for a quick and easy way to automatically and permanently add subtitles to MVK, we’ve got you covered!
In this tutorial, we will walk you through how to automatically add burned-in subtitles to MKV files using an online video editor and other workarounds. So, let’s get into it now!


Here’s what you’ll learn:
Also, read how to make realistic news tickers in news story videos.
Automatically Add Subtitles to MKV by FlexClip Online
Well, since not many video editors and video host platforms natively support MKV file format, if you are looking for an easy solution to automatically add subtitles to MKV for movies, lyric videos, and other high-quality video content and later share them to YouTube, TikTok or Instagram Reels, then using user-friendly and feature-rich FlexClip online video maker would be your go-to choice.
Effortlessly add subtitles to MKV files by FlexClip online.

With FlexClip, you can:
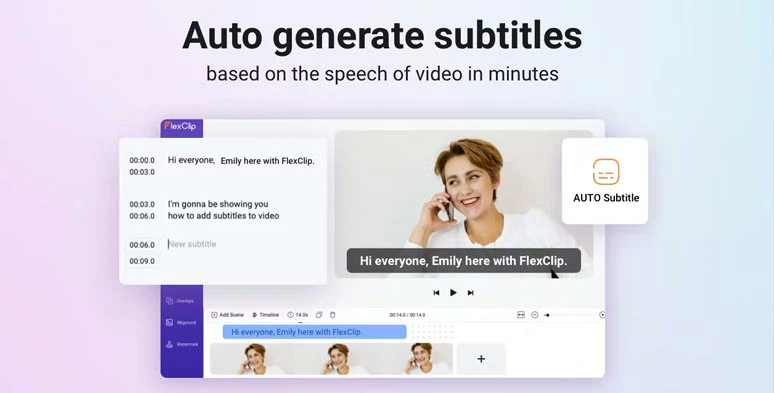
Automatically add subtitles to MKV by FlexClip’s AI auto subtitle generator.
Download auto-generated subtitles for other repurposings.
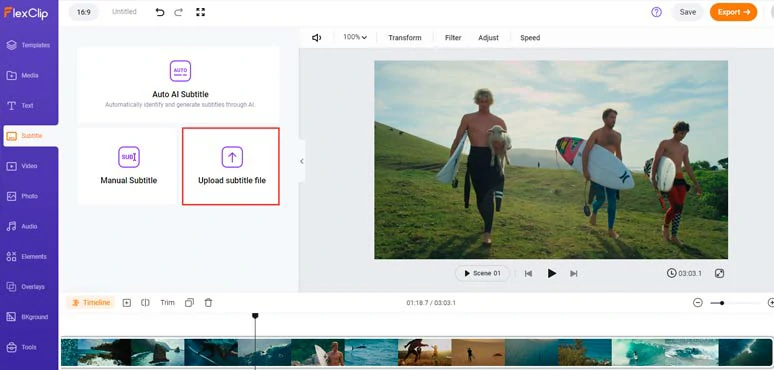
Upload subtitles to MKV files.


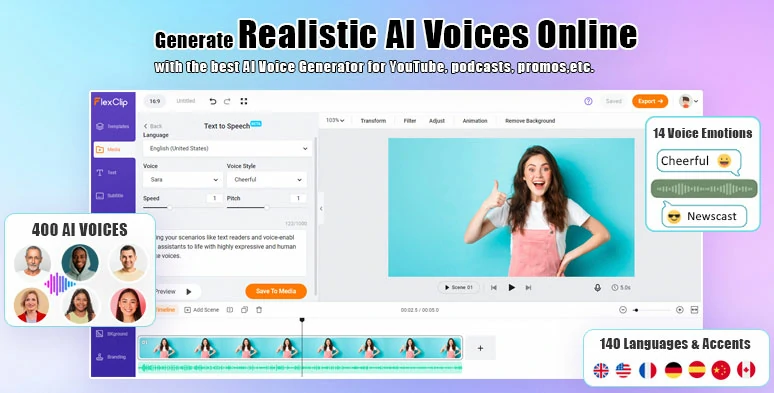
Convert text to realistic AI voices in a breeze.
Now, please walk with me to automatically add subtitles to MKV videos:
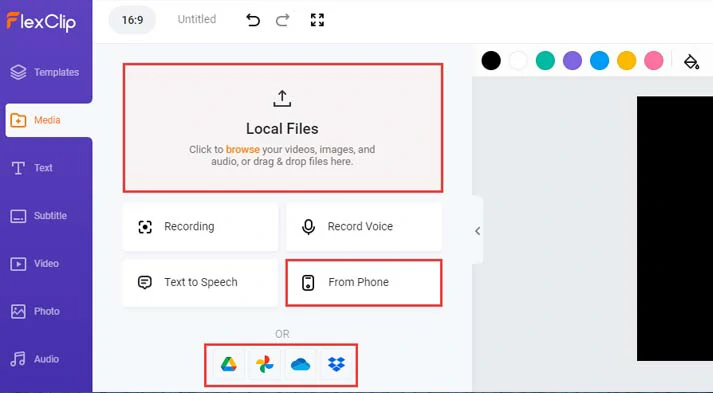
Upload your MKV files to FlexClip.
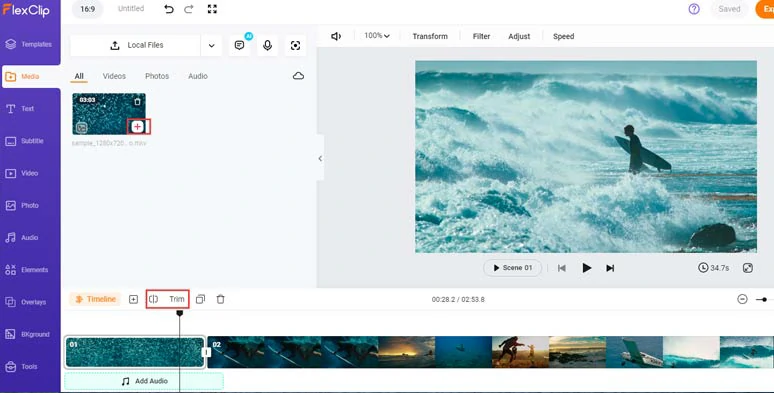
Add the MKV file to the intuitive timeline and trim or split the footage when needed.
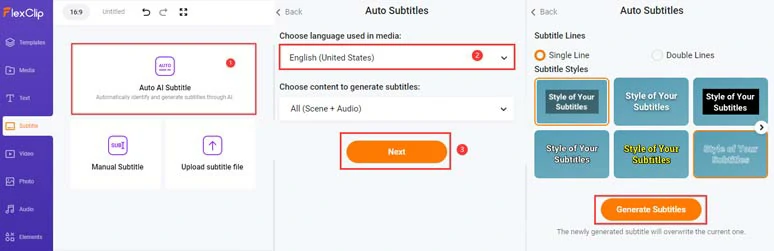
Click the Subtitle tab > Auto AI Subtitle > identify the language in your MKV file > hit Next > select the style of subtitles. It can be changed later. > press Generate Subtitles button.
Auto-generated subtitles to your MKV files.
Next, double-click the auto-generated subtitles to do proofreading > correct any misspellings > fine-tune the style of subtitles and text font, text size, color, text background fill, alignment, etc.
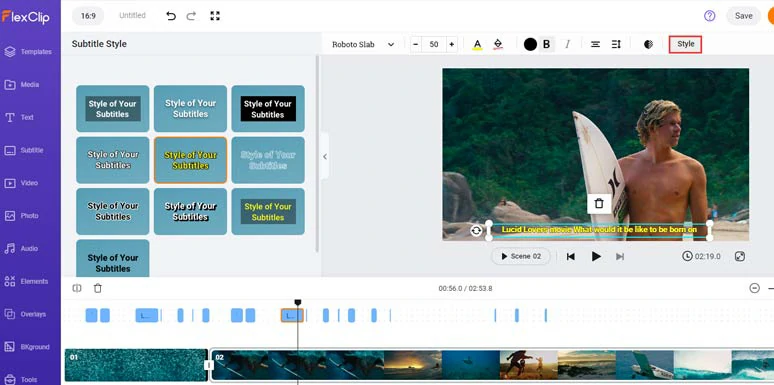
Proofread the auto-generated subtitles and fine-tune the style of subtitles.
If you find one subtitle that seems too long, you can press “Enter” to split it or click the Merge tool to combine two short subtitles. Pretty helpful!
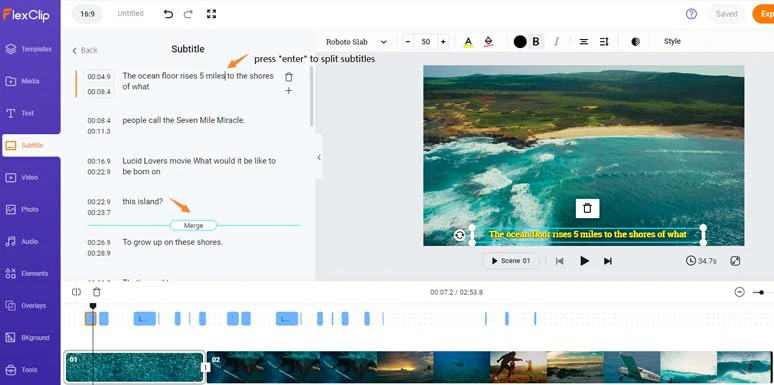
Easily split or merge subtitles with ease.
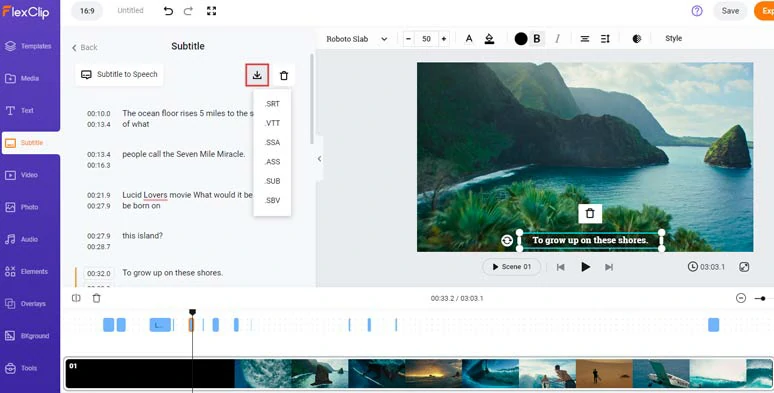
Alternatively, you can click the download button and download the subtitle in SRT, SRT, VTT, SSA, ASS, SUB, and SBV formats to your PC for backup or other repurposings.
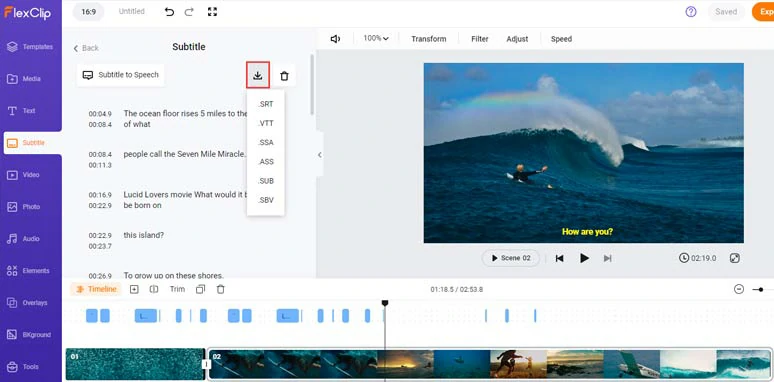
Download subtitles in SRT and other subtitle formats for other repurposings.
Done with the editing. You can click the Export button to save the 1080P MP4 video to your PC or directly share it to YouTube, Google Drive, One Drive, Dropbox, or even TikTok; a clickable link is also available for your blog posts, newsletters or other repurposings.
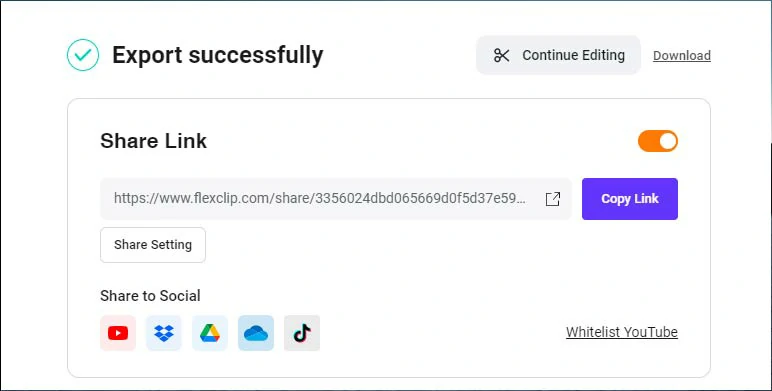
Easily share and repurpose your video content.
Add Subtitles to MKV in DaVinci Resolve
Since MKV files are not supported natively for edits in both Premiere Pro and Final Cut Pro, another great workaround to automatically add subtitles to MKV is using the latest 18.5 version of DaVinci Resolve.
Automatically add subtitles to MKV in Davinci Resolve Studio 18.5 version.
Add your MKV files to the timeline in DaVinci Resolve.
Head to the Timeline tab above > scroll down and select Create subtitles from Audio > select English language, caption style (Teletext, Netflix), and max characters per line > hit Create button.
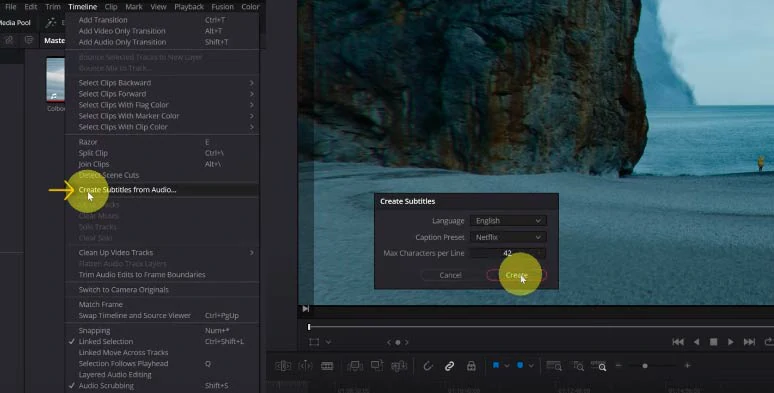
Auto-generate subtitles to MKV in DaVinci Resolve.
Drag and select all the subtitles on the subtitle track > go to Inspector panel > edit all the words of subtitles > change text font, text size and color, background shadow, etc. on the Track tab.
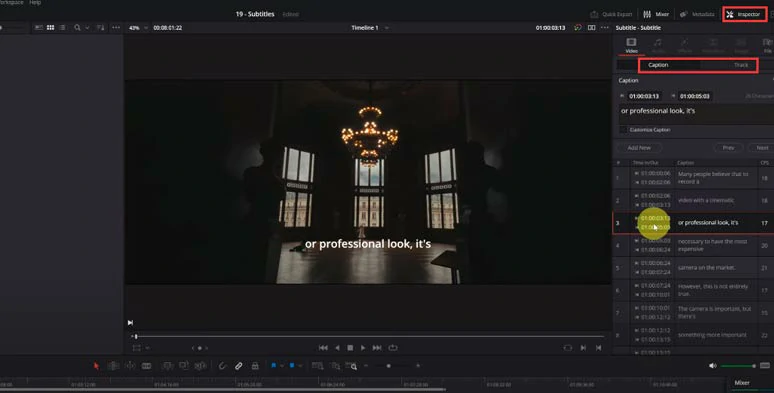
Proofread the subtitle of MKV and customize its style in Davinci Resolve.
Click the Deliver tab > scroll down to Subtitle Settings > check Export Subtitle > Format > select Burn into Video > click Add to Render Queue > save the MKV file with burned-in subtitle to your PC.
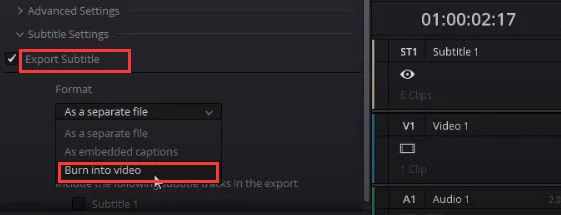
Burn subtitles into MKV in Davinci Resolve.
The only downside of using DaVinci Resolve to automatically add subtitles to MKV is that the software itself is CPU and GPU intensive and this auto caption feature is not available to free users and currently, it only supports English for auto subtitles. Besides, the learning curve of DaVinci Resolve is far too steep for newies in video editing.
Now, It's Your Move
So, these are the two quick and easy ways to automatically add subtitles to MKV files. Please feel free to experiment with these two solutions and share this post on your Facebook or Twitter and tag to tell us which option works best for you. Cheer!


FlexClip AI Video Maker
Reach professional-quality videos faster with easy editing tools, templates, and smart AI.
Start Now for Free
Hot & Trending
-

Best Ways to Find Music in YouTube Videos
-

Instagram Story Video Quality Bad After Upload? Fix It!
-

How to Repost Video on TikTok & How to Remove TikTok Repost
-

Improve Video Quality Online: 3 AI Video Quality Enhancers You Can't Miss
-

4K Convert to HD 1080p without Watermark: Best 4k Video Converters
-

Top 13 Birthday Video Makers with Music and Effects Free
-

How to Search Filters on TikTok & Use a Filter You See - TikTok Filter Guide
-

Large Collection of Creative and Funny Birthday Video Ideas for Ones You Care