iOS device is not just popular because of its aggressive marketing system. They have the least marketing strategy. iOS users can testify that iOS devices come with the most simplified user interface, even after you must have upgraded to a newer version. Again, Google map performs better on an iOS device, unlike other OS; you'd be impressed by the UX on display while using this app on an iOS device. iOS devices are specifically designed to be document-friendly; it works better with Office365.
We can go on and on; the fact remains that the iOS devices are the best you can get so far as quality performance is concerned. But most times, some users find it difficult to transfer video from iPhone to Mac PC. This is peculiar to those who are new to iOS devices. But not to worry, this piece is focused on how to import videos from iPhone to Mac, and we encourage you to read through.
How to Transfer video from iPhone to Mac with iCloud
The iCloud is one of many app services from Apple, designed to safely store and send files. It also stores photos, videos, notes, and other relevant personal data of the user through a cloud system. When data is stored on iCloud, it is easier to be restored on any other device with an iCloud service from anywhere in the world. And there is no way you can do this without knowing how to transfer videos from iPhone to Mac with iCloud. Below are steps on how to move videos from iPhone to Mac.
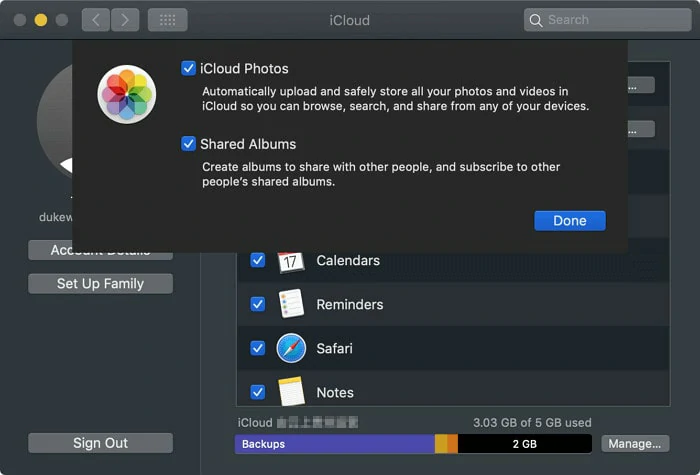
Transfer video from iPhone to Mac with iCloud
How to Transfer video from iPhone to Mac via AirDrop
AirDrop is a document transfer service by Apple Inc., used on Apple products to wirelessly transfer documents and files like photos, webpages, Google map locations, etc., to a nearby iPad, iPhone, and Mac. Using this service is easy, especially for first-timers; all you need to do is follow the right steps to get it done. Below, they are stated thus:
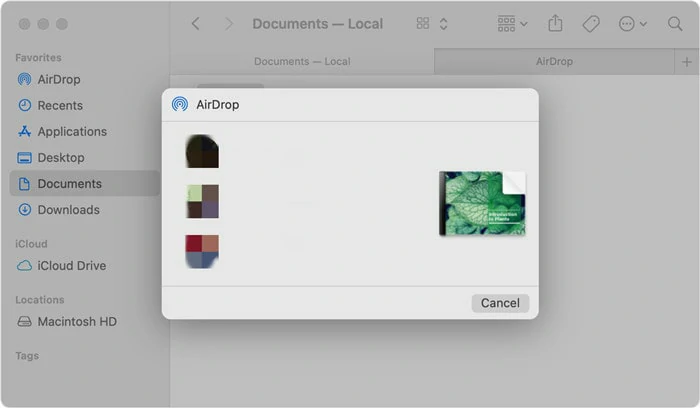
Transfer video from iPhone to Mac via AirDrop
How to Manually Transfer Video from iPhone to Mac
Sometimes people don't have the leverage of using some of these iPhone file transfer services. This is why the need to know about manually transferring your videos from iPhone to Mac becomes necessary. To perfect this process, you need to follow a few simple procedures, which we have listed below. Please follow.

Manually Transfer Video from iPhone to Mac
The Bottom Line
Where you want to transfer your files using an AirDrop service, iCloud, or manually, you just have to do it right. And since the Apple products are designed with so much simplicity, you won't have a problem navigating your way through. So, we encourage you to like and share this article to benefit others out there who need it.


FlexClip AI Video Maker
Reach professional-quality videos faster with easy editing tools, templates, and smart AI.
Start Now for Free
Hot & Trending
-

Ultimate Tik Tok Guide – How to Tik Tok & How to Make a Tik Tok Video that Gets Likes
-

7 Best Ways to Find Music in YouTube Videos
-

Instagram Story Video Quality Bad After Upload? Fix It!
-

How to Repost Video on TikTok & How to Remove TikTok Repost
-

Improve Video Quality Online: 3 AI Video Quality Enhancers You Can't Miss
-

4K Convert to HD 1080p without Watermark: Best 4k Video Converters
-

Top 13 Birthday Video Makers with Music and Effects Free
-

How to Search Filters on TikTok & Use a Filter You See - TikTok Filter Guide