Check this post if you want to:
Smart you! Keeping the main moving object centered is the best way to meet all your needs. Look no further, we will show you how to keep a moving object centered in Premiere Pro.
Can't Miss: 8 Must-Try AI TikTok Video Generators >
Free Take-Away Videos Templates to Edit Directly

Before getting started, here are a few things you need to know.
How to Keep a Moving Object Centered with Premiere Pro
Launch Premiere Pro and then drag your video to the timeline.
You need 3 tools to center an object. They are Safe Margins, Show Rulers, and Show Guides. The Safe Margins shows you where the center of the frame is. Show Rulers, and Show Guides help you identify if the moving object is centered.
In the program monitor, go down to the little + sign called Button Editor. Click on it to find Safe Margins, Show Rulers, and Show Guides, and drag them to the button editor.

Add Button Editor
Apply the Safe Margin first, you will know where the center is, and then drag the ruler and guide to the center of the frame.
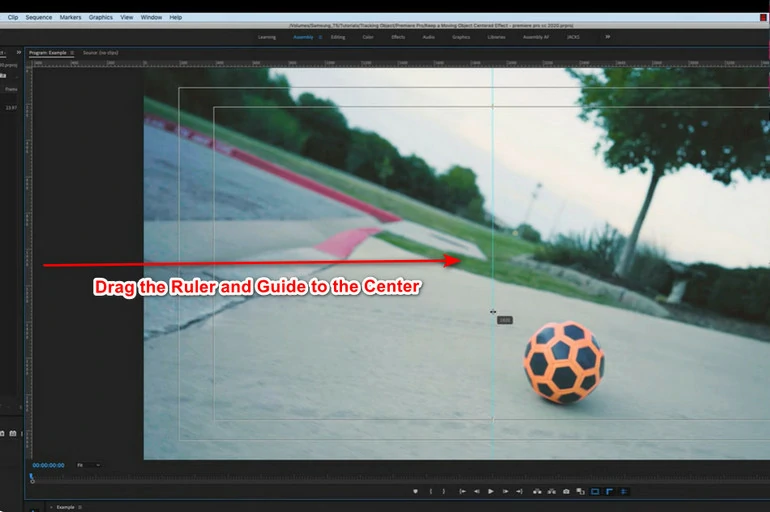
Apply Rulers/Guides to Video
Normally, to seek a balance between convenience and the best result, we add one keyframe in every 5 frames. The following setup allows you to jump to between 5 frames.
Click on Premiere Pro > Preference > Playback.

Setups that Fasten the Keyframing Process
Set the Step Back/Forward Many to 5 frames. Confirm the change. Once you click the Shift + Right/Left on your keyboard, you will be brought to the next/previous 5 frames.
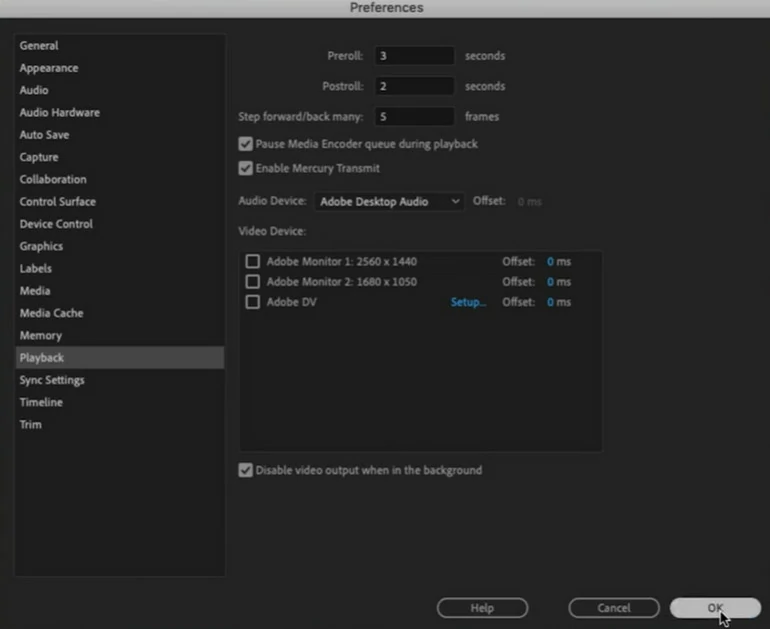
Move 5 Frames Each Time
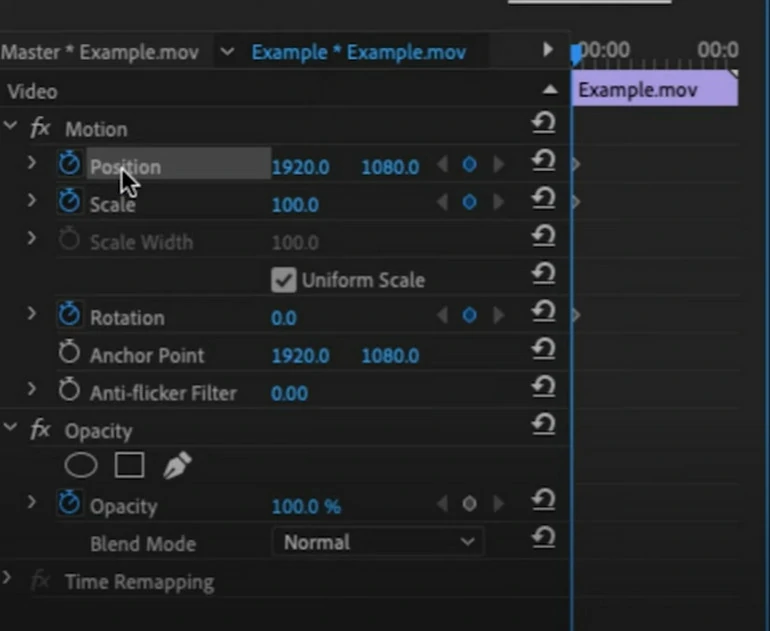
Go to the Effects Controls. Tap the stopwatch next to Position, Scale, and Rotation. Adjust the position, scale, and rotation to make the moving object centered in the current frame. Skip 5 frames, and add another keyframe again.
Please note that you don’t have to click on the Add Keyframe button. Anytime you move the position, it automatically adds a keyframe.
Add Keyframe to Video
Adding one keyframe in every 5 frames only allows you to roughly center the objects. Sometimes the object may lose track. Check the video and add some keyframes.
In case you don’t feel like reading, this video tutorial also explains how to keep a moving object centered in detail.
How to Keep a Moving Object Centered
Bonus Tip: Create a Video 10X Faster with the Power of AI
In this fast-paced era, we can’t afford so much time and energy to create a great video. Most people are utilizing AI to quickly generate videos. Instead of diving into Adobe Premiere, let’s explore the AI-powered video editor FlexClip.
In FlexClip’s video editor, you can ask the AI script generator to write nice video scripts in seconds, and then generate a video from texts. You can also access the AI text-to-speech tool that helps do the nice and natural AI voiceover. More power of AI are waiting to be explored.
AI Video Editor FlexClip Overview


Conclusion
Now, you must have successfully centered a moving object. If you find this post helpful, please do share so that others may benefit. By the way, FlexClip is an AI-powered video editor that can fasten your video creation process. Remember to give it a try and save lots of time and energy.


FlexClip AI Video Maker
Reach professional-quality videos faster with easy editing tools, templates, and smart AI.
Start Now for Free
Hot & Trending
-

Best Ways to Find Music in YouTube Videos
-

Instagram Story Video Quality Bad After Upload? Fix It!
-

How to Repost Video on TikTok & How to Remove TikTok Repost
-

Improve Video Quality Online: 3 AI Video Quality Enhancers You Can't Miss
-

4K Convert to HD 1080p without Watermark: Best 4k Video Converters
-

Top 13 Birthday Video Makers with Music and Effects Free
-

How to Search Filters on TikTok & Use a Filter You See - TikTok Filter Guide
-

Large Collection of Creative and Funny Birthday Video Ideas for Ones You Care