Recording a live webinar offers you multiple benefits. It gives you the second chance for later viewing when you are unavailable as the webinar is being hosted. You may also easily share the video recording of a webinar with your team promptly, etc.
In the post, we will teach you how to record a webinar using the recording feature of 7 top-rated mainstream webinar platforms, plus other alternatives for webinar recording like using free online video makers. So, you can easily record a webinar for both personal view and social sharing.
Contents:
How to Record a Webinar on Top 7 Webinar Platforms
Well, a webinar is a virtual seminar or meeting conducted online. So, to record a webinar, the first thing that pops into one’s mind, to many, would be using a screen recording software or webinar recorder chrome to do the job.
However, in reality, whether you are about to share your presentation by hosting a webinar for your company or being invited to join a webinar as an attendee, most of the webinar platforms you are using now may already have a recording feature you might just overlook.
So, without going an extra mile for a new screen recorder, let’s find out how to record a webinar using the following top 7 mainstream webinar platforms.
No. 1 Demio
Demio is a user-friendly webinar tool, esp for newbies of webinars. You can enjoy the seamless webinar-using experiences without an app to be download. It’s extremely easy to upload your presentation and video files to Demio for replay during a webinar, etc.
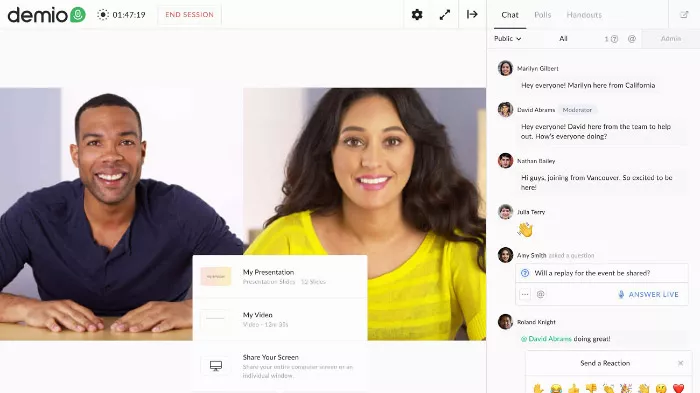
Use Demio for a webinar
To Record a Webinar While Using Demio:
Probably, to your surprise, so long as you hit the start button for a webinar session, Demio will automatically record your webinar in HD and at the close of a webinar, the video recording with both video, audio, and handout materials will be saved in the cloud.
How to Download My Recording in Demio:
You will be able to see the ‘past session’ button, then hit the button, which will reveal the list of previous webinar sessions.
Right below the ‘schedule sessions’ has an arrow icon. Press the icon, you can see the ‘download recording’ option. You can directly download in MP4 format to your local document folder.
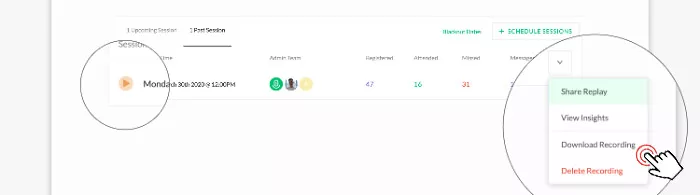
Download the recording of past sessions of webinars
Or you can hit the ‘share replay’ button to get a link to be shared with your team or press ‘edit the page’ to add captions or change the background colors, etc.
No2. Zoom
Capable of having 100 participants in each meeting, and organizing up to 1,000 large meetings, Zoom is a popular video conferencing software for both small and big businesses. It promises a superb user experience for online meetings and video chat and high-quality video conferencing features polling, recording calls. etc.
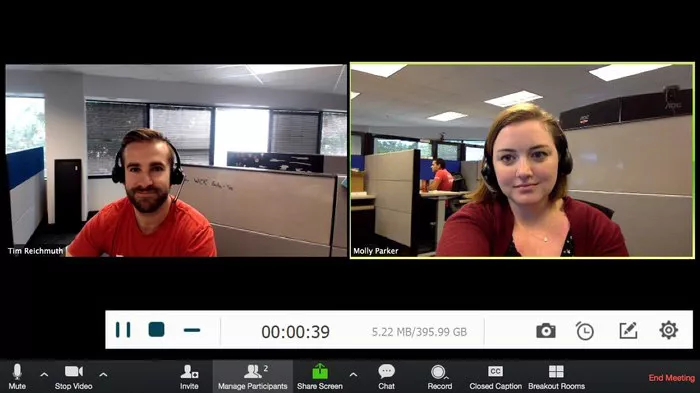
Use Zoom for webinars and online meetings
To Record a Webinar While Using Zoom:
You have two options for recording: one is ‘record on this computer’ and the other is ‘record to the cloud’. The first option allows you to save the video recording of a webinar locally in MP4 format on your computer.

Two options to record a webinar in Zoom
Where to Find the Downloaded Recording:
The recording will be downloaded locally to a folder called Zoom in the Document folder. Check how to change the virtual background in Zoom.
No3. GoToWebinar
With an intuitive interface, GoToWebinar is another professional webinar platform for web conferencing. You can use its flexible tools such as mute, video on/off, raising your hands, etc. to ensure that no one can interrupt your speech.
Use GoToWebinar for web conferencing
To Record a Webinar Using GoToWebinar:
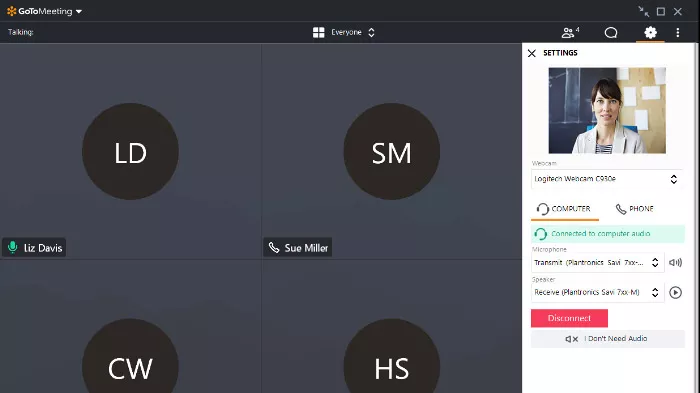
Start a Webinar Session. Once you start a webinar, GoToWeinar will automatically record the webinar broadcast by default. You can see the recording button on the right panel.
Of course, if you may also turn off the auto-recording feature anytime you want in the setting menu or directly save the recording to the video library.
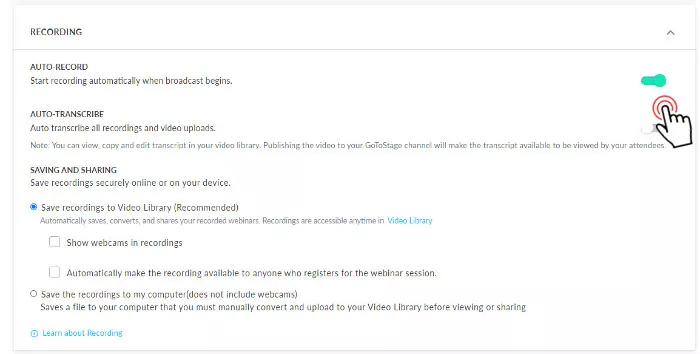
Switch on/off the auto-recording button on GoToWebinar
Where to Find the My Recording:
When you end a webinar, the recorded video will be saved to your local computer in the document folder by default.
If you enable 'save recording to video library', you may also find it in the video library with plenty of options, such as editing your video, downloading the video, or sharing the link with your colleagues.
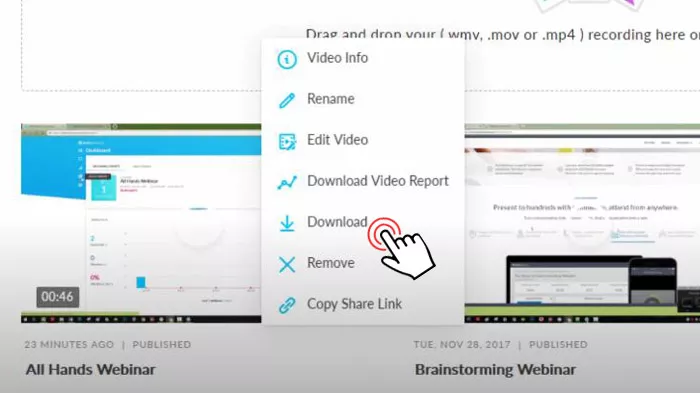
Download the recording of a webinar from GoToWebinar
No4. Google Meet
Google Meet is one of Google's holy trinities for video chat and conferencing while the other two are Google Hangouts and Google Chat.
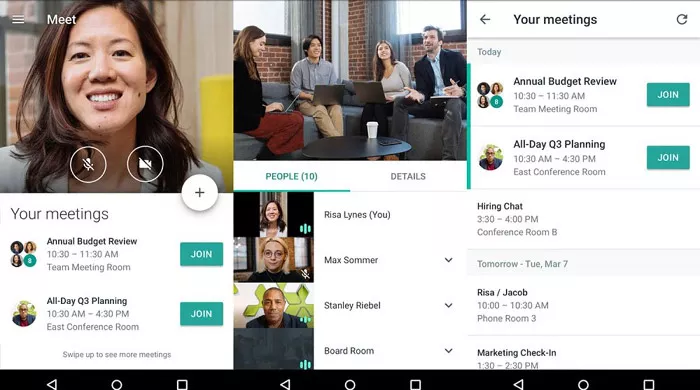
Use Google Meet for a Webinar
With Google Meet, you can host up to 250 participants for a meeting, though much smaller in number compared with the rivals mentioned above. It offers businesses and organizations a safe and glitch-free room for an online discussion on mobile phones or desktops.
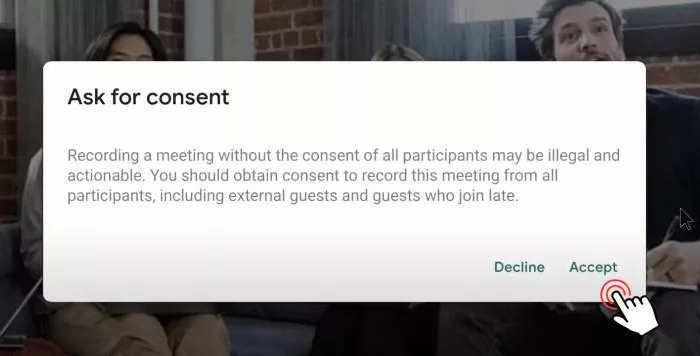
To Record a Webinar Using Google Meet:
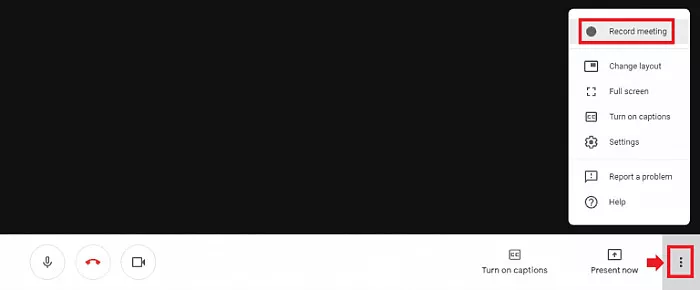
Record a meeting in Google Meet
Where to Find My Recording:
The video recording of the webinar will be automatically saved to your Google drive. You can find it in the 'Meeting Recordings' folder by default. A sharable link is also available if you right-click on the recording.
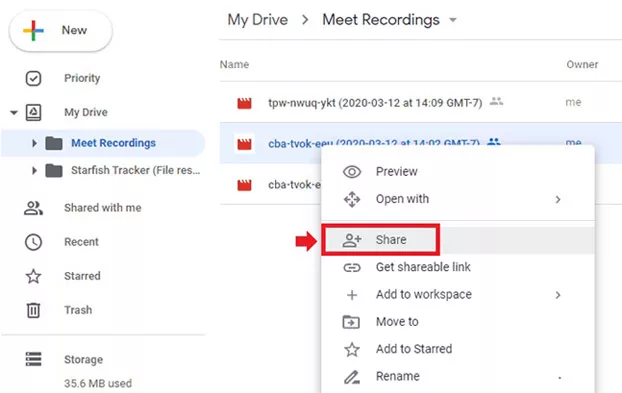
Find your recording and get a sharable link in Google drive
No.5 Zoho Meeting
Zoho Meeting is one of the most prestigious webinar software for team meetings and training, presentation, demos, etc. It uses cutting-edge encryption technology and an intuitive interface to ensure secure and hassle-free video conferencing and screen sharing.
Zoho Meeting is one of the most popular software for web conferencing.
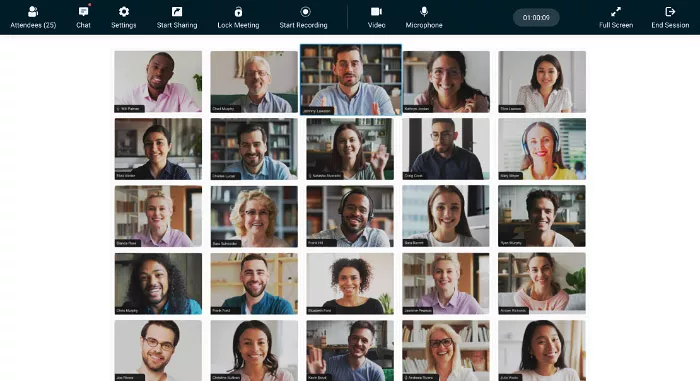
To Record a Webinar Using Zoho Meeting:
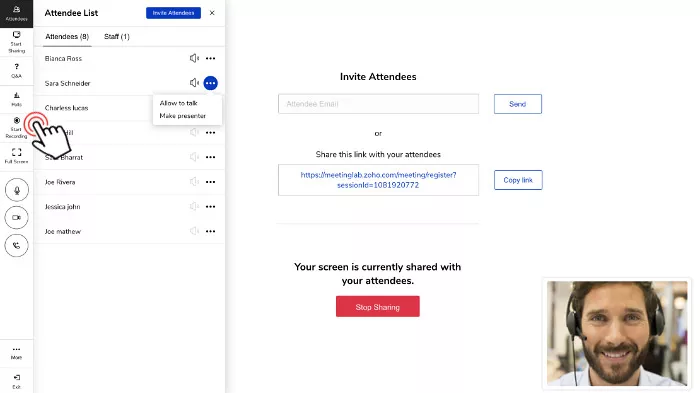
Start recording in Zoho Meeting
Where to Find My Recording:
Then head back to your Zoho Meeting account, one of the left panel, you can see 'My Recordings' option where the details of all of your video recordings are saved on the cloud. You may opt to play, share or download the recording.
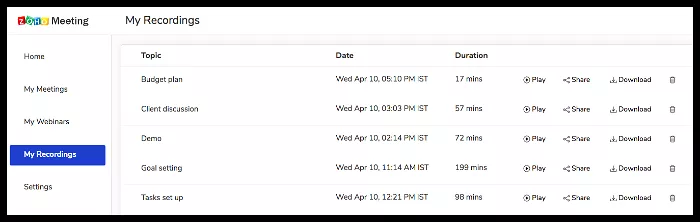
Find recordings in Zoho Meeting
No6. Livestorm
Livestorm is another browser-based video communication platform that doesn’t require any software to be installed. You can easily customize an engaging landing page in minutes for your webinar and collect insightful data from your clients, plus hosting large webinars with up to 1,000 attendees and share pre-recorded videos anytime you want, etc.
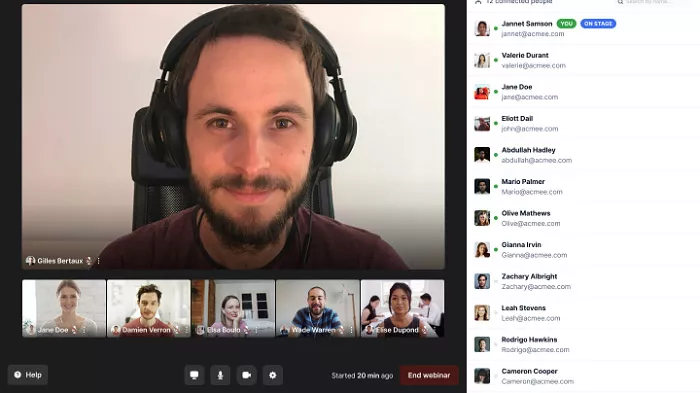
Use Livestorm for a webinar
To Record a Webinar Using Livestorm:
Like Demio mentioned above, as you hit the ‘Start Event’ button for a webinar, Livestorm will automatically record the video and audio of a live webinar. When you finish the webinar, press ‘End Event’ button, the recording will be processed and stored on the cloud.
Where to Find My Recording:
Go to the dashboard of Livestorm where you can the ‘Recording’ button. Your webinar recordings are listed in the order of the session date. Just press ‘ Download’ button to access your recording in MP4 (1080) format.
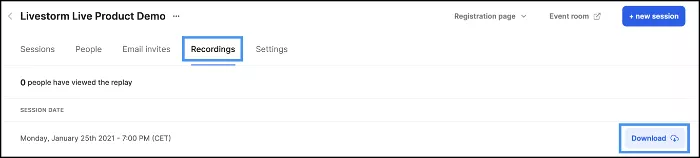
Find the recording of a webinar in Livestorm
Or you may check the ‘Settings’ button and tab ‘Recording & on-demand’ button. Right next to it, you can get an Embed Code for video sharing.
No7. WebinarGeek
Founded in 2015, WebinarGeek is a user-friendly webinar platform that helps businesses connect with customers. You can upload pre-recorded webinar videos and share a webcam, presentation slides, and screen with clients. The registration page, webinar page, and emails are fully-customizable for your brand.
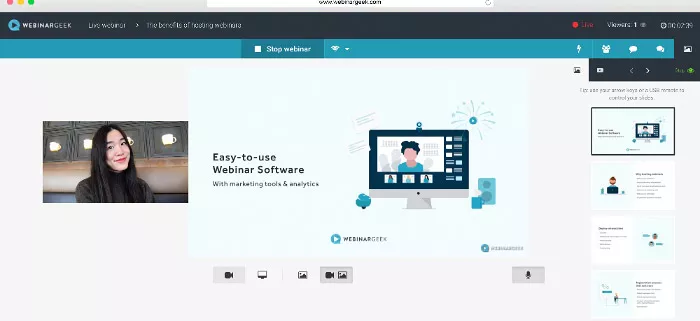
Use WebinarGeek for an online meeting
To Record a Webinar Using WebinarGeek:
Likewise, WebinarGeek has an automatic recording feature for each webinar user. The moment you hit the ‘Sart Live Webinar’ button, the system will automatically record your online meeting. And the recording stops as you end the webinar.
Where to Find My Recording:
If you are the host of your webinar, you can go to the dashboard, then navigate yourself from the ‘Replay’ button to ‘ Watch Replay’, where a new screen will pop up. You can either download your recording or share a public link.
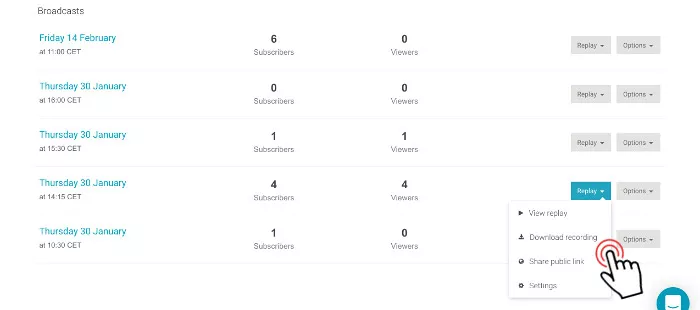
Download the recording from WebinGeek
The attendees can enjoy the replay of the webinar through a replay email sent by you.
Alternatives: Use Online Video Makers to Record a Webinar
Well, though most of the Webinar platforms have an auto-recording feature for a webinar, many are only available to either the paid users or the host and co-organizers of the webinar.
That’s why to an attendee of a webinar, you need a free webinar recorder as an alternative. To that end, using a free online video maker can be a feasible solution.
How to Record a Webinar with RecordCast
As a versatile online screen recorder and video maker, RecordCast can be used as an upgraded tool for recording and editing your webinar instantly. You don’t need to download software and it’s extremely easy-to-use for everyone.
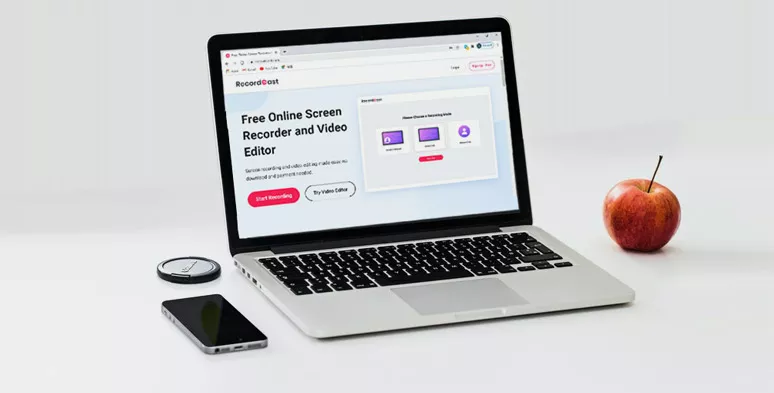
RecordCast for recording a webinar
Open the RecordCast , then select from ‘Screen + Webcam’, ‘Screen Only’ and ‘Webcam Only’ for recording the visual of your webinar. Normally, ‘Screen Only’ is a nice choice if you only want to replay the video and audio for a webinar. Then hit ‘Next Step’.
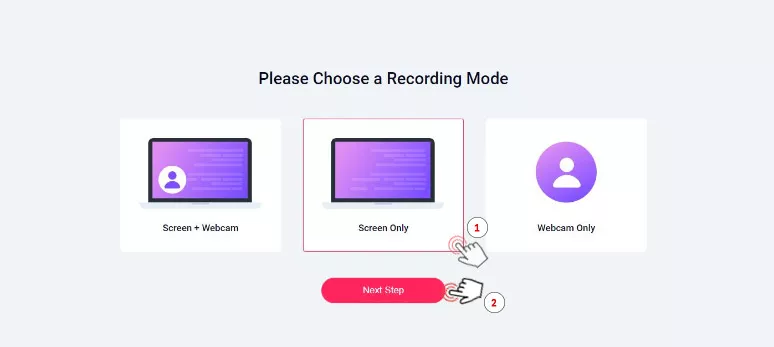
Choose ‘Screen Only’ mode for a webinar recording
You can record the ‘Microphone + System audio’, ‘Microphone’ or ‘System audio’. For web conferencing, normally recording system audio will do. Next, click ‘Start Recoding’ button.
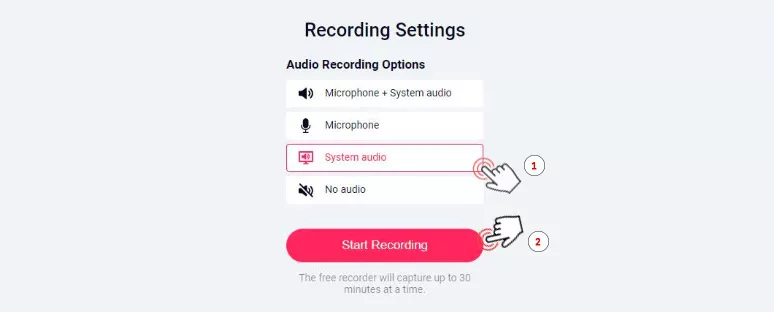
Select to record the system audio for a webinar
A pop-up window will show up and you can either choose the ‘Application Window’ if you are using a webinar software for web conferencing or opt to ‘Chrome Tab’, which will capture the screen of a browser-based webinar platform like Livestorm.
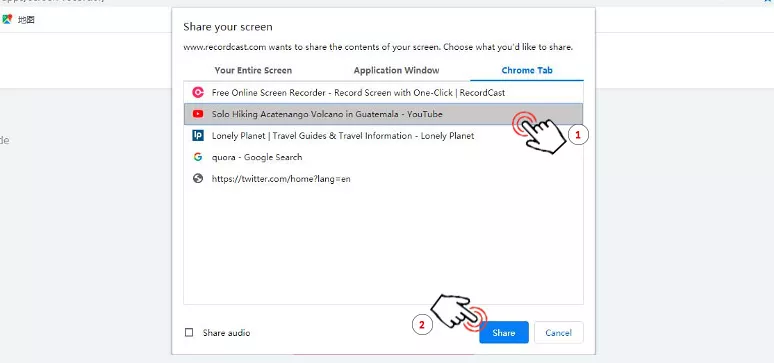
Use the chrome tab of the webinar page for recording
Then tab a webinar webpage or a webinar application window and hit ‘share’, the recording will start automatically. Check top 6 free screen recorder for windows.
After your webinar ends, press the ‘stop button’ to the top of the left corner. Then head back to the RecordCast web page, you can preview the recording. Then press the ‘download and edit’ button.
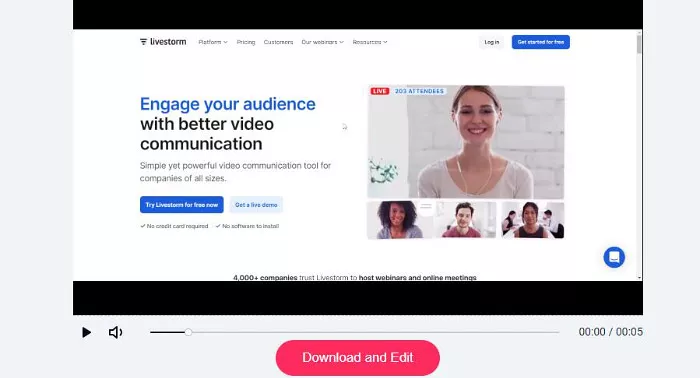
Preview and edit the recording
Your recording will be directly downloaded to your download folder in the local disk in WebM format. Meanwhile, you will also be redirected to the video editor of RecordCast for further customization of your recording.
At the video editor of RecordCast, you can use fully-customizable animated texts and dynamic elements features to point out the highlights of the previous webinar.
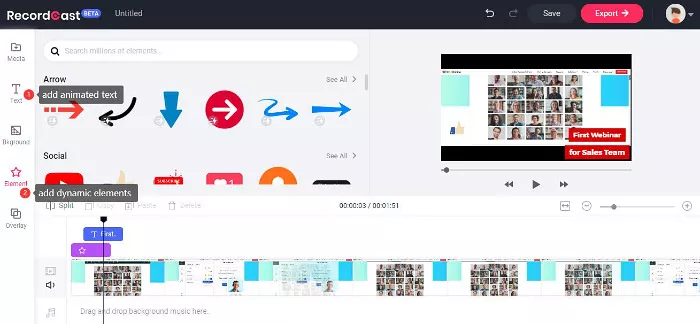
Add animated text and dynamic elements for the recording
Simply drag and drop a professionally-designed text animation or moving element and customize the fonts, colors and set the timing for each text in the timeline below.
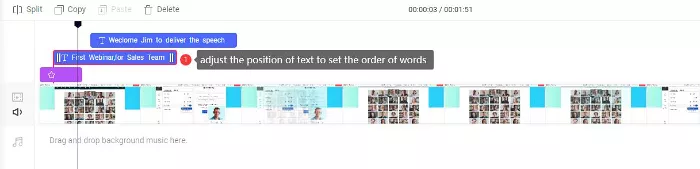
Adjust the timing of text in the timeline
You may easily split the recording and add both background and text to divide the recording into different chapters. Or add multiple music tracks to the original recording. Just have fun editing.
Once you are done with editing, preview the entire video before hitting the ‘export’ button to download the video in MP4 (1080p) to your local disk.
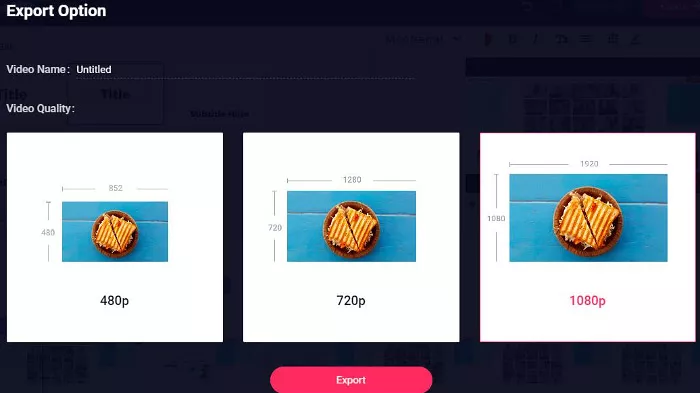
Download edited recording from RecordCast
How to Record a Webinar with FlexClip
If you are invited to attend a webinar consisting of only pre-recorded videos or PowerPoint presentations with captions, then using FlexClip, a free and powerful online video maker, could also be an option.
Use FlexClip online video maker for recording a webinar


Compared with RecordCast, FlexClip offers you millions of royalty-free music and stock videos and key features to turn your webinar recording into dazzling visual content.
Firstly, open the FlexClip video maker, then tab the ‘Recording’ button and select ‘Record Screen’. Likewise, a pop-up window allows you to choose either to record the current ‘entire screen’ or an ‘application window’ or a ‘chrome tab’.
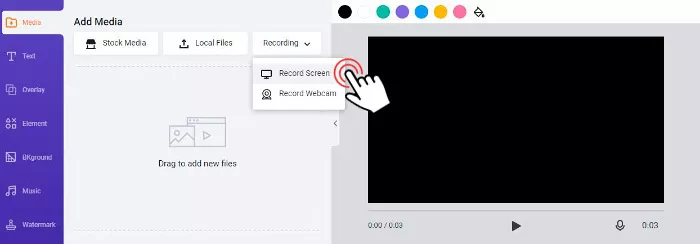
Press the record button in FlexClip
If you use webinar software, choose the second option. If your web conferencing is conducted on a browser-based web page, choose ‘chrome tab’ for a particular web page and hit the ‘share’ button.
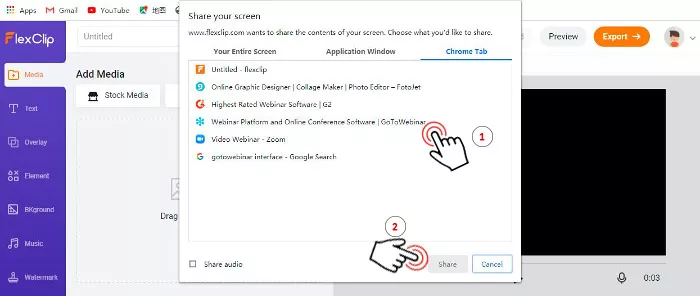
Choose the webpage or an application for recording
Once the webinar finishes, press the ‘stop’ button to the top of the left corner and head back to Flexclip. You can preview your recording. Then, tab ‘add to the media library to further edit it.
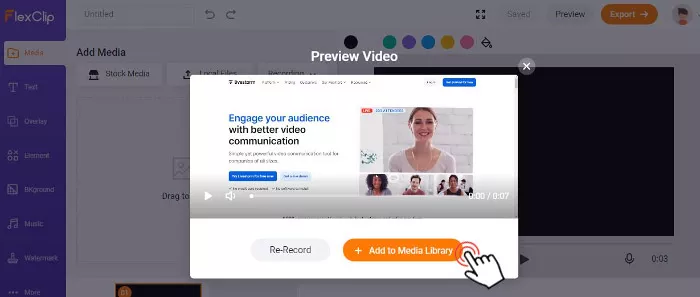
Preview the recording and add to FlexClip’s media library
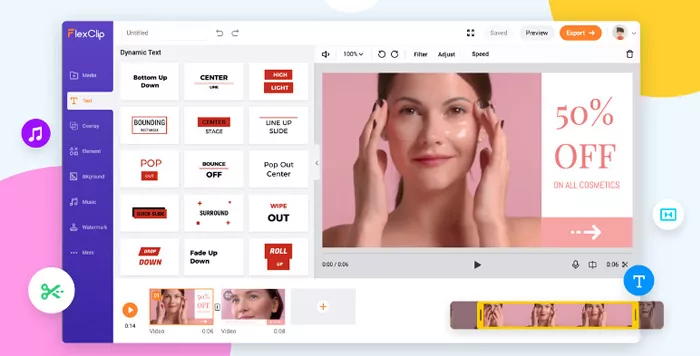
So, you can hit the ‘+’ button to add the video of your recording to the storyboard. Then you may use animated texts, dynamic elements, overlays, and transitions, etc. to further enhance the recording.
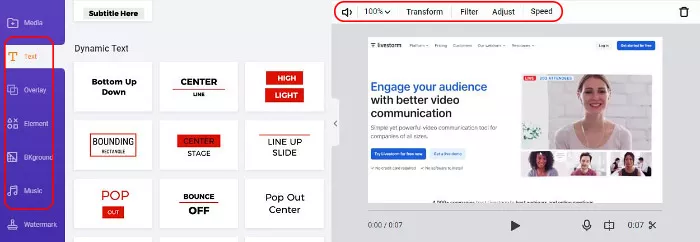
Use text, overlay, other key features and toolbar to customize the recording
To level up your video, don’t forget to use the huge stock media and 100,000+ license-free music in FlexClip’s media and music library. You can easily find HD video footage and photos for missing shots and use the trimmer for the moments you want.
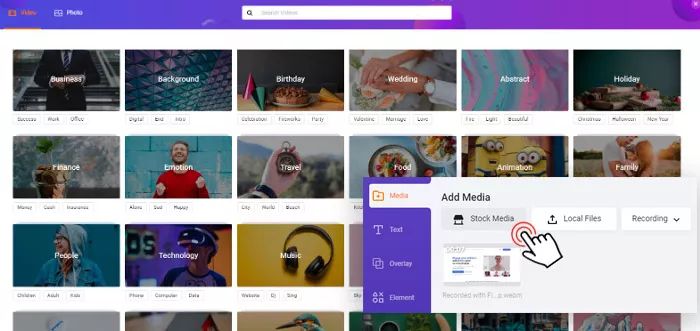
Use huge stock assets in FlexClip’s media library
Finally, after editing your recording, you can preview the video alive and export the video in MP4 (1080p) to either your local computer or Dropbox, or even YouTube channel for sharing.
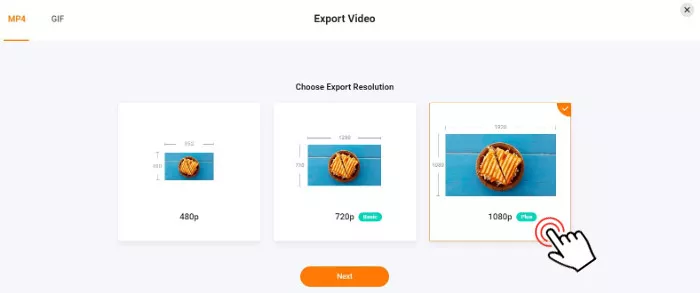
Export your recording in MP4
Final Thoughts
For both personal viewing and team sharing, it’s quite necessary to learn how to record the highlights of a webinar yourself. Though most of the webinar platforms do have recording features, the accessibility is largely limited to paid users and hosts of a webinar.
Whether you are a host or an attendee of a webinar, hopefully, it would be a win-win strategy to learn both how to record a webinar using webinar software and our recommended online video makers. So, start recording a webinar now.


FlexClip AI Video Maker
Reach professional-quality videos faster with easy editing tools, templates, and smart AI.
Start Now for Free
Hot & Trending
-

7 Best Ways to Find Music in YouTube Videos
-

Instagram Story Video Quality Bad After Upload? Fix It!
-

How to Repost Video on TikTok & How to Remove TikTok Repost
-

Improve Video Quality Online: 3 AI Video Quality Enhancers You Can't Miss
-

4K Convert to HD 1080p without Watermark: Best 4k Video Converters
-

Top 13 Birthday Video Makers with Music and Effects Free
-

How to Search Filters on TikTok & Use a Filter You See - TikTok Filter Guide
-

Large Collection of Creative and Funny Birthday Video Ideas for Ones You Care