Putting a video inside texts is a professional way to touch up your video and emphasize the textual information. You can see videos playing inside texts in travel vlogs, movie trailers, ads, and more.
The technology behind the video in text effect is masking. The texts are transparent, but the areas out of the texts are usually solid background. When the video and the text are overlapped together, you can see the video playing inside the text.
In the following parts, we will show you how to add video inside text with three video editing tools. They are Adobe Premiere Pro, CapCut, and FlexClip respectively. Check them out!
Can't Miss: 8 Must-Try AI TikTok Video Generators >
Free Take-Away Videos Templates to Edit Directly

How to Put a Video Inside Texts with Adobe Premiere Pro
Adobe Premiere Pro is one of the most professional video editors that enables you to achieve all sorts of effects, including adding a video to text. The results with Adobe Premiere Pro are always stunning.
Before getting started, here are a few things you need to know. First, don’t use Premiere Pro if you are totally new. Premiere Pro is a software for professionals, and it can be hard to use for video editing beginners. Secondly, Premiere Pro is costly. It won’t be a bargain if you are a one-time user.
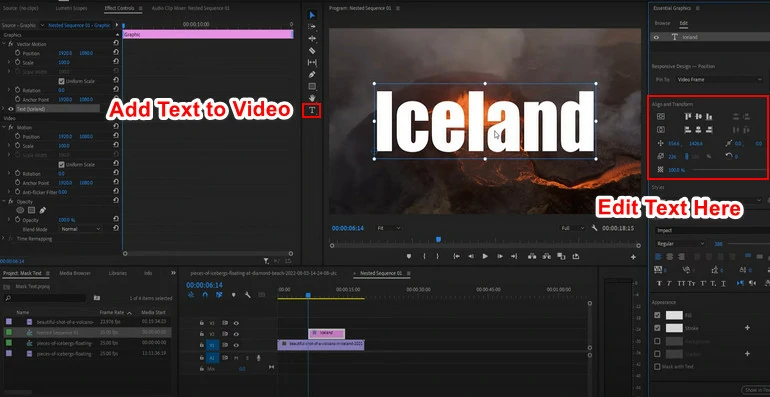
Add Text with Premiere Pro
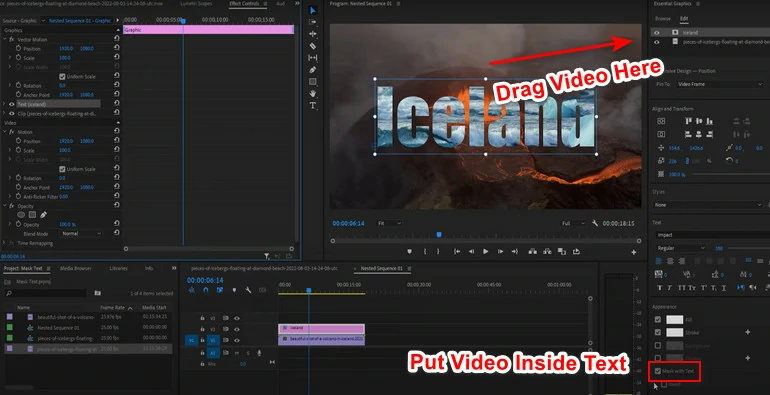
Mask with Text
How to Put a Video Inside Texts with CapCut
CapCut is developed for BiteDance to encourage people to create more videos for TikTok. It first works on mobile devices, but now you can also use CapCut on your computer.
We recommend CapCut for two reasons. To begin with, CapCut is a totally free software that works on all platforms. You don’t need to pay to use any tools. Besides that, you can use lots of video-in-text templates directly. No need to do edits yourself. Just replace with your resources and make the template yours.
There is one shortcoming that might bother you. You need to create a transparent text overlay manually. That means extra operations. Yet, even beginners can catch up with those steps easily. Check the following steps below.
Launch CapCut, create a new project.
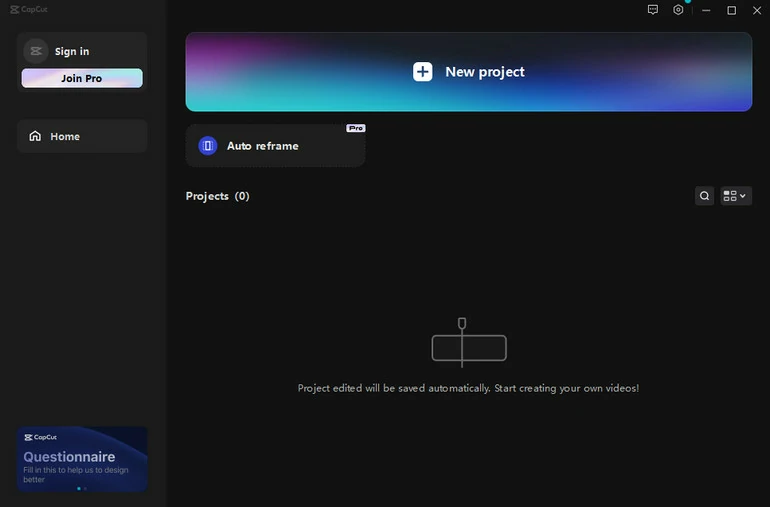
Create a New Project
Instead of uploading a video clip from a local folder, go to Library. Choose a white or black background. Apply to the timeline, and then adjust its length.
Click on Text in the Menu bar. Pick a style, font you like. Please don’t pick a text with animation. After adding the text, turn the text color to green. Export the text video.
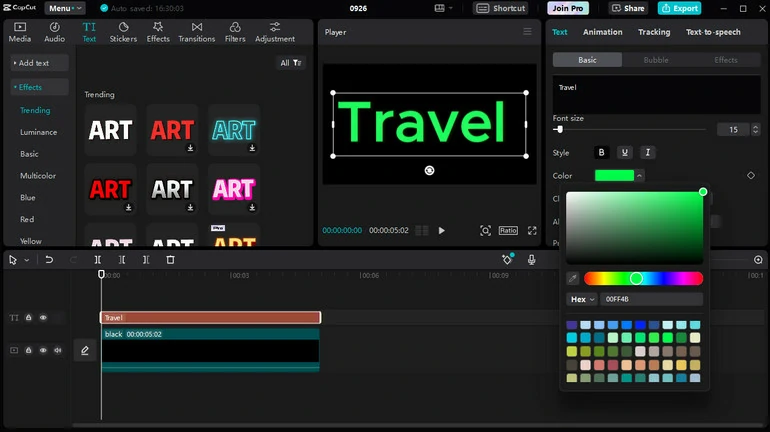
Create a Text Video
Drag the text video and the a video clip to the timeline at the same time.
Select the text video. Go to Callout > Chroma Key. Tick the box in front of the Chroma Key, CapCut will ask you to pick a color. Pick the text color, which is green. Adjust Strength and Shadow to at least 50 so the video looks best. Now, the video is perfectly put below the text.
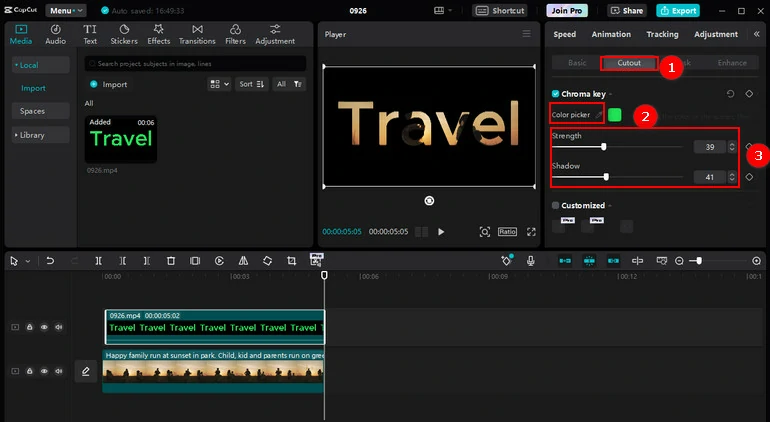
Put a Video Inside Text
How to Put a Video Inside Texts with FlexClip
You don’t have to install or register to access all editing tools. FlexClip’s video editor enables you to insert any text to a background and put a video inside it completely online. After that, you can crop, flip, filter the video to achieve the best result. FlexClip also provides lots of elegant video templates. Take them away and start editing directly.
Click on the Create a Text Mask button now to get started. You can also browse more templates to get more inspiration.


By default, you will be greeted with a 3-second pure black video clip. Adjust its length. You can change the background color by clicking on the Background Color icon, or choose a background video from the stock library.
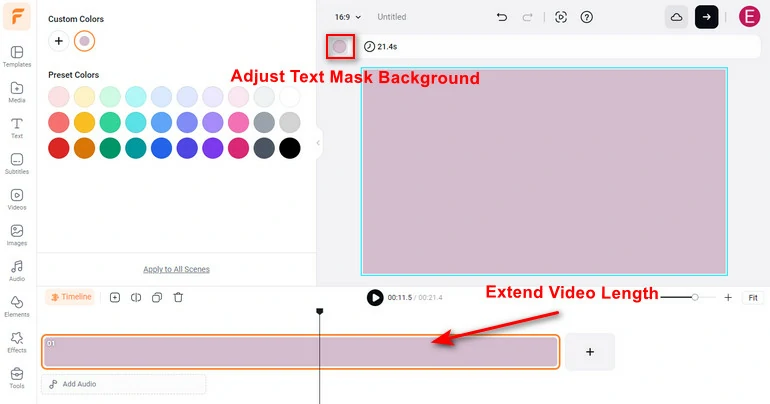
Add Background to Video
Go to the Text section, input any text with the font you like. Adjust its size, position, alignment. You can even upload your own font and use it for text mask creation.
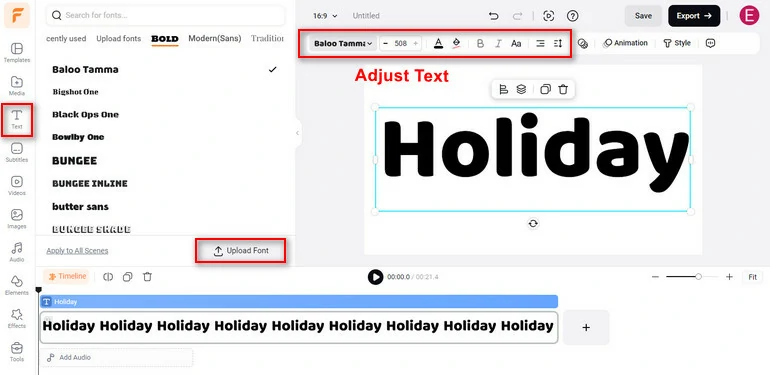
Add Text to the Background
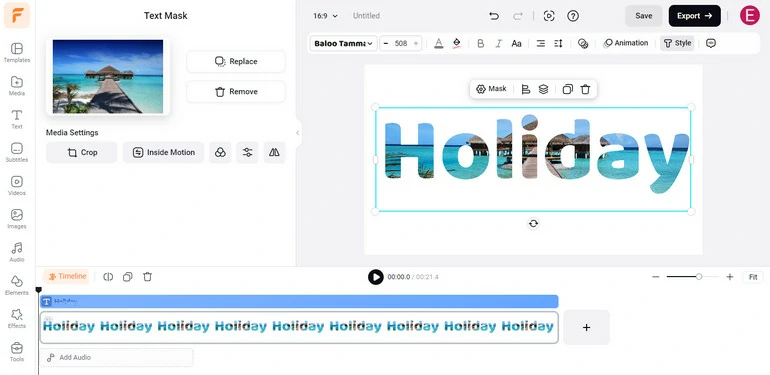
Click on the Style button, follow the prompt to upload a video. The video will appear inside the text. After that, utilize all available tools like cropping, flipping for a perfect text mask.
Put Video Inside Text with Premiere Pro
Conclusion
It is not that hard to put text above a video with Premiere Pro. You only need 4 steps to complete the whole process. Other tools like CapCut, FlexClip can also help you place a video inside texts. If you find this post helpful, please do share with others.
We’d like to invite you to try FlexClip’s AI video editing tools for free! Fasten your video creation process with the powerful AI video script generator, AI text-to-speech tool, auto subtitle tools. Click the Create a Video button to get started!


FlexClip AI Video Maker
Reach professional-quality videos faster with easy editing tools, templates, and smart AI.
Start Now for Free
Hot & Trending
-

Best Ways to Find Music in YouTube Videos
-

Instagram Story Video Quality Bad After Upload? Fix It!
-

How to Repost Video on TikTok & How to Remove TikTok Repost
-

Improve Video Quality Online: 3 AI Video Quality Enhancers You Can't Miss
-

4K Convert to HD 1080p without Watermark: Best 4k Video Converters
-

Top 13 Birthday Video Makers with Music and Effects Free
-

How to Search Filters on TikTok & Use a Filter You See - TikTok Filter Guide
-

Large Collection of Creative and Funny Birthday Video Ideas for Ones You Care