Premiere, packed with extensive editing tools, is a popular application to blender your creativity into real media resources. As we all know that audio is an indispensable part of awesome videos, especially among different scenes. So how to fade out audio like a breeze becomes an crucial step of creating stunning videos.
When it comes to audio transition, Premiere offers the fade out effect, which makes audio transitions among scenes naturally by increasing or reducing the volume without hassles. To enable the audio fade out effect, follow the tutorial to learn how to fade out audio in Premiere and let's see it right now.
Part 1. Three Types of Fade Out Effect in Premiere Pro
Before jumping to the key point, let's talk more about fade out audio effects in Premiere. Essentially, the audio transition between two audio samples on the same audio track is called crossfade.
Here Premiere provides three types of crossfade effects to fade out audio for its users: Constant Gain, Constant Power and Exponential fade. Details are given as follows:
Constant Gain
Constant Gain crossfade fades out audio by reducing or increasing audio at a constant rate between scenes. However, this crossfade usually makes the audio sound abrupt.
Constant Power
The Constant Power in Premiere represents the fade that changes audio volume between clips in a dissolved way.
It's used to decrease audio for the first clip slowly at first and then quickly toward the end of the transition. For the second clip, this crossfade increases audio quickly at first and then more slowly toward the end of the transition.
Exponential Fade
This crossfade works in an exponential way that starts slowly while changing faster and faster until the end of the clip, which looks like a curve moving path. It's suitable for the ending part or dialogue switching scenes.
Part 2. How to Fade out Audio with Premiere
To fade out your audio in Premiere, you just need to follow these steps below.
How to Fade Out Audio in Premiere Pro CC
Bonus Tips: Easiest Way to Fade out Audio Online
Using Premiere can be challenging and mastering this tool requires a large time pouring. If you are looking for an alternative tool to fade out audio easily, then FlexClip deserves a try.
FlexClip is an online video editor, allowing you to make audio fade out in minutes without any audio quality loss. Besides, it provides a music stock with numerous music clips for free. No matter you're a beginner or a master in editing, FlexClip always offers the easiest solution for you.


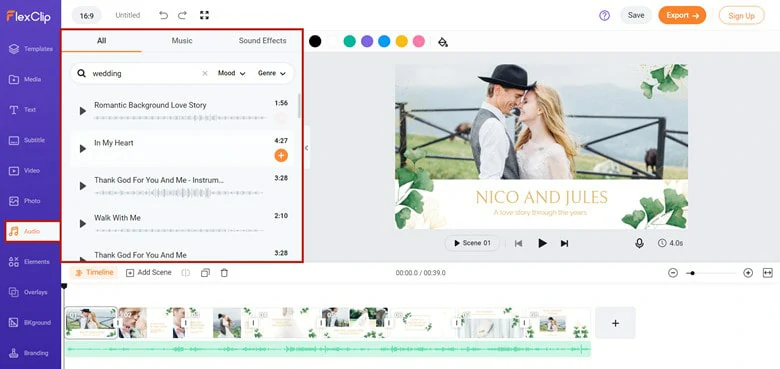
Upload Music to FlexClip from Local Drive
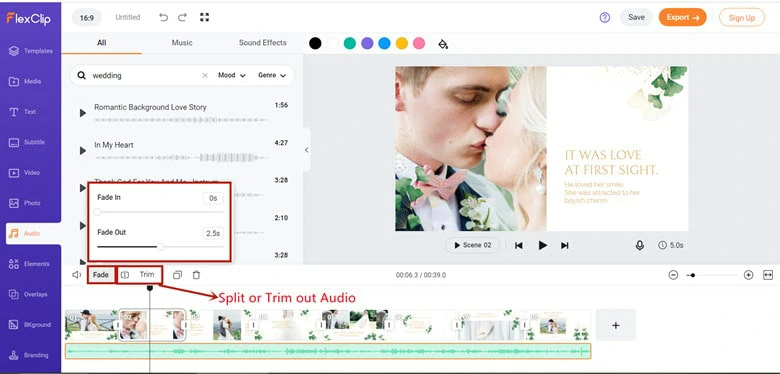
Fade out Music with FlexClip
The Bottom Line
That's all for how to fade out audio in Premiere Pro. Remember the fade out audio effect can make or break your production. If you regard Premiere pro as a difficult stuff, try another easy tool to fade out your soundtrack online. Come and pick the method you like.


FlexClip AI Video Maker
Reach professional-quality videos faster with easy editing tools, templates, and smart AI.
Start Now for Free
Hot & Trending
-

Best Ways to Find Music in YouTube Videos
-

Instagram Story Video Quality Bad After Upload? Fix It!
-

How to Repost Video on TikTok & How to Remove TikTok Repost
-

Improve Video Quality Online: 3 AI Video Quality Enhancers You Can't Miss
-

4K Convert to HD 1080p without Watermark: Best 4k Video Converters
-

Top 13 Birthday Video Makers with Music and Effects Free
-

How to Search Filters on TikTok & Use a Filter You See - TikTok Filter Guide
-

Large Collection of Creative and Funny Birthday Video Ideas for Ones You Care